Transform Toilet Paper Rolls Into The Cutest Desk Storage Solution

Having a messy desk can really impact your productivity. Too much clutter can leave you distracted and take you away from other things you may need to get done. Instead of worrying about the mess, consider a creative approach to storage that might even offer a touch of whimsy to your space. One of the best ways to do this is to use toilet paper rolls to make a cute and colorful storage solution that gives you space to hold pens, pencils, and even a nail file or two.
All you need for this project is seven empty toilet paper rolls, enough fabric to cover those rolls, hot glue, cardboard for the base, and some embellishments. The original DIY from thephulia on Instagram uses chenille yarn and a floral patch for the embellishments, and the fabric used was a gingham print in seven different colors. This is where you can get a bit more creative and find fabrics that work for you and your design aesthetic instead. While there are plenty of DIYs that can help you transform your desk storage, such as this one that uses wooden crates from the Dollar Tree, with this toilet paper roll-based DIY, you can personalize it with either the fabrics you choose or even the embellishments added to complete the look.
How to create your own desk storage with toilet paper rolls
An empty toilet paper roll can be used to organize a craft room or a desktop with the right DIY project. To get started on your desktop storage solution, you'll want to measure your pieces of fabric so that they'll completely cover the cardboard when rolled around the tube. The fabric needs to be long enough to fold down into the tube, allowing you to finish the edges. This will help to reinforce those edges and make them more durable. With the fabric cut to size, take your hot glue gun and run a line of it over the toilet paper roll from end to end. Then, wrap your fabric around the tube, adding a bit more glue when you get to the other end. Once you do this with all the rolls, fold the fabric in and glue it down.
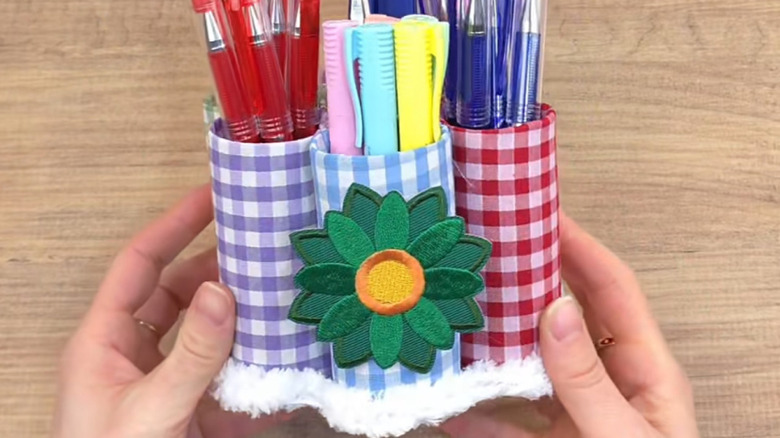
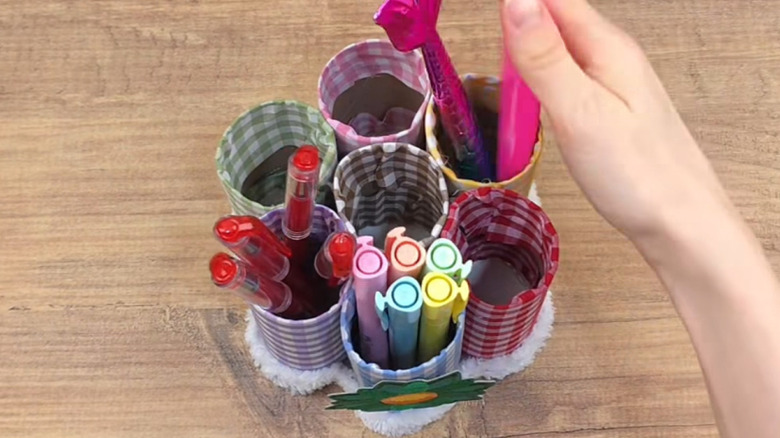
With all the rolls covered in fabric, you'll want to glue them together in a flower-like shape. Start with a roll in the center, and then glue the other rolls around it. Once the rolls are all attached, you'll take your piece of cardboard and trace the shape of your storage tubes. Cut out the shape, which should look like a flower. Take your hot glue gun and add glue along the edge of the cardboard cutout, then place the tubes onto the cardboard and let them dry. This gives you your desktop storage.
The optional part of this project comes with the embellishments. In the original project, a piece of chenille yarn in white was glued along the bottom edge of the rolls, although you can choose any color you want. The final touch was a floral patch glued to the front.
Things to consider when making this storage solution for yourself
This DIY project would even work alongside another snazzy desktop organizer that was also made with toilet paper rolls as a storage solution. Both projects give you plenty of storage flexibility, and with this particular DIY, you can actually shape it to fit whatever space you have on your desk. Although the floral shape of this project lends itself to being stronger as a unit, you could also do a more rectangular or box-like shape instead. You would just need to make sure that the base of the project is sturdy if you need to move your DIY storage around.
Another thing you might want to look at is the actual covering of the DIY. The original creator chose to use fabric, but you could also cover the empty rolls with paper instead. Not only could scrapbooking paper be used as a decorative cover, but another option to try is wrapping paper. While this material might not be quite as sturdy, it still gives your desktop storage solution a cuter appearance than if it were displayed in its plain cardboard appearance.