Don't Toss That Broken Window Shutter — Turn It Into A Clever Way To Display Photos
We may receive a commission on purchases made from links.
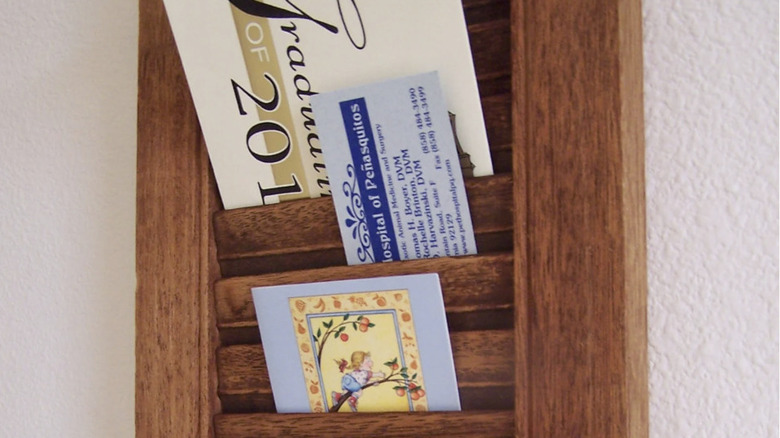
If you love the cute cottage look, then you probably find louvered window shutters totally adorable. They are the timeless fairytale window treatment that can elevate your home's design. However, you may also recognize that weathered, broken shutters can transform your house from a storybook dwelling to a haunted house. If your wooden shutters are missing slats, have chipped paint, or no longer block light or provide privacy, by all means, replace them. However, don't trash the old ones. It turns out that shutters are perfect DIY materials. You can, for example, turn them into an indoor wall display for photographs, gift cards, flyers, art prints, and more.
Even once you fix those old shutters up, they'll have a slightly rustic or coastal vibe that adds a cottagecore aesthetic to any room. Repairing and refinishing a damaged wooden shutter may take some work, but once the job is done, it'll be ready to use as a real-life mood board or display for flat curios. For this project, you'll need tools and supplies for cleaning, repairing, and decorating wood, but exactly what those are will depend on the state of the shutter. First, get a non-abrasive brush or sturdy cleaning cloth, mild soap, fresh water, and a towel. Wood glue, wood filler, sandpaper, basic carpentry tools, and wood stain or primer and paint will help with repairs. While this DIY focuses on wood shutters, you may be able to fill any holes in vinyl or PVC shutters with Flex Seal Weatherproof Hybrid Polymer Paintable Caulk.
Cleaning, repairing, and transforming your shutter into a wall display
Removing old shutters from the outside of a house is fairly easy — use a ladder to reach them if needed. Most shutters are attached to the window frame or wall with clips, screws, or spikes. Usually, you gently unscrew or pop them off the siding. Attach the new shutters before moving on to this DIY project. With your weathered shutter in hand, the first step is to clean it. Whether it's made of vinyl or wood, mix water and mild soap in a bucket, then apply it to the shutter. Scrub the surface gently with a brush or cloth. Rinse the shutter thoroughly to remove any soap suds, and towel it dry to prevent damage to the material.
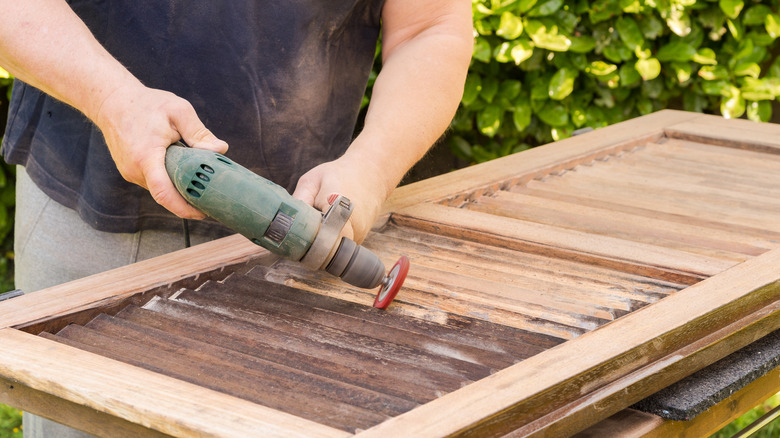
Next, assess the damage. Common damage may include loose or broken slats, chipped paint, cracks, or warping — depending on what the shutter is made of. For wooden shutters, a dab of wood glue can secure broken or loose slats. Use wood filler to disguise chips, cracks, and gaps, and tighten or replace old screws. Remove and replace any broken slats as needed after sourcing them from the manufacturer. Once you're satisfied with the repairs, sand the wood smooth — or gently sand the vinyl for better grip — and brush or roll two to three coats of paint or stain onto the shutter. If the shutter is warped and you can't gently bend it back into shape, it's not right for the project.
Hanging and styling your refurbished shutter
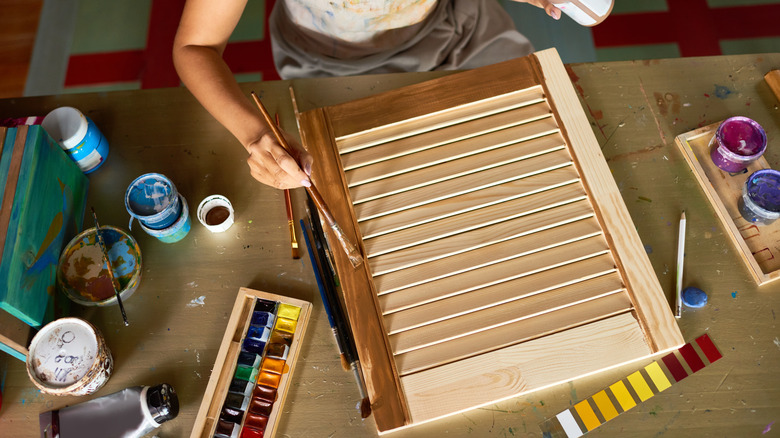
Once your old shutter has been restored to its former glory, you can move on to the most exciting part of this project: styling your new wall display. From changing the color and adding decorations to slotting your most beloved photos between the slats, there are near-endless ways to customize the shutter to fit your existing aesthetic. For example, lean into a coastal look with light-hued paint and some intentional weathering, or go rustic with an earth-toned stain. Treat the shutter like a painter's canvas and stencil on some lettering or stamp on some geometric shapes. Apply jumbo Super Z Outlet Assorted Colorful Adhesive Gems or Opseam 3D Butterfly Stickers for a cool three-dimensional effect. It all adds personality and makes this DIY decor stand out.
Once you're done decorating your old shutter, you're ready to hang it. There's a useful trick to properly hang vertical artwork every time: ask someone else to hold it in place on the wall while you stand back to check if it's well-positioned. Just make sure you can easily reach all the slats so you can swap out the photos and cards slotted between them whenever you wish. Secure items with small clips or easily removable (and cute) Mr. Pen Washi Tape if the room is drafty or you worry about people pulling them out. If you've got lots of shutters, you could make a board for every room in your home. Alternatively, consider some of the other ways to repurpose shutters around your home and garden, such as DIYing a pot hanger or crafting a floor lamp.