Use Wood To DIY A Versatile Storage Bin That Beautifully Conceals Yard Clutter

Storage bins are very useful to have in front of your home, especially if you have children or grandkids who enjoy playing in the yard. Instead of leaving those butterfly nets, baseball gloves, and Nerf guns at the doorstep, where they bring down curb appeal and pose a tripping hazard, they can put them in a box. But you probably don't want a giant plastic one nestled by your front door — that can be just as big of an eyesore as the yard clutter. That's why you should consider using some wood to build a versatile but attractive outdoor storage bin, just like TikTok creator MakingYourPlaceAHome did.
For this project, you can upcycle some wood you already have or buy some from a nearby hardware store. You will need several 2-inch by 2-inch by 8-foot furring strip boards and several 1-inch by 6-inch boards. The amount of wood you'll need depends on the dimensions you decide upon. You will also need a level, a measuring tape, a table saw, a circular saw, wood glue, a nail gun, several wood clamps, a wood stain, 120-grit sandpaper, 150-grit sandpaper, and 220-grit sandpaper. You can also build the perfect toy storage bin for inside your home using similar supplies.
How to build a storage bin using wood
The first step is to cut four 2-inch by 2-inch boards to the height you desire for your bin. Then use your circular saw to cut four 2-inch by 2-inch boards to match the square or rectangular dimensions you prefer. Make two frames out of these boards and press them together with your wood glue and clamps. The wood glue should only take an hour to dry, and then drive nails to secure it. Next, cut four 2-inch by 2-inch boards to match the desired width of your bin. Join the two frames using these four boards, some wood glue, your clamps, and your nail gun.
The next step is to make the bottom of the bin. Measure and cut two 2-inch by 2-inch boards to run parallel to one another across two sides of the prism. Use your level, measuring tape, and pencil to mark the spots, and then secure the furring strips to the inside of the prism.
@makingourplaceahome It's time for water gun and sidewalk chalk season and I decided no more messy porch this year. I found some plans from @diyhuntress that she used for planters and thought why not make a faux toy storage planter. So here it is! How do you store you outdoor toys? Tell me in the comments! Follow @makingourplaceahome for more!
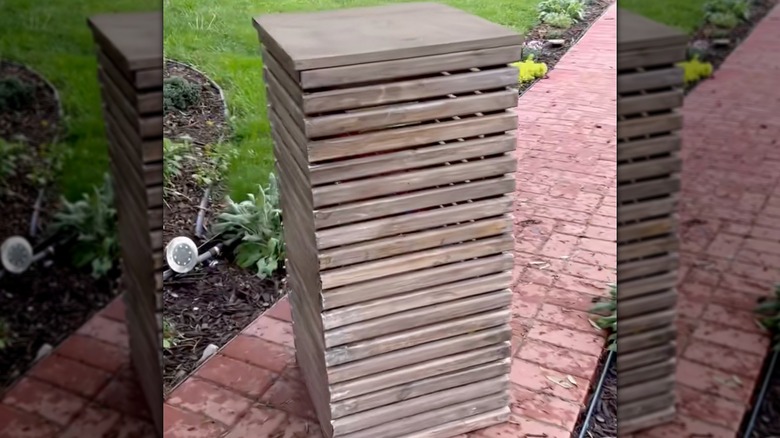
To proceed, you'll need to cut several 1-inch by 6-inch boards lengthwise using your table saw to create 2-inch-wide strips. Cut the strips to length to lay across the bottom of the prism and secure the boards using your nail gun. Then cut additional 1-inch by 2-inch strips to the proper length and nail them to the outside of the frame, covering the entire prism. Then sand the storage box (starting with the lowest grain and ending with the highest) and stain it. And with that, you can say goodbye to outdoor clutter with this stylish DIY.