Say Goodbye To Shoe Clutter & Meet This Clever 6-Tier Hanging Storage Solution
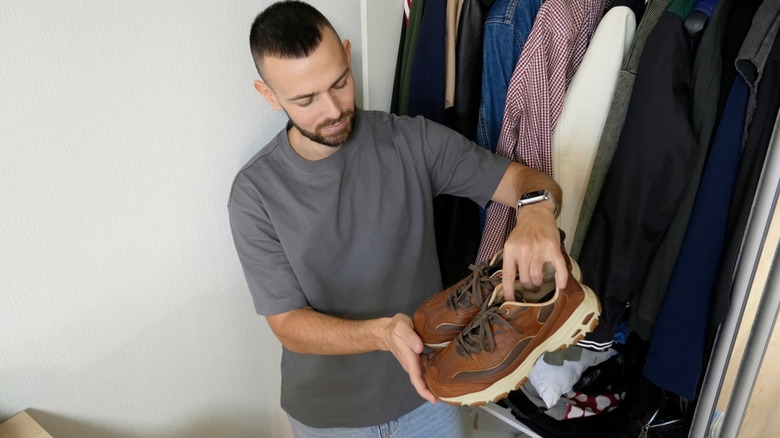
Shoes are high on the list of sneaky sources of visual clutter in our homes. If you're short on space, adding a shoe rack to your entryway or sliding a shelf into the bottom of your closet may not be practical. You have to get creative, and that is where an idea from Christine Schindler Maisch, the crafter behind the YouTube channel Christine's Home Affairs, comes in. It's one of those shoe storage solutions that are actually worth trying.
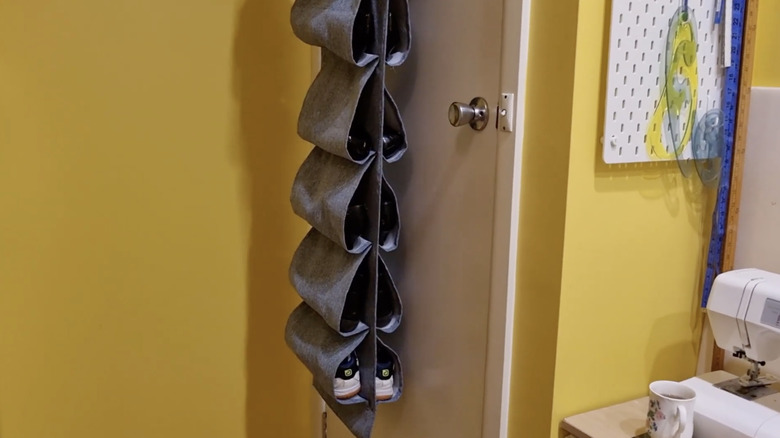
Schindler Maisch uses fabric to create a vertical six-tier organizer that hangs behind a door or inside a closet. You could even roll it up for travel. Compared to the average over-the-door organizer, this one is built with a lot of intention. It does not feature flimsy plastic pockets that can sag when full. That said, how well it holds up depends on the fabric you use and the quality of your stitches.
Ideally, you should source some upholstery fabric for this project. Other sturdy textiles, such as duck canvas or denim, would work, too. Avoid lightweight or stretchy materials. The process is fairly straightforward, as long as you have basic sewing skills. All you need besides your chosen fabric is a clothes hanger, sewing thread, sewing clips or pins, a ruler or measuring tape, a fabric marker or chalk, and a sewing machine. Once you've gathered all your supplies, you're ready to craft a nifty new shoe storage organizer. No more attempting to squeeze yet another bulky storage system into your last spare corner!
How to make a hanging shoe storage organizer with pockets
To begin, cut the fabric into four pieces: two 15-inch by 56-inch pieces for the center panel and two 13-inch by 75-inch pieces for the pockets. Place the two wider pieces' right sides together, and stitch around the edges with a ⅜-inch seam allowance, leaving a roughly 6-inch opening at the top for the hanger. Clip the corners, turn the panel right side out, and topstitch around the perimeter, keeping the top opening free. Then find the center of the panel and mark horizontal lines 8 inches apart. These marks guide where to attach the pocket strips.
For the pockets, hem both of the 13-inch by 75-inch strips with a ½-inch fold along the long sides and a 1-inch fold at the top and bottom. Then mark the strips in 12-inch intervals from the center. Next, line up those 12-inch marks with the 8-inch marks on the center panel. The difference creates the pockets that hold each pair of shoes. Pin one strip to each side of the center panel, matching the markings as you go, and stitch across at each junction. Reinforce the top and bottom rows with a second line of stitching. Once everything is in place, slide the hanger through the top opening and stitch it closed. Just like that, you have a hanging shoe organizer that maximizes your bedroom closet's vertical storage spaces.
You can get creative with your shoe organizer

The cool thing about this hanging shoe organizer is that the structure is so simple, it's quite easy to tweak to your preference. For instance, if a clothes hanger does not work for your space, you can sew a reinforced sleeve along the top and slide in a dowel, add a row of grommets, or attach sturdy fabric straps instead. A dowel can help you achieve a more elegant finish, while grommets or straps are useful if you want to hang it from over-the-door hooks.
You can also change the pockets based on what you actually need to store — smaller pockets for slippers and kids' shoes, deeper pockets for sneakers or boots. If the organizer will hang near an entryway or mudroom, one row can become a mini drop zone for items like socks, extra shoe laces, reusable shopping bags, or gloves. With that in mind, you can use a fabric with a color or pattern that matches your decor. Clear vinyl or thick mesh fabric are also worth considering.
This project is an equally good way to repurpose old jeans or sturdy curtains. Cotton twill scraps or thrifted tablecloths can also work, as long as the fabric has enough body to hold its shape. If you are buying everything new, this DIY may not be cheaper than a basic store-bought organizer. But since you are building from scratch, you have full control over how it looks and meets your needs.