Skip Pouring New Concrete — There's An Easier DIY Way To Widen Your Driveway
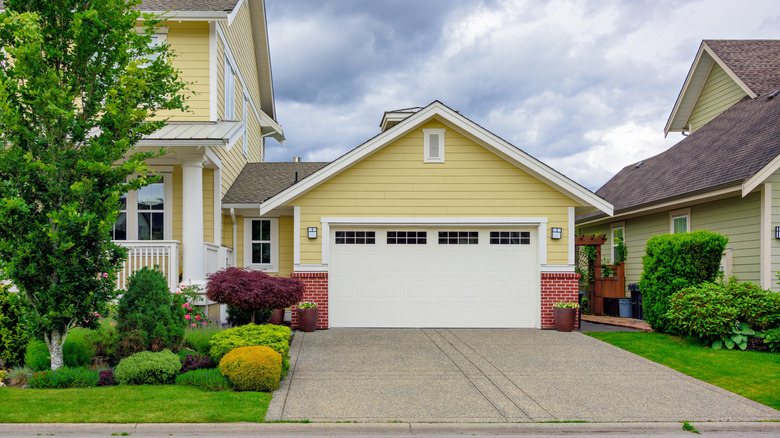
Is the grass section next to your narrow driveway looking sad and spent thanks to damage from foot or vehicle traffic? In instances where driveways are exactly two-car (or one-car) widths with no wiggle room, there's hardly any space left to step — even turning or backing out the vehicle can be tricky. Eventually, your lawn starts to suffer from unsightly ruts or dead grass or crushed flowers, which is both annoying and a major hit to your curb appeal. Fortunately, there's a relatively easy fix. You can extend your driveway by repurposing old pavers you may have in storage. If you're lacking the supplies, visit your local home improvement stores or get some at thrift prices by scavenging secondhand stores or shopping for reclaimed materials on Facebook Marketplace.
But isn't this a complicated job to do on your own? It turns out that even a newbie DIYer can handle this project. You just need to excavate the section you intend to pave to clear the dirt, add some road base layer, pour in a sand layer, compact it all, and place your pavers. Unlike pouring new concrete, installing pavers is a fairly forgiving project, and in many cases, it's much more affordable. But, before you grab a shovel, make sure to check your city regulations or HOAs rules. Are there any restrictions, or do you need a permit for driveway extensions? A thorough check or consultation with the necessary authorities can save you expensive penalties, or worse, demolitions, later.
Widening your driveway with pavers: gather your supplies and prepare the base
To kick off your DIY driveway widening project, gather your pavers. You will also need road base, sand, and polymeric sand to seal your joints. For tools, you will need a wheelbarrow, tamper, level, rubber mallet, tile saw, broom, screed board, rake, and shovel. You will also need a good pair of work gloves to protect your hands.
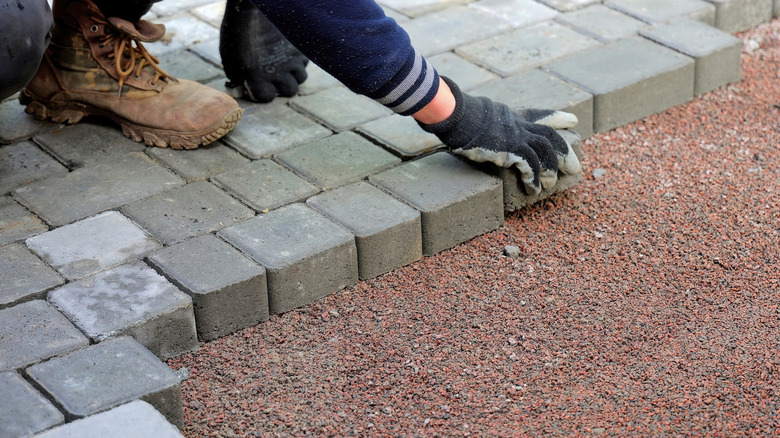
To begin, first mark the strip you want to widen. A convenient way to do this is determining the width of your driveway extension by calculating the number of whole pavers that will fit within that space. Working with these measurements will save you the trouble of having to cut custom pieces. Next, shovel out a few inches of dirt to create space for the road base, sand, and pavers with the aim of having the pavers on the same level with your driveway. About 8 ½ to 9 inches will do. That gives the recommended 6 inches for the road base for a residential driveway, 1 inch for the sand layer, and about 2 ½ to 3 ½ inches for the paver itself.
@crystelmontenegrohome DIY Paver Driveway Extension (An Easy Way to Widen Your Driveway) Our driveway was just a little too narrow, and the grass along the edge kept getting trampled. Instead of constantly trying to fix the lawn, I decided to widen the driveway with a DIY paver driveway extension. It's a practical way to add a paver driveway border, and walkway, without pouring new concrete. Prep the ground, add road base, sand, and brick pavers, then lock everything in with polymeric sand. It looks like it's always been part of the driveway and keeps people off the grass. Full tutorial HERE: https://crystelmontenegrohome.com/practical-paver-driveway/
Once the grass and dirt is gone, pour in your road base to provide a sturdy support for your pavers. After that, compact it with a tamper working from one end to the other. This will prevent your pavers from shifting or sinking over time. Next, add the bedding sand and screed it to make it level and smooth it out. You're aiming for a flat, even surface. Now on to the fun part of laying the pavers.
Laying down pavers and final touches on your driveway extension
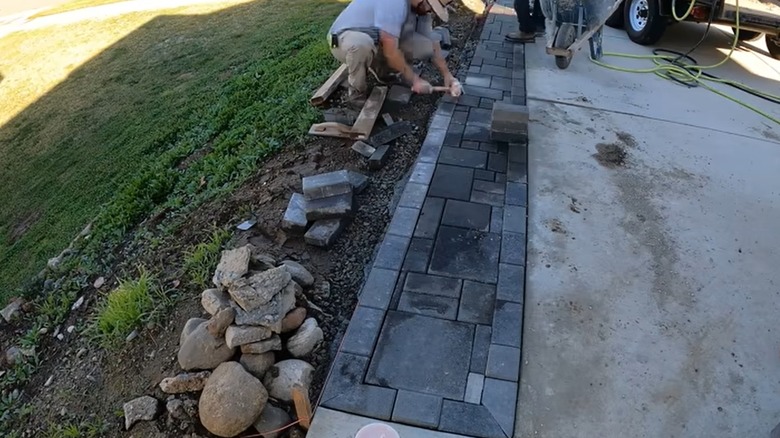
You probably already know the pattern you want your pavers to display. If not, figure that out before you start this step. Ready? Now start placing your pavers following the pattern you've chosen, starting from one corner. Use a rubber mallet to tap them into place as you go. You can also use a level as you work to keep your pavers flush with the driveway. If you notice uneven spots, don't be afraid to lift a few pavers and redo that section.
Once all your pavers are in place, pour the polymeric sand on top, spreading it out to cover the whole section of pavers. Make sure the pavers are dry before carrying out this step to prevent polymers in the polymeric sand from activating unevenly and creating a hazy mess. Now sweep the sand across the pavers to coax it into the joints. Finally, spray water on top using your garden hose's shower setting. When this sand comes in contact with water, it will firm up and bind to the pavers, fixing them in place. That's it — Your driveway extension is all done.