Everyone Owned It In The '60s — Turn This Thrift Store Gem Into A Pot For Tiny Plants
Long ago, in a time where touchscreen smart phones were but a twinkle in our eyes, every home had something called a home phone. It was a stationary device that everyone in your household had to share in order to make calls. These clunky phones came in a lot of different forms, but a favorite in the 1960s was the rotary phone. These pieces feature a wide base, a circular rotary dial, and a phone on top. Today, you can find these gems at your local thrift shop. While not a lot of us need a house phone these days, you can still make use of these quirky pieces by using them as the key piece in a creative thrift flip for plant display.
If you're ready to say goodbye to traditional planters, this might be the DIY for you! For this project, you'll need a thrifted rotary phone, screw driver, scissors, spray paint, super glue, a succulent or small plant of choice, gravel, and soil. Start by flipping over your thrifted rotary phone. There should be a few screws there holding the bottom in place. Unscrew these and gently pull off the bottom. Now it's time to get to work disassembling the phone innards.
Completing your rotary phone planter

Each phone will look a bit different on the inside, so take your time with this part of the project. Use your screw driver to remove each component. At this point, you can also start to snip away wires with your scissors. Remove the number dial from the rotary piece, but keep the shell intact. There should be a hole in the center. This is where you're going to put your tiny plant.
Now you can spray paint the outer casing of your phone. Feel free to paint the shell of the rotary piece a different color for some contrast. If you already like the color of your rotary phone, skip this step. Once these pieces are dry, you might need to super glue the rotary piece to the phone casing. Without all the inner components, there might not be anything to hold it in place. Now screw the bottom of the phone back into its original position.
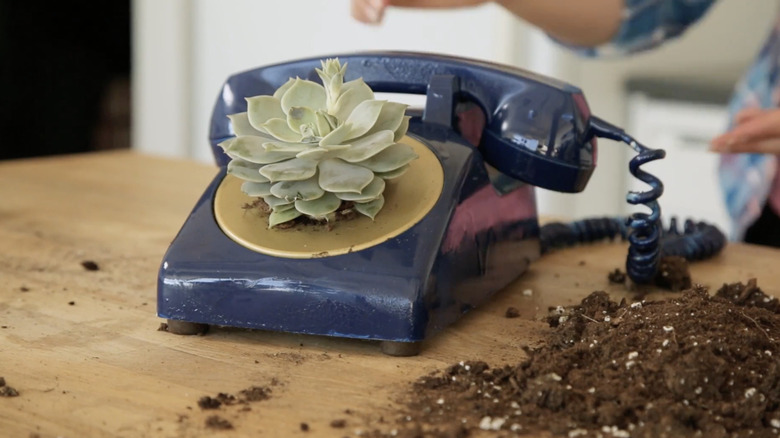
With your rotary phone beautifully refurbished, it's time to move on to planting. Start by filling the bottom of the phone up with gravel through the hole where the rotary dial was. Next, fill it up with soil, leaving a bit of space for your plant. For succulents, be sure to select soil that includes sand, perlite, or pumice for optimal drainage. From there, you can loosen the roots of your plant and gently work it into the hole.
Caring for the plant in your rotary phone planter
If you planted a succulent, place your new rotary phone planter somewhere it can receive bright, indirect light. Succulents don't need a ton of moisture, but you will need to water your plant when the top of its soil dries out. This can be tricky to deduce since most of the soil will be out of reach in the phone. As a good rule of thumb, water your plant every two weeks in the summer and every three weeks in the winter.
Some other great options for this planter include the Chinese money plant, string of pearls, or African violet. Of course, you'll need to care for whatever tiny plant you select based off of its unique care requirements. Just pick something slow-growing and small to get the most out of your rotary phone planter. Once it comes time to repot and replace your plant, don't be afraid to unscrew the bottom of your phone to help streamline the process and more easily loosen the roots.
If you don't want the hassle of tending to a real plant, you can easily recreate this project with an artificial plant, too. Instead of using soil, you can fill the inside of the phone completely with gravel to help keep your fake plant in place. Air plants are also an easier option since they do not require soil — just indirect bright light and a manageable water soaking routine. Either way, take this as inspiration to see the things around you in a new light. With a creative eye, you'll find that there are a ton of opportunities to repurpose items in your home as adorable planters.