Use Old Baking Molds To Create Budget-Friendly Pavers With This Clever DIY
We may receive a commission on purchases made from links.
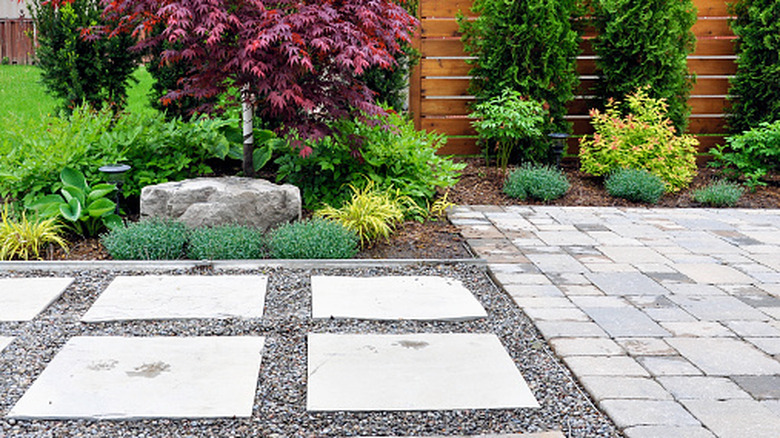
When you think of a beautiful home with amazing curb appeal, oftentimes there's one thing that stands out the most. That might include a manicured lawn, blooming garden, or thoughtfully designed walkway. Something else that can take things up a notch is a stunning path or walkway in the yard. Custom pavers, in particular, can give your home an instant facelift, besides serving the practical role of preventing mud transfer from the outdoors into the house during wet days. While the most commonly used paver material is natural stone, concrete is a popular choice that can also serve you well. And the best part is that you can make them yourself using old baking molds and, in the process, save some money and also produce very unique pavers that look high-end.
This DIY paver project is so easy, with just a little effort and the right supplies, even a beginner can hack it. First, you combine concrete mix with water, next, pour the mixture into baking molds, and finally, remove the pavers once they're set. So get ready by gathering the supplies, including Quikrete (a popular concrete mix available on Amazon), water, and petroleum jelly or cooking oil spray. You'll also need a bucket, trowel, gloves, paper towels, a screeding tool, a tarp, and old baking molds. Silicone molds tend to release the pavers more easily, though standard nonstick pans can also work. Decorative molds with floral, butterfly, or geometric designs can help the finished pavers look more custom and decorative.
How to make DIY concrete pavers with baking molds
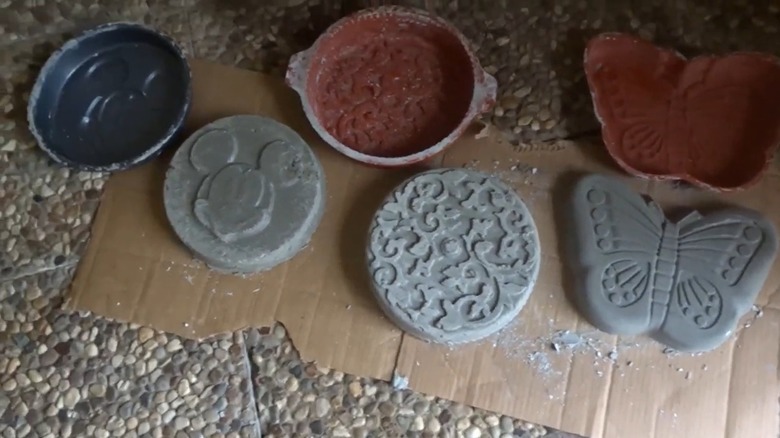
With paper towels in hand, start this DIY by applying petroleum jelly to the inside of each mold or baking pan. This helps release the pavers once the concrete hardens. Next, put on your gloves and mix the concrete and water in a bucket according to the package instructions. Add water gradually while mixing thoroughly to avoid a runny consistency. You want to get a batter-like consistency, as that will result in a smooth finish on the pavers.
Now fill each mold with the concrete mixture. Press the mixture firmly into the mold to capture all of the design details and remove gaps. At this stage, you can add stability to your pavers by inserting a piece of chicken wire. If using reinforcement, you'll need to first fill the mold halfway, then place the chicken wire before topping up the remaining amount of cement mixture to fill the mold. Gently tap the mold against the work surface to release trapped air bubbles. Then use your screeding tool or improvise with a piece of cardboard or wood to level the top of the concrete.
Make as many batches of concrete mixture as you need to in order to fill all your baking molds. Allow the concrete to set for at least 24 to 48 hours. Once hardened, carefully remove the pavers from the molds. Next, move the pavers to an airy, shaded spot and leave them to cure for an additional three to seven days.
Painting and arranging the finished pavers
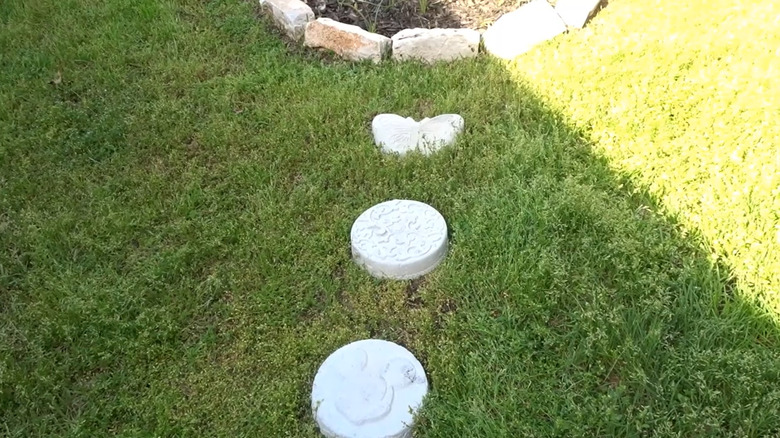
The paver stones look absolutely fantastic, thanks to the design transferred to them from the molds, but a touch of paint can make the designs stand out even more. A good idea is to use a weather-resistant acrylic paint like FolkArt Outdoor Acrylic Paint or go for spray paint for easier application. The pavers can be painted in a single color or accented with multiple shades to highlight decorative details, like red petals and green leaves on a rose flower design.
As for where and how to lay your pavers, first, keep in mind that these particular pavers are ideal for use as stepping stones. They can make a great walkway in your front yard or a leisure path in your garden. Figuring out the perfect spacing for the stepping stones is important, and that means considering the people in your household who would regularly use the path, including little ones. Finally, you can lay the paver step stones on your lawn, in gravel, or on mulch. With thoughtful placement, the finished path can add both charm and functionality to the yard.