Use Plastic Bags To Create Budget-Friendly Patio Pavers With A Savvy DIY

Social media has been buzzing with several DIY concrete techniques that enable you to make your own affordable pavers, and if you're building or re-building a patio, it's time for you to get in on one of the easiest ones. DIY paver projects will instantly elevate your yard, and you also can take pride that you did it yourself. While some of these trendy projects use household objects to make molds in which to place concrete for pavers, this patio project skips the molds in favor of plastic bags filled with budget-friendly concrete mix to make pavers that look just like stone.
To create your pavers, you'll need 1 quart zip-top or slider plastic bags, a bucket, a scoop or trowel, and concrete mix (be sure you're not confusing concrete with cement). You can also use plastic bags without closures and twist them closed. Consider using a colorant with the concrete mix for a custom look.
How to mold pavers using plastic bags
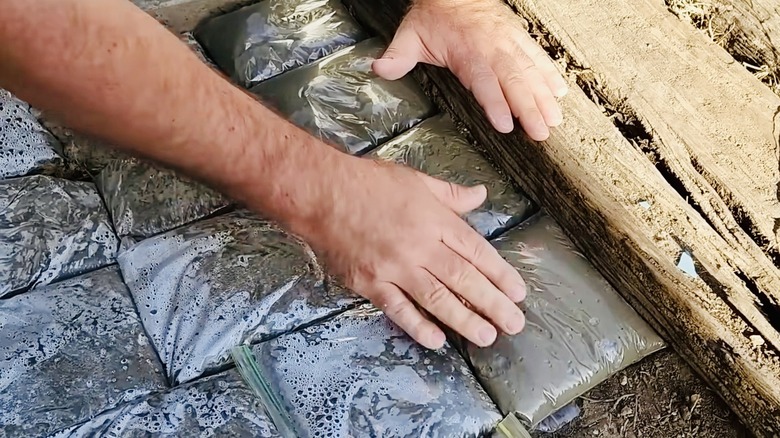
To kick off your project, clear and level your designated patio area, removing any stray debris. Combine water with your concrete mix according to the package directions. You'll know it has reached the ideal consistency when the wet concrete slides cleanly off your trowel. Using your scoop or trowel, fill plastic bags between half and three-quarters full with the mixture. Carefully press out any trapped air before sealing or twisting them shut. Arrange the bags tightly together in your prepared space, tucking the closures or twisted portions underneath so they stay out of sight.
To ensure the concrete fills out each bag evenly, place your palm flat on top and give it a quick shimmy to smooth it out. For a perfectly uniform surface, slide a straight board across the tops of all the bags. While the concrete is still wet, consider adding some customization — a fun personal touch to your stepping stones. Cut an "X" into your bags or press in decorative elements such as glass pebbles, marbles, sea glass, mosaic pieces, or other durable yet stylish objects.
Finishing off your DIY pavers
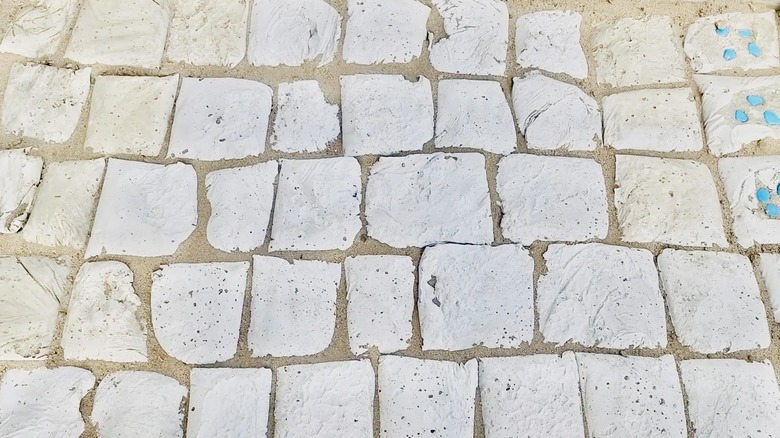
Let the concrete cure overnight. While it is still slightly damp, peel away the plastic covering; you may need to wiggle the blocks a bit to loosen it completely. Leaving plastic on the unseen bottoms is perfectly fine — it could even help to deter weeds that could pop up in the empty spaces.
Several DIYers use a blowtorch to melt the plastic away quickly. This torching method actually texturizes the surface for better slip resistance, similar to a polyurethane finish. However, if you use a torch, wear an N95 respirator mask to protect yourself from toxic fumes.
After clearing the plastic, pour sand over the area to fill the joints between your new pavers. Use a broom to sweep away the excess. This sand-filled gap method ensures that rainwater can still naturally drain through the patio. Once you're done, all that's left to do is sit back with a beverage on your patio and blow your guests' minds with the tale of how you made your own pavers.