

No More Wet Countertops: DIY A Dish Drying Solution With An Empty Detergent Container
We may receive a commission on purchases made from links.
Handwashing dishes is a job in and of itself, but once you factor in the time spent wiping down the countertops afterwards just because rinsed plates get water everywhere, it becomes a major chore. Not to mention, laying them on kitchen towels takes up a ton of counter space that you might not have. You could always invest in a dish drying rack, but the truth is, you don't need one. While store-bought products can be up to $100, there could be a free solution right in your home. Mana Creative Corner on YouTube demonstrates why you don't throw out empty laundry detergent bottles — they might be budget-friendly drying racks in disguise.
Showcasing one of the many ways to repurpose a detergent container, the video highlights an empty bottle that's already been detached at the bottom and flipped over so that the dispenser portion and handle rest on the ground. This is important since the dispenser cap can be removed to drain any water that's collected from the plates above. The handle will be used as the center support to keep the DIY rack upright. To replicate this genius idea, you'll need a large detergent or soap container with a screw-on or pop-off lid and a handle located along the top, a box cutter, a hot glue gun kit, and a handful of wooden spoons (or something like these Wisyok Jumbo Craft Sticks). Depending on what materials you already have, you can complete this DIY for under $20.
How to make a dish rack out of an empty detergent bottle
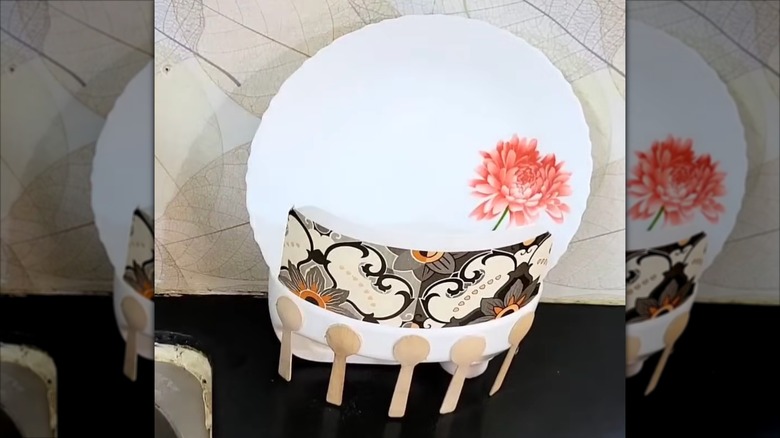
When trying to decide how much of the bottom to remove, start with a less is more approach. The less you cut off, the deeper you can make the cutouts and the more stable it will be for drying large plates and dishware. To ensure you cut straight lines, mark spots on each end and side with a ruler first, using the lines of the bottle as a guide for where the base of the holes should be. If your bottle doesn't have convenient lines, you can always eyeball it as long as they're the same depth on both sides. This prevents plates sliding out one side since the slots are level.
Although the handle keeps the bottle steady, you'll need additional supports to keep it stable enough to hold dishes. Wooden spoons attached to the sides with hot glue will provide more structure, but you can also use popsicle sticks, trimmed down to have flat bottoms. The amount you add is up to you, but the more you have, the more support you'll provide. This is a super important step because the sticks need to be secured at the same point to ensure the entire dish rack is level.
How to elevate this homemade dish drying solution

The video details one cutout on each side, but you could potentially maximize your drying efforts by adding multiple along the length of the bottle instead of just on the ends. Depending on the width of the container, this might influence the size of the plates you can dry on it, but it could be great for smaller dishes or utensils. You can even keep the end cutouts and add the lengthwise slots to give yourself more flexibility for drying different size dishes.
Customize your homemade dish rack by hot gluing a decorative pattern to the sides or layering on some patterned contact paper. You can also use outdoor-suitable acrylic paint to add color, designs, and long-lasting style to the repurposed detergent bottle. This Gotideal Acrylic Paint Set from Amazon comes with brushes so you can get started right away. Since the DIY rack will be exposed to water and soap suds, the quality of the paint will help it hold up over time.