

Not Baskets, Not Shelves: The Dollar Tree DIY For Stylish Toilet Paper Storage

We may receive a commission on purchases made from links.
Some of the best storage ideas for keeping things organized can be crafted from the simplest of materials. It's not glamorous, but it's absolutely necessary to find a good way to stash your toilet paper. While it may not be the most exciting DIY endeavor, you can absolutely create your own stylish, cost-effective storage solution with a handful of materials. Whether you have limited shelving or you simply want a more aesthetically pleasing way to store your TP, YouTube creator Heidi Sonboul DIY has you covered with her ingenious cube organizer DIY.
For this project, all you'll need are seven thin canvases, peel-and-stick contact paper, zip ties, and a heavy-duty hole punch. You also have the option to use paint if you'd like to customize the finished piece. First things first, you'll want to set yourself up for a smooth assembly process by prepping all of your canvases.
Start by punching a small hole in each corner of five canvases. Try your best to ensure the holes are in the same spot on every canvas. If it helps, measure and mark out these spots before you proceed. Some heavy-duty hole punches also have a measuring gauge built in. Heidi favors the Crop-A-Dile II Big Bite Punch, which is available on Amazon. Next, grab two of those canvases and add two more holes along each long edge. Once that's done, you're ready to assemble the organizer.
Putting together your DIY toilet paper storage cube
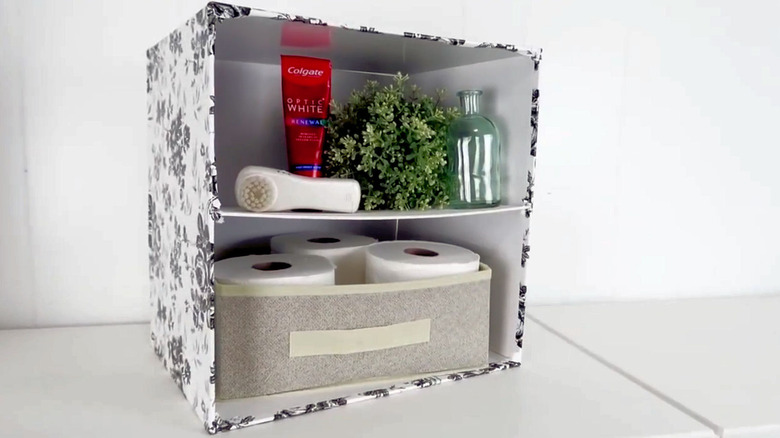
Now that your canvases are prepped, it's time to assemble the organizer. Line up one canvas with six holes next to a canvas with four holes along the short edge. Use zip ties to secure them together. Attach another four-hole canvas to the opposite side of the six-hole canvas. Next, take another four-hole canvas and line it up with the middle holes to form a shelf. You can add a second canvas to the middle for added support, but this isn't necessary. Finally, attach the last four-hole canvas to the bottom.
To cover the back, find a canvas that fits the dimensions of the opening, or slightly overlaps it, and zip tie the final two canvases together to form a back panel. Either way, create new holes that line up with the panel and zip tie it securely to the back. Be sure the fasteners are facing the back of the organizer.
Now it's time to get creative! Use fun contact paper to give these shelves some personality. You can also opt to paint the cube organizer instead. For more dimension, add contact paper to the back panel before attaching it and paint the rest of the organizer a solid color — the possibilities are endless. While this is the perfect storage solution for toilet paper, this project isn't particularly water-resistant. Instead of keeping it directly in the bathroom, consider using it to declutter your linen closet. Slide in a basket insert for even more optimized storage. You can also use this DIY to store items like makeup, skincare products, or other bathroom essentials.