Transform A Log Into Stylish, Coastal-Inspired Garden Decor

We may receive a commission on purchases made from links.
If you have visited a garden store recently, you may have found yourself feeling a little daunted by the prices of some larger garden decor items. However, if these pieces are a little out of your price range or you simply don't like the look of the store-bought options available, that doesn't necessarily mean you have to make do with an undecorated outdoor space. In fact, there is actually a clever DIY project you can undertake instead which can help you achieve an adorable coastal-inspired garden look while repurposing a variety of items you may already have around the house.
This project by @SeppnShelleyDIY involves transforming a simple wooden log into a charming mini lighthouse by painting it and adding a light on top. To make it, you will need a wooden log, a steel rod, some coastal-inspired paints, a round wooden disc for the top, an LED light, some spare washers or nuts, a glass jar with a metal lid, and some waterproofing lacquer. In addition, to help you piece it all together, you will need a drill and a hammer. While this may sound like quite the list, many of these items can be spares from other projects, and each item goes a long way towards turning this simple wooden log into an eye-catching lighthouse. Keep in mind, it is probably best to tackle this project outside — or, at least, over a sheet or tarp — to avoid getting any paint drips or stray wood shavings all over your floors.
How to DIY your own sweet lighthouse garden decor
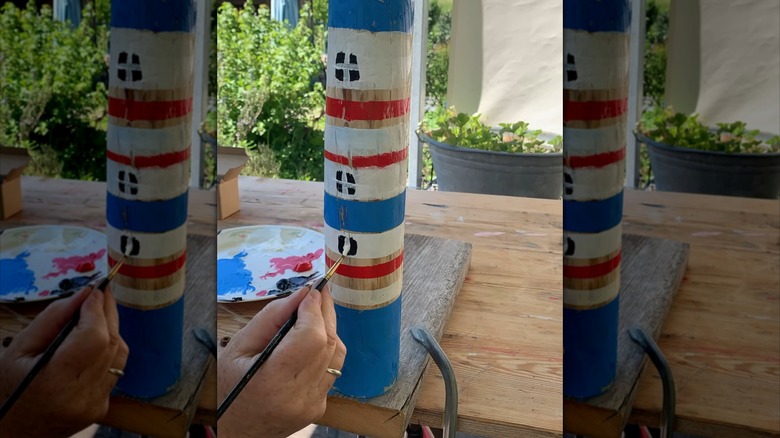
To start this DIY, you will need to drill a hole in the center of your log, roughly 4 inches deep. This is where you will hammer in a steel dowel that can then be pressed into the soil, enabling your lighthouse to stand upright. Before displaying it, however, you need to decorate the log! Start by painting horizontal lines across the wood in coastal colors like blue, red, and white. You can have some fun with this part by painting other cute details such as windows, moss, or portholes. Why not also paint a few spare metal washers to look like red-and-white striped life preservers? If you want to add a door, try painting one on or hammering in a small rectangle of wood with the nail representing the handle. Remember to spray all painted sections with a waterproof lacquer — like this Olympic WaterGuard sealer spray — to ensure the design is weather resistant.
Once the body of the lighthouse is decorated, it's time for the topper. Take the round wooden disc and paint its edges black. To create an adorable fence around it, hammer some nails in a circle along the top and thread garden wire between each one. Finally, your lighthouse needs a light! Using your drill, screw the metal lid of your jar upside on the wooden disc, then screw both into the top of the log. This will allow you to place your LED on the jar lid and screw the jar upside down on top, creating a little glass enclosure. When you're done, style your brand new DIY lighthouse to instantly add whimsy to your backyard.
Styling your new lighthouse decor
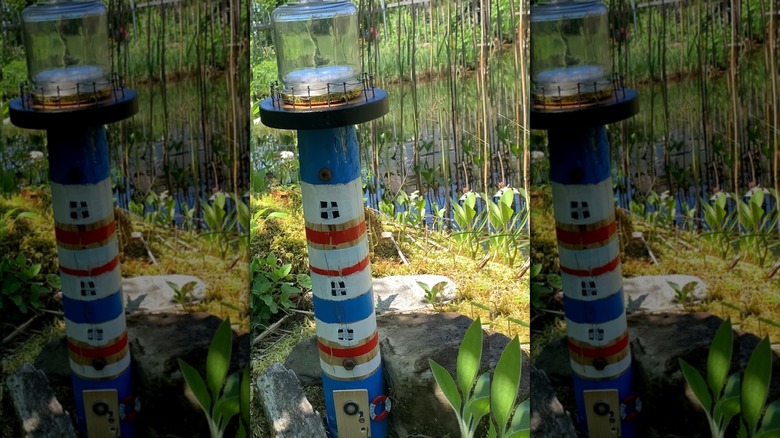
After spending your free time creating your own adorable lighthouse decor, you will no doubt want to make sure it is displayed in a way that is both aesthetically pleasing and practical. So, to make your lawn stand out with this unique decor, remember to make the most of the bright, coastal colors you used to paint the lighthouse. To do this, try placing it in a spot that is currently lacking color or within a flower bed that tends to look a little plain after the flowers have finished blooming.
However, when thinking about where to display your lighthouse decor for the best visual effect, remember to consider the practicalities of keeping it in good shape over time. For example, you will likely need to change out or recharge the LED light at the top every once in a while, particularly if you like to have it on for long periods of time. This means you may want to place the lighthouse in a location where you can access it easily without having to step over flower beds or past large bushes to get to it. Alternatively, you could opt for a solar-powered LED light, meaning you can place it deep within your plants without worrying about having to access it quite as often.