Turn A Mason Jar Lid, Plastic Bottle, And Snow Globe Into The Perfect Planter
We may receive a commission on purchases made from links.
Sometimes you need a new planter to make room for a new leafy roommate, or to repot an older plant, but you don't want to make yet another trip to the store. At the moment, you also might not want to shell out the extra bucks — and maybe you don't need to. That's because with a bit of DIY, everyday, common household items can turn into beautiful planters for the home. Take, for example, this DIY from digital creator Sir Tyler Berg, who transformed a snow globe, a plastic bottle, and a Mason jar lid into a one-of-a-kind planter.
Part of what makes this planter so appealing is that it's easy to recreate. The snow globe serves as the planter itself, while a Mason jar lid and the top portion of a plastic bottle are stacked to make a stand. Additional supplies you'll need include a pair of scissors, like these Fiskars All Purpose scissors, and a can of spray paint to give the new planter a more chic finish. A can of Rust-Oleum Ultra Cover Spray Paint, for example, can be purchased for about $7 on Amazon.
You'll also need either an epoxy, super glue, or other strong adhesive, such as Bob Smith Industries Slow-Cure Epoxy, to help secure the snow globe on top of the bottle lid. The finished planter also has a surprisingly decorative flair, making it suitable for placement on a living room table, bookshelf, bedroom windowsill, or even out on the patio.
Completing your snow globe planter pot
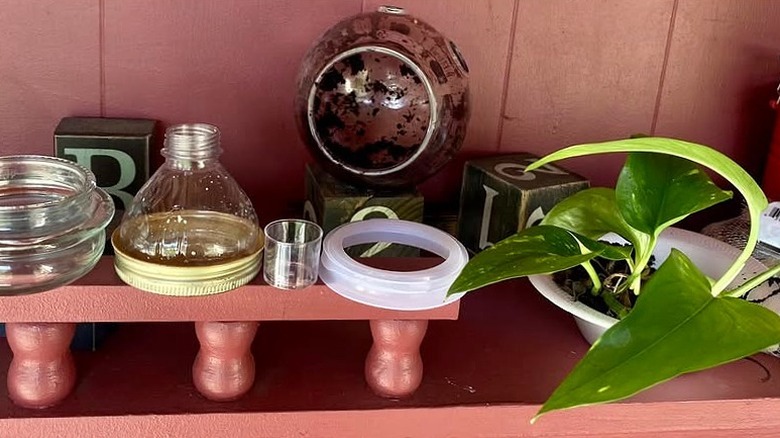
Since you're working with adhesive, it's best to place a cardboard box or some newspaper on top of your work surface to serve as a protective barrier. Also, be sure to choose a plastic bottle with a body narrow enough to fit inside the Mason jar lid, as it will be placed inside the lid to create the base of the planter's stand.
You're going to begin this project by cutting off the top portion of the bottle, leaving only the neck and roughly 3 inches of the bottle's body. Then, using adhesive, secure the bottle section inside the Mason jar lid. Once this assembly is fully dry, attach the snow globe to the top of the bottle neck.
Holding the globe in place for a few moments may help create a stronger bond, and painter's tape can be used for additional support while everything cures. At this point, the bulk of the project is complete — just add a layer or two of spray paint to the finished design and you're ready to debut your new planter.
Customization ideas and considerations
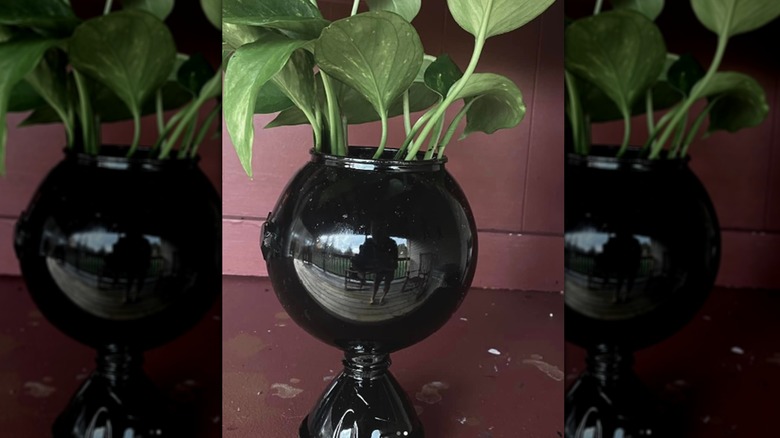
The finished design can also be upgraded using different paint colors, creative stenciled designs, or perhaps even gold and silver leaf for a more regal look. If you'd rather add a bit of texture instead, consider gluing decorative accents, such as rope, beads, or a velvet ribbon, around the snow globe to give your planter a bit of charm and personality. Also, if you're not sold on the snow globe, a small fish bowl can also work as an easy alternative for the pot.
That said, whether you opt for the snow globe or a small fish bowl, neither have holes for drainage, which is a consideration when it comes to this DIY planter idea. Just be sure to keep an eye on those watering sessions. One way around this, though, is to pair your new planter with succulents (like one from this list of the 10 best succulents to grow indoors), as succulents generally need less water and can still thrive. They may be an ideal choice.
Aside from a careful watering schedule, a well-draining potting mix, such as Duspro Succulent Mix, can also help reduce the risk of overly damp soil in the pot.