Say Goodbye To Ugly Weeds In Your Raised Garden Beds With An Eco-Friendly Solution
I loathe landscape fabric. I know it's widely used, especially when people are starting raised garden beds, but as a master gardener, I know how destructive it is. In my opinion, it's no better than when old-timers would lay carpet at the bottom of a bed when they wanted to suppress weeds. Both leave chemicals behind as they break down, and both will require you to spend hours of back-breaking labor excavating the shredded remnants. Landscape fabric tangles around roots, releases microplastics as it breaks down into smaller and smaller fragments, and really contributes nothing apart from a slow accumulation of plastic in the soil.
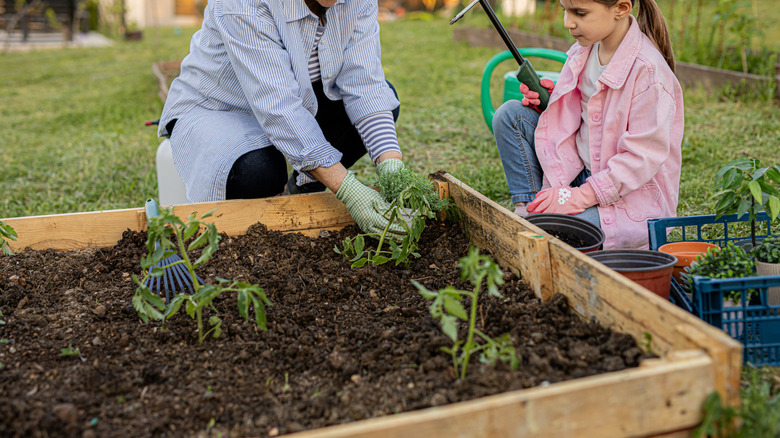
If you're building a new raised bed and want to give yourself the best chance of minimal weeds growing straight through, my favorite solution is plain, clean cardboard. It's also one of my favorite ways to repurpose cardboard boxes in the garden. I'm a permaculturist, and sheet mulching with eco-friendly materials is a cornerstone of my no-dig and permaculture gardening practices. I actually did this project again at the end of May 2026, when someone donated me a whole bunch of vegetable seedlings that I didn't have any space for. I made them a new bed using cardboard at the base and some logs from a dead apple tree as the walls. I even managed to score some free soil to fill it with. Cardboard works to suppress weeds because it blocks light and growth pathways. And, eventually, it breaks down and improves the soil.
Choosing and preparing your cardboard
At the base of a raised bed, the cardboard you lay will break down in four to six months, adding organic matter to the soil. Your goal when choosing and preparing your cardboard is to make sure that when it does break down, nothing harmful is left behind. Some people swear by corrugated cardboard and only use that for their beds. I've used both corrugated and regular cardboard and can't honestly say I noticed any difference between the two. What matters more is that you choose clean cardboard with minimal printing, and definitely avoid anything glossy or waxy, as these coatings and their brightly colored inks can contain chemicals that you don't want in your soil, especially if you plan to grow vegetables.
Plain brown shipping cardboard with barely any printing, preferably none, is my recommendation. You can actually buy reels of virgin cardboard, but if you need to make a DIY raised bed super-cheap or free, then taking the time to find minimally printed shipping boxes is the next best choice. Once you've identified some appropriate cardboard, make sure that it is devoid of tape, labels, and stickers. You should also pull out any staples, as you don't want these in your soil either; they can puncture an unwary hand. Also remove as much residue from heavy-duty adhesives as possible. These are often plastics and other polymers that won't break down cleanly in the soil. In other words, only use cardboard that you would put in a compost heap, and remove anything from that cardboard that you wouldn't want to compost.
How to lay cardboard and what to put on top
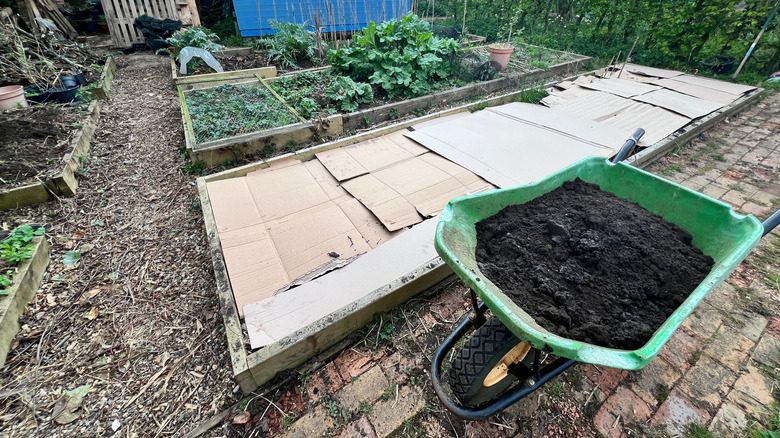
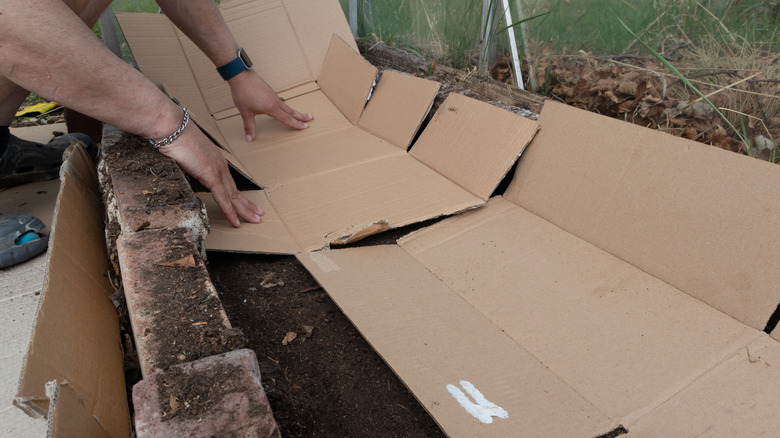
If the area is overgrown and weedy, I recommend trimming the weeds low to the ground first, but leave them lying on top of the soil unless they are heavy with seed. This will create an extra layer of mulch and provide the soil with more organic matter to eventually break down. Then lay your cardboard on top. Use the largest possible sheets you can find, especially on the bottom layers, so that you minimize seams and overlaps. Every gap or break is a weak spot where weeds could theoretically push through before the cardboard has the chance to do its work and kill off the weeds below. I usually do at least four layers of overlapping cardboard sheets at the bottom of a raised bed, sometimes as many as six, depending on the weed pressure of the ground I'm covering. Make sure that every seam or every gap between sheets is covered with another sheet of cardboard.
Water the cardboard thoroughly. Give it a good soaking, and then use your hands or feet to push the cardboard into the corners and right up against the edges of the bed for a better chance of blocking weeds. Lastly, fill the bed with a nutrient-rich growing mix and get started planting. In my recent project, I used the free topsoil, which was a little bit too sandy and didn't look like it was terribly nutrient-rich. I amended it with compost and also worked in a lot of vegetable scraps, which will very quickly break down and enrich the soil. I'm also still regularly feeding it with more kitchen scraps and the spent herbs from my herbal tea that I would normally compost.