Don't Toss Metal Lids From Empty Tins - Turn Them Into The Cutest Mini Flower Baskets
When it comes to reusing empty tin cans, you usually keep the empty can but throw away the lid. After all, there are so many unique ways to repurpose metal containers around your garden — and around your home. Turn them into string lights to illuminate your patio or balcony at night or create clever hanging storage solutions for your craft room. The ideas are near-endless. Perhaps, however, you've never thought that the metal lids could be useful. Well, it turns out that they make for charming mini flower baskets. Credit for this unexpected idea goes to TikToker fulfilnesfloral, who fashioned a metal can lid into a cone-shaped flower basket that resembles a vintage tussie-mussie — an adorable 18th- and 19th-century metal posy holder.
The key item for this DIY is the tin lid — lids from canned fish, pet food, canned fruit, and more will work. Collect as many lids as you can if you want to make more than one flower basket or think you might need some practice to get the look right. Similar-sized tins will give you uniform posy cones; lids in different sizes will accommodate a wider assortment of bouquet styles. For this creative DIY, use faux flowers from Dollar Tree in the decor, or shop online for small, sweet blooms. These Wavwavw Mini Artificial Sunflower Heads with Iron Stems are adorable. Add some filler, like pretty baby's breath or feathery foliage, to them. A small pre-made posy like this LawnIdyll Charming Dried Flowers Bouquet would work, too. Lastly, some spray paint in any color you prefer will come in handy for adding a personal touch to your tussie-mussie reproductions. You'll also need some Tessco Mini Floral Foam and a craft knife.
Crafting your DIY mini flower baskets from tin can lids
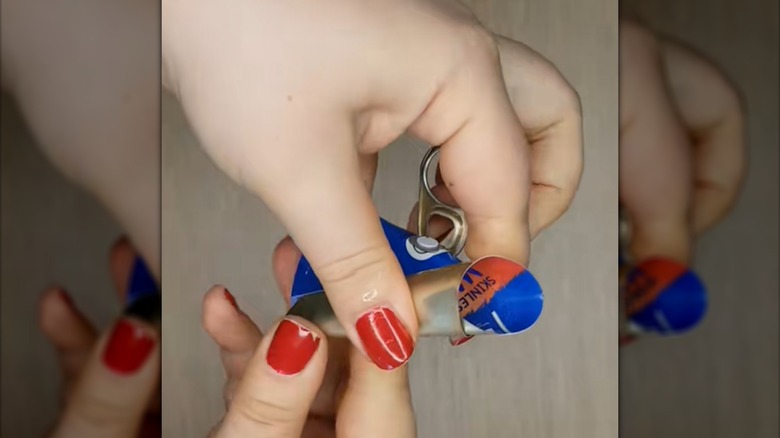
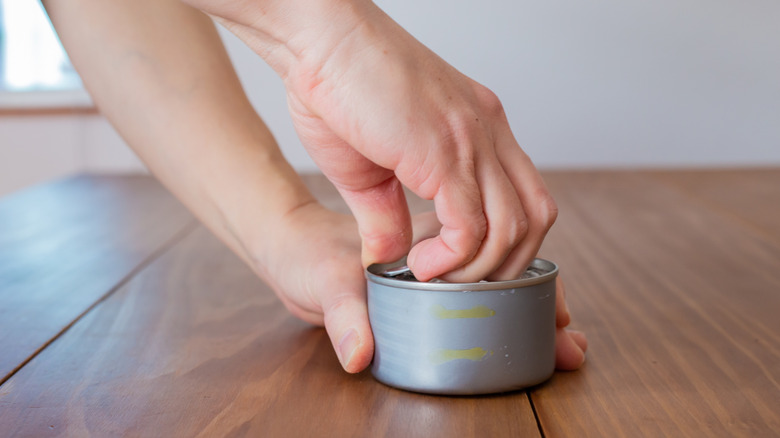
Ready to upcycle a metal lid into the cutest flower basket with this easy DIY? Crafting a mini metal cone for a posy will take you no more than a few minutes. Start in the kitchen, where you'll remove the lids from the cans — if you haven't already — and wash them thoroughly to get rid of any food residue. Don't remove the pull tab; you will need it later. Wear gloves to protect your hands from the sharp edges of the lids. Once the lids are dry, gather them and your supplies together in one place, like your craft room desktop. Pick a lid and, with the plain, unbranded side of the lid facing you, slowly and cautiously roll it into a small cone. Then bend the pull tab perpendicular to the cone to hold the metal in place.
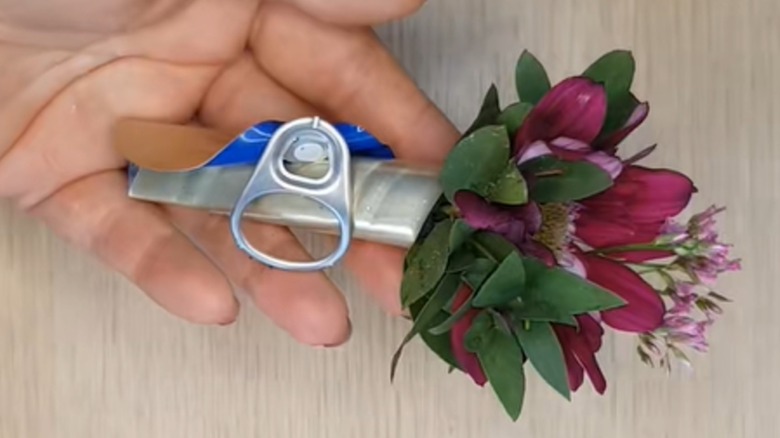
@fulfilnesfloral Using can lid in decorative way.I made a cone with metal lid,put floral foam in to it after that placed the flowers and fillers.Result looks like an interesting buttonhole 🌟 #creativeideas #flowerdesign #flowerarrangement #flowerarrangementlesson #floral
Insert the small piece of dry floral foam into the cone; cut it to size to fit the cone using a craft knife. Cut the stems of the artificial flowers you're using as the centerpiece for your bouquet shorter, if needed, and then push them into the foam. Fill the space around and between them with filler blooms and foliage. Adjust the metal cone so it fits snugly around the foam and posy. The trick is to hold the cone in your hand and gently squeeze it while pulling on the tab. Once you are happy with your arrangement, repeat the same process for any other lids you collected. Eventually, you'll have a whole collection of sweet, tiny flower baskets ready for display or gifting.
Adding the final touches and displaying your mini flower baskets
You can leave the mini flower baskets — or, more aptly, tussie-mussies — just as they are when completed. The original metal lids have a certain rustic charm. Or, of course, you can put your own twist on this DIY. Spray-painting the cones is one option. For this, use spray paint that adheres well to metal, like Rust-Oleum Painter's Touch 2X Ultra Cover Spray Paint. It comes in lots of colors — we're particularly enamored with Pink Peony, Almond, and Key Lime, or simply choose whatever color best coordinates with your bouquet. Another option is to decoupage both sides of the lid before folding it with a craft adhesive like Mod Podge Matte Sealer. A pack of Tenceur Vintage Green Floral Decoupage Napkins has 12 styles to choose from for just $13. A non-floral design would be the least overwhelming pattern choice.
This DIY will truly light you up if you've been thinking about adding floral elements to your existing decor. Displaying these mini flower baskets with their artfully arranged contents almost anywhere in your home couldn't be easier. One idea is to hang them individually on a wall by looping the pull tabs over hooks or from ribbon or twine. You could also hang multiple posies garland-style from a length of rustic jute rope. Clip them on with wooden pegs and alternate each bouquet with a small printed photo. Add a loop of ribbon to the basket and hang it from a door handle, or pop a bundle of cones in a pretty woven basket and display the collection on a side table.