The Headboard Alternative That'll Add A Rustic Touch To The Bedroom
We may receive a commission on purchases made from links.
A headboard is the perfect canvas for injecting a little rustic life and personality into your bedroom. It doesn't dominate the space like floor-to-ceiling shiplap walls, yet it's more grounding than a mere barn painting on the wall. Whether you're creating the modern rustic bedroom of your dreams or adding homey touches to a minimalistic space, turning old window shutters into a unique, rustic headboard is the project your bedroom craves.
The star of this DIY is the window shutters, which you can salvage from thrift stores or score secondhand online through eBay and Facebook Marketplace. The amount you'll need depends on the size of your bed. The width of the headboard should align with the mattress, or if you're going for an oversized look, it can be up to 3 inches wider on each side. The height should be between 14 and 58 inches above the mattress, with shorter headboards reserved for twin-size beds, taller ones for king-size beds, and midsize (roughly 28-inch) headboards for queen- or full-size beds.
The supporting materials include spray paint, 80-grit sandpaper, wood glue, screws, a drill, and mending braces (like this QSJ 12-Pack Flat Mending Plate). This is a simple DIY that you can complete in one day. Plus, you can customize the headboard with various colors, shutter arrangements, and accent decor.
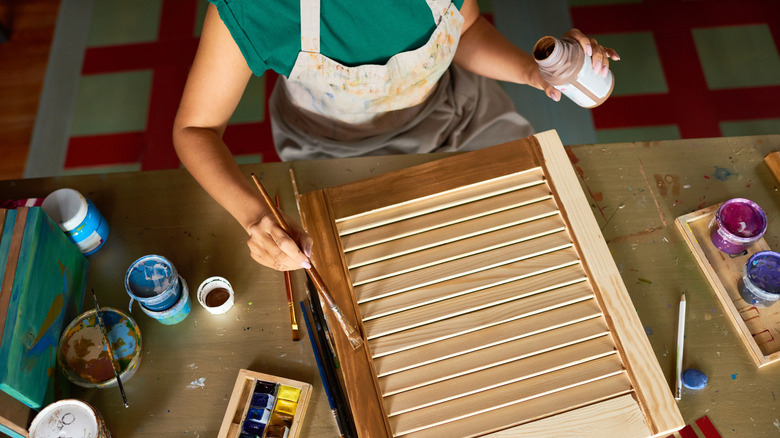
Clean, sand, and paint the window shutters
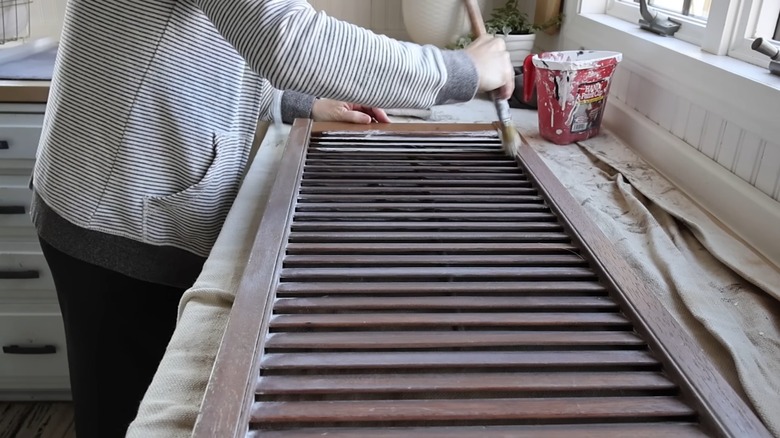
This project is an excellent way to repurpose shutters around your home and end up with a unique feature that's functional and stylish. First up is prepping the shutters. To clean them, dust the surface before wiping it down with a damp cloth. Apply a solution of equal parts water and white vinegar with a splash of dish soap if the shutters are particularly grimy. When they are clean and dry, sand the surface. This will ensure your pillowcase doesn't snag on any splinters, and it will help the paint adhere better.
Next, go in with a coat of paint in your preferred color. Sticking with browns will lean into that rustic vibe most, while black or white will give the feature a more modern look. However, any hue from the rainbow works and can create a statement pop of color or help the headboard blend with matching hues in the room. Also feel free to forgo the paint, keeping with a natural wood look. When the paint dries, use the sandpaper on the edges and open slats to create a distressed look.
Screw and mount the shutter headboard
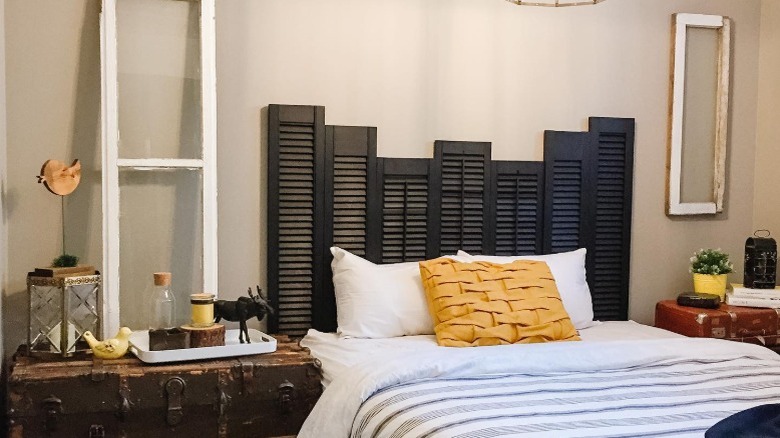
Now, it's time to build the headboard. For the layout, arrange the shutters vertically or horizontally. With a vertical design, you position each shutter upright for horizontal slats. Lining each shutter at the same height is best for a clean, uniform look. Staggering the height of the shutters, with each one at a different level or mirrored ends evened out, adds more dimension. With a horizontal arrangement, you position the shutters on their sides for vertical slats and stack them to the desired height. You can even create a mix of vertical and horizontal panels.
When you're happy with the look, use the wood glue to attach all the pieces, clamping them while they dry. Then, on the backside of the headboard, screw the mending braces in place at the top, middle, and bottom of each seam where the shutters connect. This will provide extra support for the wood pieces, so nothing comes crashing down in the middle of the night. Finally, position the headboard at the top of your bed and screw it onto the wall, preferably into the wall studs. That's it! For extra flair, string fairy lights through the open slats, attach aged metal knobs around the border, or top it with decorative floral molding. Further, if you're itching for another rustic touch in your bedroom, there's also a matching DIY rustic table using old shutters that can work as a vanity or an oversized nightstand.