Use Fabric To Create Stylish, West Elm-Inspired Countertop Decor With This DIY
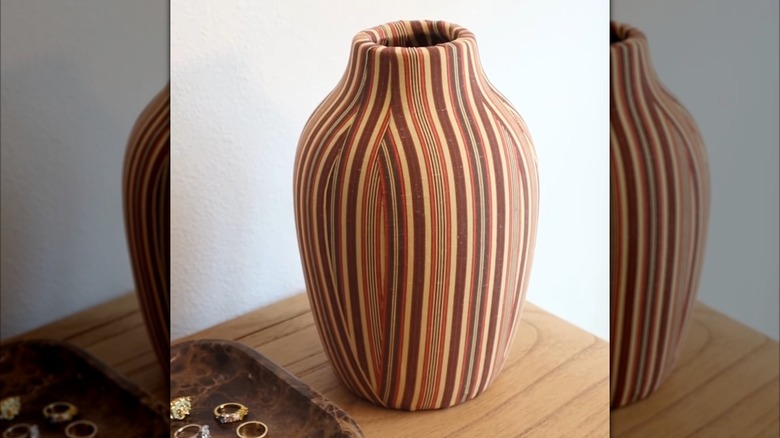
Vases come in plenty of styles, but a unique one that grabs your attention is one featuring fabric. The Emma Chamberlain Fabric-Wrapped Vases from West Elm are eye-catching. This quirky look can instantly invite more texture, sculptural detail, color, and pattern into your space. However, the price is a tad steep, ranging from $89 to $119, depending on the size you choose. While this piece is certainly eccentric, some folks might not be willing or able to pay its high price. Thankfully, there is an affordable trick that transforms any ordinary vase into this trendy decor. One DIYer, @tinalemac on Instagram, showed how to pull off this West Elm-inspired DIY by simply covering any vase in fabric.
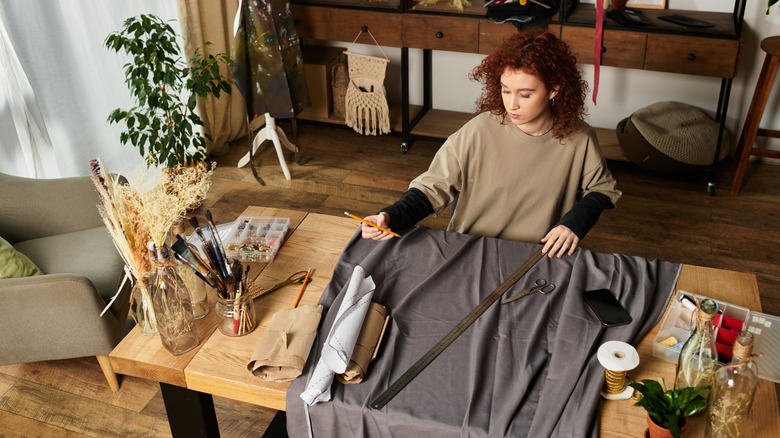
To tackle this DIY project, you'll need a vase, fabric, PVA glue like Mod Podge, fabric scissors, paper to create a template, and foam brushes. These simple tools allow you to achieve the project for much less than the West Elm pieces. Whether you are searching for ways to repurpose thrift store vases in your home or just really crave a West Elm dupe, this is a great DIY to try. While you can use any vase, one with a smaller mouth or opening is ideal to better hide the wrapped fabric edges. However, the secret to success for this project lies in the fabric. A thin-striped fabric is best, as this will hide the seams. Additionally, it won't look too distorted when wrapped around the vase compared to chunkier patterns. Thin, colorful vertical stripes also mimic the Emma Chamberlain collection best.
How to make a fabric West Elm-inspired vase
To begin, create a template to make cutting and laying the fabric easier. The template will vary based on the vase shape. In general, for vases with curvature, you'll need two templates: one rectangular piece and one that maps the curved silhouette of the vase. Start by measuring the height of your vase, from the opening to the bottom, and add about two inches of extra length. The width should match the size of your vase's main body before it curves. Once you have your template, use it as a guide to cut your fabric. For your curved vase, you will need four of the rounded silhouette pieces and four rectangular strips.
Next, use a foam brush to apply the PVA glue directly to your vase. Lay a straight strip down and hold it while it dries (a blow dryer will speed up the process). Tuck the extra inch of fabric underneath the vase and use scissors to cut the top overhanging inch so that the fabric folds into the vase mouth neatly. Repeat this three more times with the other rectangular cuts until your fabric strips look like a cross when viewed from above. Then, take your remaining template-cut fabric and glue it in the dead spaces between the four strips. Be careful to keep the edges flat and smooth. Now your decor is perfectly wrapped, and you can style the vase in your home as-is, or fill it with flowers, feathers, or branches for a high-end look.