Use Old Plastic Nursery Pots To Create Budget-Friendly Pavers With A Clever DIY
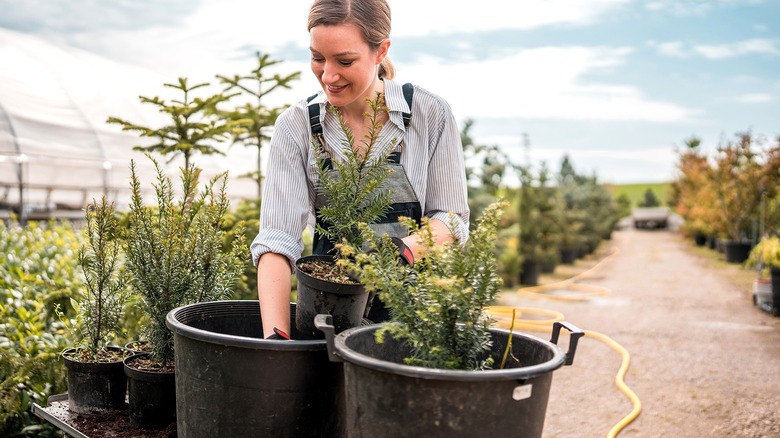
If you've been a plant parent for a while, you're familiar then with the sight of nursery pots piling up in or around your home. You don't want to pitch them because you may need them for new plants, but soon they start taking up valuable space that can be used for other storage needs. But why keep them stored away only to collect dust in the shed when you can put them to good use in a budget-friendly home project; specifically, a DIY paver project that will instantly elevate your yard.
You may be surprised to learn that your plastic planters can be upcycled to make molds for pavers. So, if you've been meaning to upgrade your outdoor space with new features, a path of stepping-stone style pavers may just be the gorgeous landscaping idea to liven up your yard. YouTuber DIY Landscape design does a superb job of illustrating this, proving that you don't always need to pay top dollar to get an expert-level landscaping look.
Perhaps the best part, though, about this idea is how it can save you money on store-bought pavers. For example, for a 12-inch round paver that's 2 inches thick, you can expect to pay $4 each, meaning a set of 20 could cost you at least $80. On the other hand, one 80-pound bag of concrete mix costs around $6, from which you can make four similarly sized pavers. That works out to about $1.50 per DIY paver; and to make 20, you'd only have to spend around $30. That's a savings of ~$50. In other words, if you don't mind doing some manual labor, you can stand to save quite a bit by making the pavers yourself.
Steps to creating paver molds from old nursery pots
Before creating your customized pavers, you'll need to gather a few supplies, which include an 80-pound bag of concrete mix, a trowel, a mixing bucket or wheelbarrow, sand, scissors, and a mallet. If you plan to make pavers thicker than 4 inches, adding a square of wire mesh midway through the pour can help reinforce the slab and reduce the risk of cracking. Optionally, you can also add coarse sand to the cement mix (if it doesn't already include it) to create a smoother final finish.
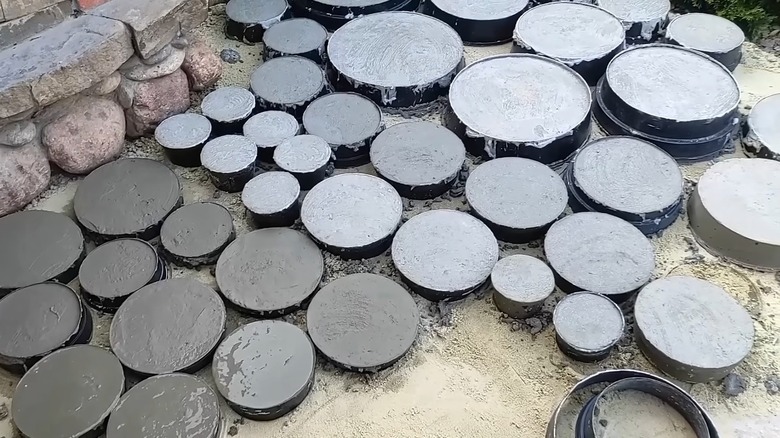
To create the paver molds, cut the bottom off a nursery pot. Then mark how high you would like the pavers to be; cut along these lines to create your rings. One pot should be able to create at least two molds. Note, you can use scissors for smaller pots, while you may need something like a circular saw for larger pots.
Next, put down a layer of sand to create a level base to work with. (How much sand you'll need will depend on how much area your pavers will cover. Using a calculator like this one from Lowe's will tell you how many bags to get.) Then, position the rings out on the ground with adequate space between them.
Once done, prepare your cement mixture, and pour it into the paver rings to cure. The curing time can vary and may take anywhere from five to seven days in moderate temperatures.
Ways to customize your DIY new pavers
At the pour stage, here's where building gives way to designing, and you can explore ways to make the pavers your own. For example, you could give the pavers a botanical appeal by adding a colored pigment to your cement mix before pouring the molds. Or, you can also personalize your homemade pavers by painting unique designs on them, such as flowers or butterflies . Better yet, use stenciled designs to create cool geometric shapes and patterns.
Or, before your DIY pavers cure, try embedding them with decorative river rocks, seashells, or colorful landscaping glass. This is another easy way to build upon a nature-inspired theme, and it'll also offer some texture to the pavers' smooth surface.
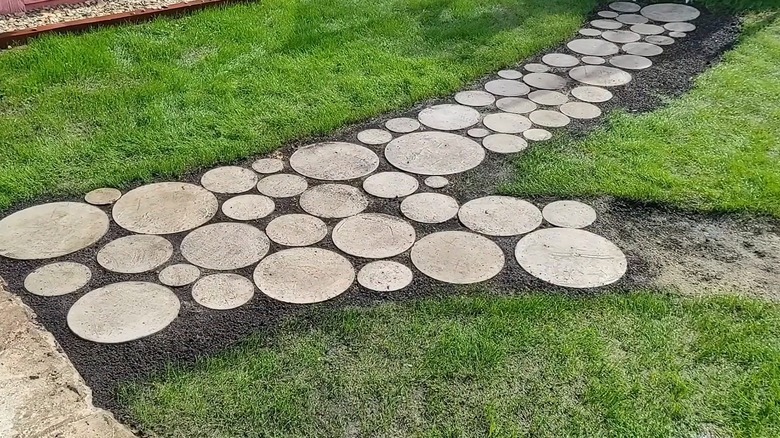
The final phase of this project, meanwhile, includes digging out your paver path, then laying down your stones. For a professional look, add a layer of dry sand beforehand to fill any uneven spots and ensure the stones have a level, stable base. (Learn how to choose the best base for pavers for your home.)
Also, after placing each paver, tap it down with a rubber mallet to help secure it into place and prevent it from rocking upon being stepped on. Wrap this DIY project up by spreading grass seeds and dirt around the newly laid pavers to restore grass in the surrounding areas.