

Ditch Cabinets: Here's A Creative Way To Add Storage To Your Craft Room

We may receive a commission on purchases made from links.
You can definitely keep your craft room clutter neat and tidy with affordable Dollar Tree storage solutions, including drawers, baskets, and boxes. However, it's understandable to feel a bit of frustration toward these kinds of makeshift compartments when you're deep in whatever craft project you're working on. They require you to break your concentration to rummage around for what you need. Or perhaps your craft room is diminutive — in that case, knowing how to maximize storage space in small places with store-bought containers can be challenging.
A hanging storage rack can help keep your most-used supplies within easy reach and, in turn, reduce friction during your flow state. Instead of spending hours browsing store shelves or Amazon listings for a ready-made rack, the DIY YouTube channel Hometalk has a tutorial that shows you how to build one yourself. Bonus: It uses mostly affordable items that you can easily find at Dollar Tree.
For this project, an Essentials Black Plastic Broom Handle acts as the rod that holds the storage baskets. To disguise the broom handle, you'll need some Crafter's Square Jute Cord, which you'll wrap around it. Continue the rustic look with four to five Essentials Iron Rectangular Baskets in black or gold — that number will fill the full length of the broom handle — and two Mtsooning Diamond Glass Knobs. You'll also need some cable ties and wall hooks (you can use self-adhesive or screw-in hooks), as well as some scissors and a hot glue gun. As an optional decorative addition, prepare some spare wide ribbons or strips of fabric to weave through the baskets.
Use a broom handle and some baskets to DIY a storage rack
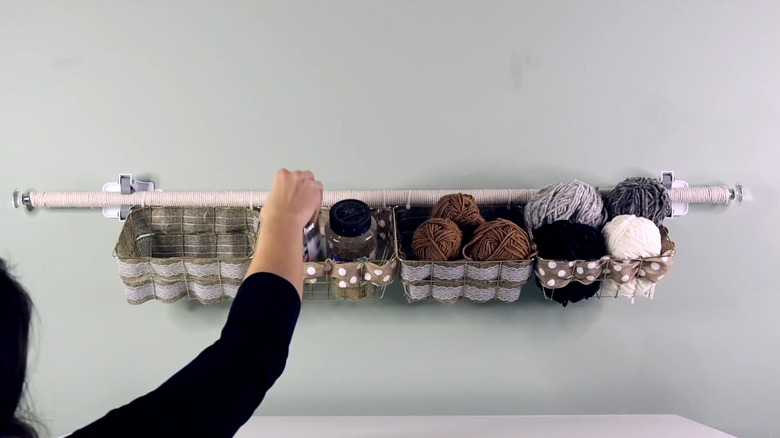
The first step in building this storage rack requires a little patience. Glue one end of the jute cord to one end of the broom handle. Once the glue is dry, wrap the cord tightly around the length of the handle. When you reach the other end of the handle, glue the loose end of the cord to it, cutting off any excess. Hide the glued cord ends by adding a dab of hot glue to the stem of the glass cabinet knobs and pushing them inside each end of the broom handle. If you wish to weave fabric strips or wide ribbons through the baskets, do it now, before you attach them to the broom handle. This addition doesn't just look nice — it also prevents whatever you store inside the baskets from falling out.
Secure each adorned wire basket to the broom handle using cable ties. Then measure the broom handle and the height of the baskets and note the dimensions. Use these measurements to make marks on your craft room wall for the hooks. If you plan to store heavy items, consider using more than two hooks to hold everything in place. Once you've installed the hooks on the wall, mount your new rack and fill the baskets with the craft essentials you reach for most often — think scissors, glue, drawing materials, yarn, sticker sheets, and rolls of washi tape. Organize things even better by labeling each basket. That way, you and anyone else who uses your craft room often know what to put where. Storing ribbon in this organizer? Use an empty toilet paper roll to help organize your craft room — and help keep these storage baskets neat — by transforming it into a ribbon spool.