

Ditch Traditional Range Hoods: Try This Old-World DIY To Add Storage To Your Kitchen
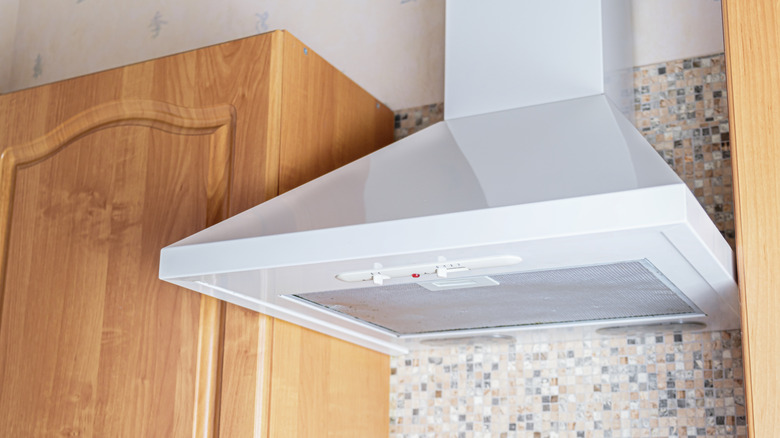
Traditional range hoods serve a very important purpose in the kitchen, but the exposed style can be bulky. In fact, range hoods end up taking up wall space that prevents you from fully taking advantage of the over-the-stove space, which can be valuable for streamlining the cooking process. Luckily, there's an old-world DIY that adds storage and hides the eyesore of exposed range hoods. Installing a natural stone archway is a simple way to bring a rustic style to your kitchen while adding extra storage for spices, cookbooks, and more. Not to mention, natural stone is the Christina Haack-favored kitchen feature that's dominating today's trends, so you can get the best of both worlds.
The best part is, you don't need expensive stone bricks or contractors to turn your kitchen into the cozy stone paradise of your dreams. Instead, you can use a wooden frame that wraps around the hood and doubles as the framing for the shelves. Then, using natural stone tiles, you can tile the new structure to look like an expensive stone archway, all on a modest budget. Plus, the project is simple enough that you can install it on your own, or with a helpful partner.
Framing a natural stone tiled range hood

To build a DIY stone archway for your range hood, you will most likely have to remove your current hood and reinstall it once the initial framing is in place. The framing is the most important part of the project. Natural stone tiles are heavy. Not to mention, you'll want stable shelving for glass or books. Start with a design that considers not only the framing for the hood and the shelving, but also how the weight will be supported. There are two general options to incorporate enough support into the design. You can either build the arch so that it is supported by the counters and anchored to the wall, or you can install it as a hanging structure anchored to the studs. Either way, you will want to use sturdy mounting hardware, like lag bolts, to secure the frame to wall studs.
Measure the frame so you have square or rectangular boxes on the sides, top, and bottom. Then, make sure there is a wood box to sit flush against the new hood. Add vertical supports every 24 inches to ensure the frame is sturdy enough to hold the weight. For extra storage, add shelving to the sides of the arch frame. When you install the frame, consider using the Property Brothers-approved trick for perfectly hung floating shelves by using painter's tape to mark the studs. To finish off the arch, use a piece of wood with a right angle on one side and a curve cut on the other in each corner. The final step in preparing the wood frame for your stone tiles is to install cement board to the front of the frame.
Adding the stones to your old-world DIY archway
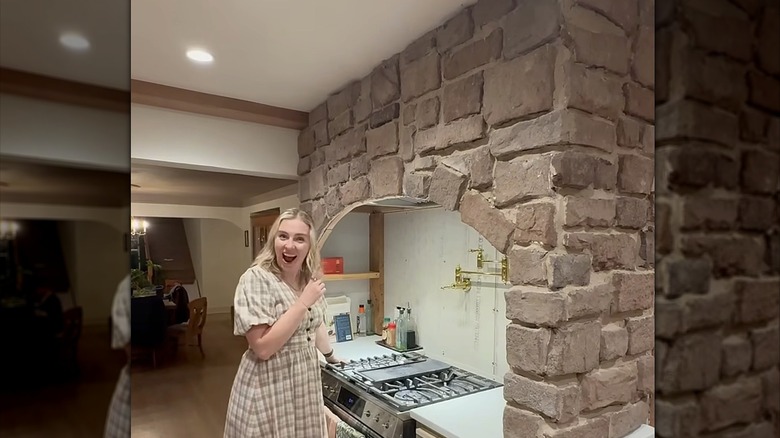
Once the framing is out of the way, it's time to finish off the final look by adding the stones. With all the measurements and heavy lifting involved in installing the frame, it may seem like adding the stones would be the easy part, but it actually can be the most difficult. Not because it's physically demanding, but because mixing the mortar wrong could become frustrating and costly. It's best to do some research on how to use thin-set mortar to install stone and tiles before you get started. The exact mortar you choose may vary depending on the materials you choose for the rest of the project.
To install the stone, you'll need spacers and mortar. Mix your mortar according to the package instructions until you have a moist, peanut-butter-like consistency. Then, apply a thin layer of mortar to the cement board. Immediately apply a thicker layer to the back of the stone you are installing. Press it firmly to the board exactly where you want it, from bottom to top. Then, scrape off any excess mortar that squishes out. You may need to add a temporary board to the bottom to hold the stones in place during the install. Apply spacers and repeat the process until all tiles are laid. Once the mortar is set and you are sure the stone is holding, add grout between the stones. Finally, add any finishing touches like stained wood borders or painted shelving.