

Repurpose Old Cabinet Pulls Into A Unique DIY Jewelry Storage Solution
We may receive a commission on purchases made from links.
Whether you have a lot of jewelry or a small, curated collection, a jewelry box isn't always the best storage solution. Necklaces, earrings, and rings easily get tangled inside. If you're looking for a good way to declutter and organize jewelry to free up useful space, DIYing an organizer is the way to go. You'll save money, create something that fits exactly the jewelry you own, and keep your pieces tangle-free. Got some old cabinet knobs lying around in the garage? Put them to good use by crafting a wooden wall-mounted jewelry organizer.
In order to make this nifty organizer, you'll need some cute or stylish cabinet pulls. How many you need depends on how much jewelry you own. The pulls can match, or you can use an assortment of pulls for a more eclectic vibe. Use pulls you already have, thrift them, or buy them new. This 18-pack of Joy Decor Gold Cabinet Knobs costs around $15. You'll also need a wooden board or an S&S Worldwide Wood Pallet Sign. To hang the organizer on the wall, you can use a Yuoilhy Large Sawtooth Picture Hanger, which supports up to 50 pounds of weight, or a couple of EesTek D-Ring Steel Picture Hangers, which are rated to 40 pounds. Finally, get some paint or wood stain and some screws or an industrial-strength adhesive, such as E6000, to attach the pulls to the board.
How to create a wall-hung jewelry organizer using cabinet pulls
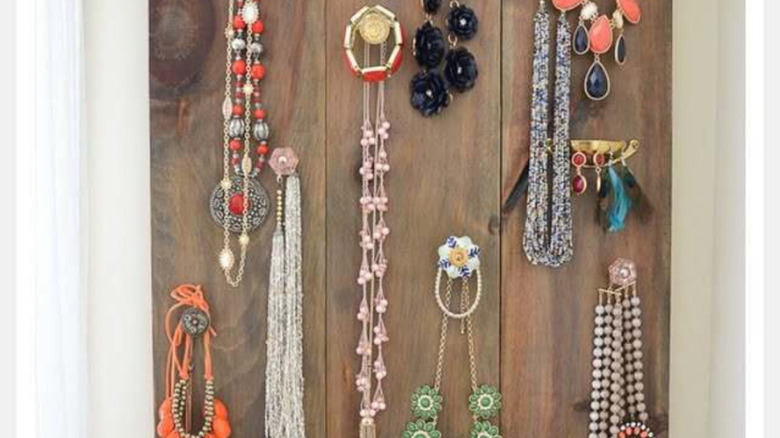
Ready to organize your jewelry and keep it tangle-free with this space-saving storage solution? Start by preparing the wooden board — it's the backing for the organizer. Wipe any dust from the board and lightly sand it before painting or staining it. You can choose any color you prefer or that matches your existing decor. Decide whether you want to hang the organizer vertically or horizontally on your wall, then attach the hanger to the back of the board. Take precise measurements and mark the hanger location on the board — you don't want a wonky jewelry organizer on your wall!
To determine the arrangement of the drawer pulls on the front of the board, measure all your necklaces and decide which piece you want to hang on which knob. The necklaces need to have enough space to hang freely without bunching together or getting tangled in one another. Decide, too, if you want to hang other jewelry, like bracelets or rings, and plan your spacing and knob size accordingly. Once you've decided on the placement of the knobs, mark their location on the front of the board and attach them using the screws or glue. If using glue, make sure you give it the appropriate curing time before hanging your DIY organizer from a wall anchor or Command Universal Picture Hanger.
Ways you can personalize this jewelry storage to make it more usable
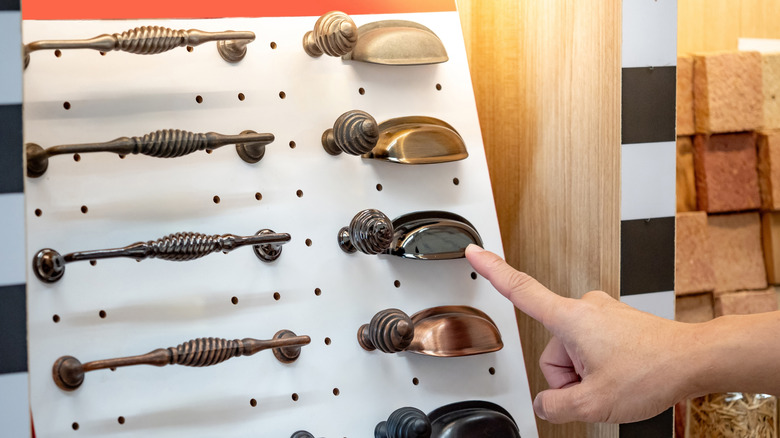
If you love the idea of making one of these DIY jewelry organizers for yourself, but you want to be able to store more than just necklaces and bracelets on it, it's easy to modify. Use a variety of drawer and cabinet pulls — small and large, decorative and plain, bar pulls and knobs — to hang everything from hooked earrings to hair accessories to sunglasses. Do you have lots of stud earrings and rings that you struggle to keep organized? You could even attach a few upside-down cup pulls to the bottom of the board as catchalls for small items. We love the rustic look of these Homotek Brass Dresser Pulls — you get three for about $22.
Another way to customize this DIY wall-hung jewelry organizer is to skip painting the wood board and instead cover it with patterned fabric or burlap. Cut out a piece of material that's larger than the board on all sides and place it over the board, wrapping it around the back. Use upholstery staples to secure the material to the back of the board. You won't be able to glue the knobs to the board, so you'll need to screw them into place through the material. Since the backing will be covered in fabric, you could even switch out the wooden board for another material — for example, here's how to display and organize your jewelry with a Dollar Tree pegboard. Now all that's left to do is stand back and admire your tangle-free jewelry collection that's neatly organized on your high-end organizer.