

Don't Pay To Remove A Tree Stump: Turn It Into An Impressive Outdoor Table

Sometimes a tree will uproot in a storm, but often the trunk will snap instead, leaving a stump. Other times, you might be left with one because the top was diseased. Tree stumps are difficult to remove, and a professional will charge hundreds of dollars for the job. There are lots of ways to use a tree stump for decor around your home, so just removing it and throwing it away or chopping it up for firewood seems like a waste. Why not turn it into an impressive outdoor table instead?
Woodworking Skill on YouTube shows how it's done by cutting a clean, dry stump to height and carving out a groove that will hold the tabletop made of a set of half-round branches before applying a protective finish. They use two smaller stumps, but depending on the size and shape of your trunk, you'll be able to use a stable one for a smaller table or join two for a larger one, as Woodworking Skill does. They do use an extensive collection of tools, so as we go through the process, we'll try to offer alternatives that will simplify things and save you some time and money.
Before you start any work, make sure you are wearing eye protection and a dust mask. You will need a chainsaw — there are some dangerous mistakes you can make when using one, so be sure you know how to operate it safely, or get someone experienced to tackle this part instead. Before cutting the stump, mark around it using a level and a Sharpie, then use the chainsaw to trim your tree stump to a comfortable height — normally somewhere around 28 to 30 inches. Make sure to account for the thickness of the tabletop, which you'll make separately — ideally before you cut the stump (we'll cover the options in a minute). After cutting, work on it with a portable power planer until it is flat. Stop every couple of minutes to check the level.
Preparing the tree stump and assembling the tabletop
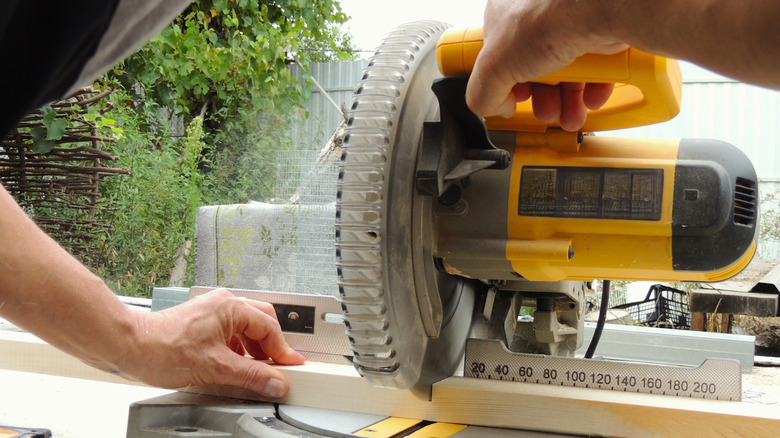
This project doesn't demand a high degree of skill, but you do need patience and focus. Work slowly and be aware of where your hands and any blades are at all times. Once the top of the stump is flat, a groove is cut alongside it to accept 2x4-inch lumber using a chainsaw and a chisel.
Woodworking Skill uses half-round branches for the tabletop, but you could source half-round fence posts for around $10 to $15 apiece instead. The edges need to be trimmed with a bandsaw or a table saw. The latter is one of the tools worth investing in to start woodworking at home, and it performs several functions for this project. If you use it to carefully trim the sides of the posts, the big bench planer shown in the video is unnecessary.
You will need a sliding miter saw to cut grooves in the back of the posts. After multiple slices, the waste is broken down with a hammer and then chiseled out. The ends of the 2x4s can be cut at a 45-degree angle on the table saw, then screwed in place. Once completed, the tabletop ends are trimmed with a circular saw. If you cut the posts to length individually on the table saw before assembly, you won't need to do this.
Alternatives for the tabletop
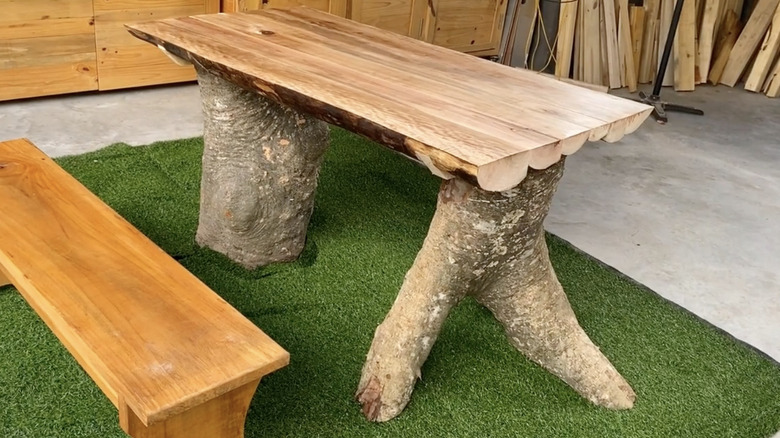
It takes a lot of work to make the tabletop out of half-round posts, and the rustic effect is mostly hidden underneath. A simpler alternative would be to make it out of store-bought 2x4s or 2x6s. In this case, there would be no need to cut the grooves in the back. Sand the edges and join them using cross members in the same way. The boards are smoother, so it probably wouldn't be necessary to plane the top either — just run a sander over it.
If you want a large table, you'll have to find another section of tree trunk and go through the cutting and slotting process again. If you're happy with a smaller version and your tree-trunk is stable, make the tabletop shorter, and use a single cross member to join them or two smaller ones spaced a few inches apart if the trunk size allows it. To fix the tabletop in the slot, use construction adhesive. It helps fill any gaps and uneven spots and provides a stronger grip than wood glue. Finally, it's time to apply a protective finish to your outdoor table. Spray equipment is fast, but penetrating oils and brush-on varnishes are both easy to apply by hand. Make sure you get the exterior type.