

Ditch Traditional Planters: 8 Fun Designs You Can DIY With Concrete Blocks
We may receive a commission on purchases made from links.
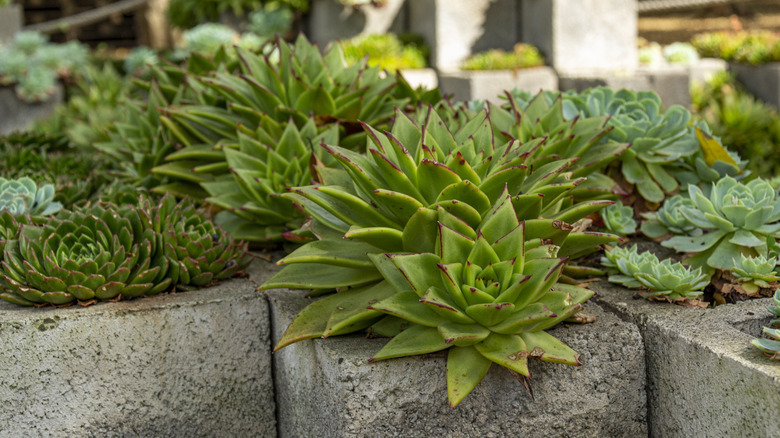
Providing more space than a single pot, planters and raised garden beds allow you to control your planting environment, reduce the risk of pests, and ensure better drainage. Traditional planters made from wood are susceptible to mold, however, resulting in pricey and more frequent replacements. For a longer-lasting solution, you can DIY countless creative and unique planters made from basic concrete blocks.
Incorporating planters into your yard is a good way to boost visual appeal and functionality for your garden, with concrete blocks supplying you with a durable building medium. There are multiple types of concrete blocks, from pillar blocks to solid paving blocks. These heavy building materials can be configured in thoughtful layouts to accommodate your planting needs, whatever they may be. With an immense amount of online inspiration, you can choose from a super simple row of concrete blocks for planting herbs and succulents, or a more impressive design that can serve as a focal point in your backyard, like a cinder block vertical garden.
Simple planter edging
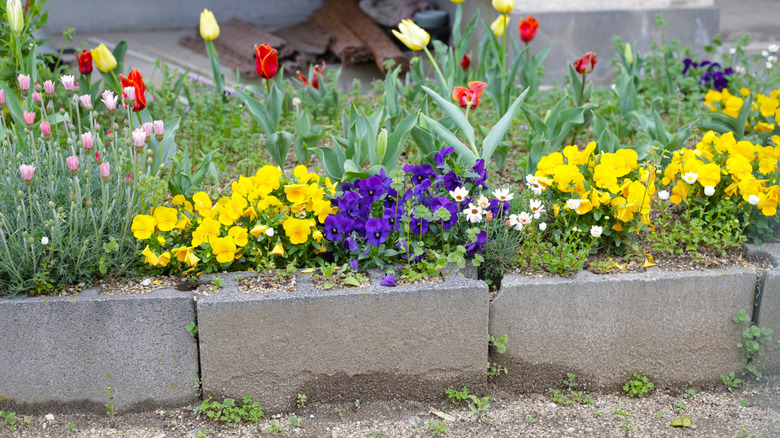
Adding edging to your garden beds can keep weeds at bay and deliver clean lines that make the yard appear more put together. You can create that edging with pillar blocks. To do so, level the perimeter of your garden beds before positioning the blocks. Scattering a layer of gravel on the ground first, then tamping it down, will keep the blocks from sinking into the soil. Once positioned, you can fill the holes with compact plants like herbs or flowers suited to small containers. You'll reap the benefits of edging plus the plants growing in the concrete blocks!
Large-capacity planter
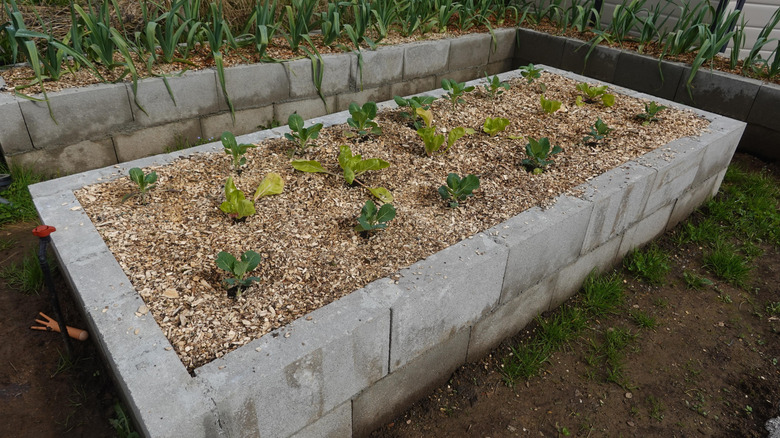
If you're hoping for a planter that fits a larger number of plants, recreating something like this is easy to do. You can follow something like @SouthernToATea's TikTok for detailed steps, but you first want to remove the sod, level the ground, and lay a weed barrier to control undesirable growth and compacted pea gravel to create a sturdy foundation. Then, choose partition or solid concrete blocks for the walls, arranging them in the shape you like. Use a rubber mallet to level the first layer, and then go as high as you would like your planter to be. To keep the blocks together, use an exterior landscape adhesive, like PL 500 Landscape Block.
Remember that concrete block planters can change the pH of the soil within, so monitor levels from time to time to ensure your plants stay healthy — here are the best testers for healthier soil.
Staggered concrete blocks
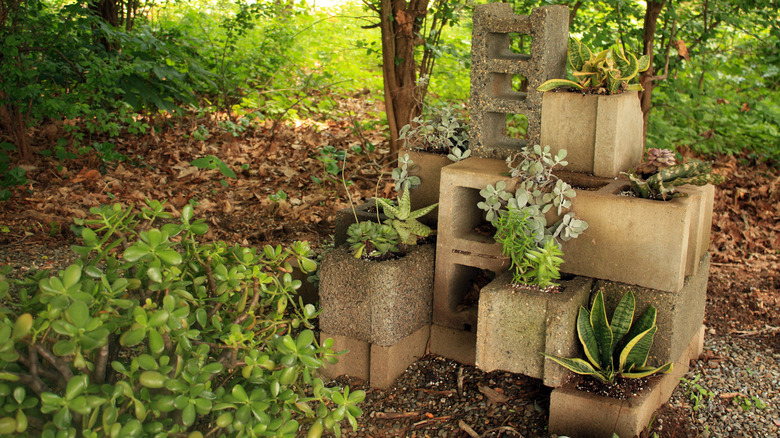
For this concrete block planter, you can acquire a variety of block types. Create a firm base layer that is partially sunken into the ground, positioning the blocks into an H formation. From there, you can get creative by stacking the blocks up and down or laying them down, making sure to balance out the blocks' weight to prevent toppling. Secure everything with an adhesive suited for heavy-duty construction applications to keep everything stable and sturdy. If you position any blocks so they jut outward to create floating planters, you'll need to add a bottom since concrete blocks have open cores. Simply line the opening with chicken wire to create a base to hold the planter in place.
Compact, square garden display
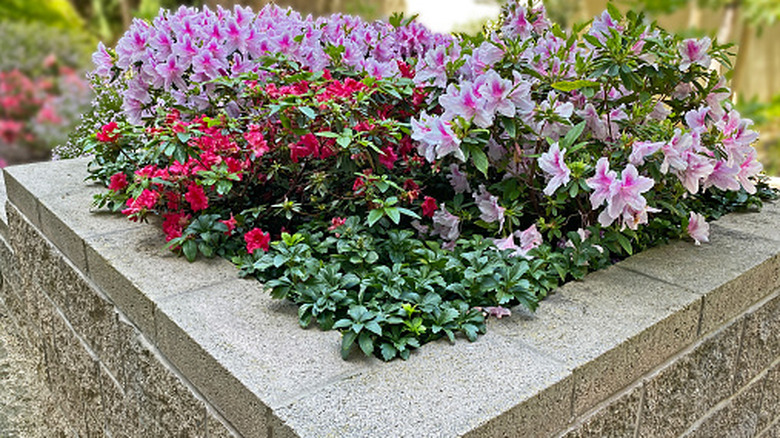
For a visually appealing garden planter, position solid paving blocks in a square, then build up several pavers high. Just like with the large-capacity planter, you will need to create a sturdy foundation of leveled dirt and compacted pea gravel to ensure there is enough drainage and that the blocks have a solid base to sit on. Since it will only be two blocks high, you can secure it with adhesive.
Select from different colored pavers, like the Holland Charcoal Concrete Paver, for a more modern appearance. To create a more polished look like the one above, you can also buy caps for your concrete blocks to hide the open cavities. Such an example is the Concrete Block Cap, and it costs less than $2 and attaches with an adhesive like PL 500 Landscape Block.
Create a garden wall
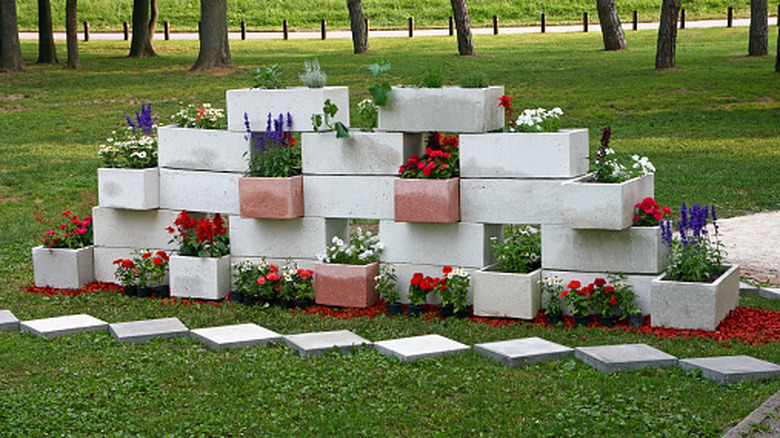
This fun and creative DIY is easy to recreate and involves building a tiered concrete block wall. Just like the other DIYs, you'll want to remove your sod, level the soil, and add pea gravel to help hold your cinder blocks in place. Once you're ready to start arranging, begin by alternating the blocks' positions from width to length on the base level. Next, you'll build up the feature by stacking directly on top of the lengthwise-oriented blocks before repeating the base layer's pattern, but removing the outer blocks for a pyramid-type construction. Glue down each block using a landscaping adhesive like PL 500 Landscape Block. You will also want to provide support through the stacked cavities since this is a rather tall structure with gaps. You can use something like rebar or a 2x4 to keep the blocks from shifting.
Filling in the open slots with colorful flowers is sure to turn heads. However, watering frequently will be imperative for the plants' health, since the porous blocks will steal hydration.
Curved planter wall
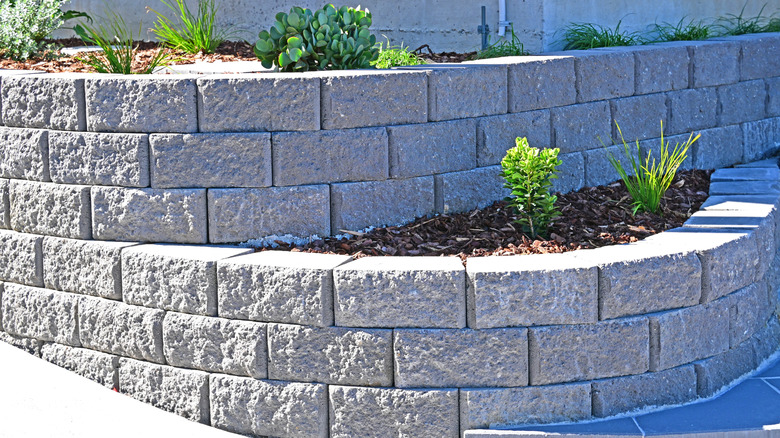
Adding a curved concrete block planter to your property has a decidedly more permanent and professional appearance. Stagger concrete blocks in a running brick bond pattern for good stability, but if you want to avoid adding rebar or 2x4s, then keep the planter two or three blocks high. Then fill the planter with everything from succulents and perennials to herbs and flowers. However, beware of choosing plants that are sensitive to high lime levels, as concrete blocks can seep lime into the soil. Instead, opt for plants like rosemary and thyme that thrive in alkaline soil.
Minimalist black planter
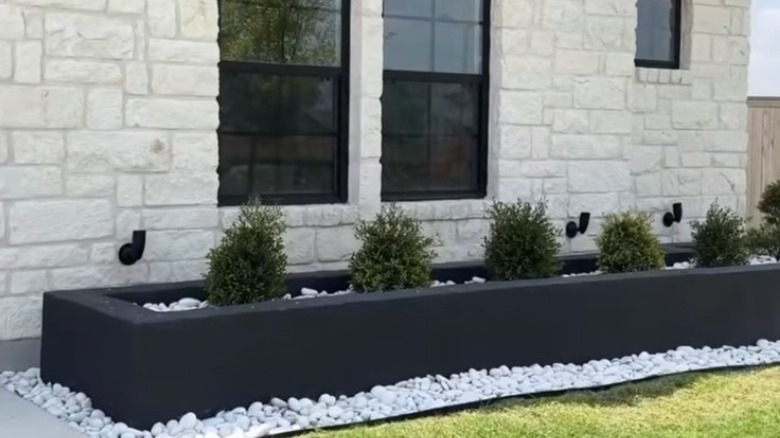
If a chic landscaping feature is what you're hoping for, this idea might be the inspiration you need. Like the aforementioned concepts, it will require a firm foundation of gravel to keep things level and prevent the blocks' weight from sinking into the soil. You'll then need to position the concrete blocks of your choice, using construction adhesive between the blocks. For a smooth end product without visible lines between the blocks, you can use a surface bonding cement like Quikwall. A final finishing touch of masonry paint will give you that completed look you're craving.
Colorful concrete block planters
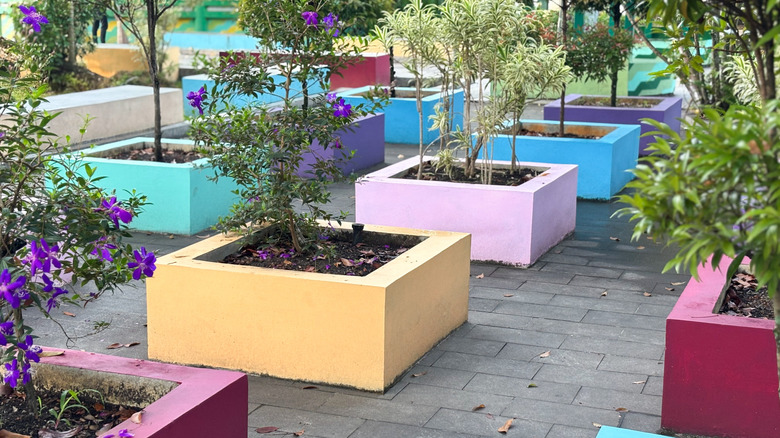
Similar to the aforementioned idea, this DIY planter is a smaller and more playful take. Instead of creating one massive planter that runs a long stretch, create petite square planters that are painted in colorful shades. These planters can be playful containers for flowering plants in the yard, helping you control weed growth and providing something fun to look at, too. Remember to position the planters in a spot that receives the right kind of sunlight for the plants you've chosen.