

Upcycle A Thrifted Tray Into Beautiful & Useful Entryway Table Decor

Wooden trays are one second-hand find you should stop overlooking. These pieces are ripe with potential to add both style and functionality to your home. Many are already ready to use throughout your home with a bit of cleaning. However, some pieces may require a more trained eye to notice their true potential. You can easily upgrade a boring or dingy tray into something special with some DIY prowess.
If you're on the hunt for entryway decor that is practical and beautiful, look no further than this genius DIY. Lisa Burningham shared a fantastic, simple way to transform a thrifted wooden tray into a statement piece that will look perfect on an entryway table. With simple materials she created a decorative tray with an elegant, patterned top. This thrift store flip can make your home look more expensive, adding an element of refinement to your space.
For this DIY, you'll need a wood tray, spray paint, a gift bag with a nice print, a rotary cutter or equivalent tool, Mod Podge, a sponge brush, and washi tape. Be sure the front of the gift bag you select is larger than the inner section of your tray. You're going to need enough material to cover this entire area. Lisa used white spray paint but you can go for whatever color will suit your gift bag print best. If you want to stick with a more natural wood texture, you can also opt to sand down and re-stain your wood tray.
How to create a patterned entryway tray
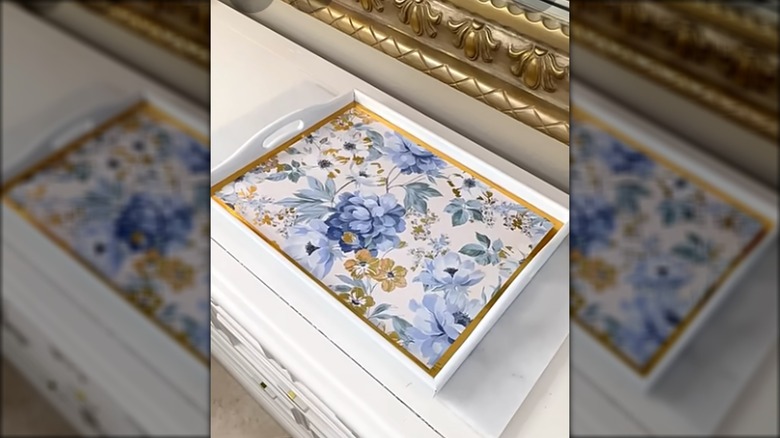
Your first order of business is to track down a wood tray at your local thrift shop. There should be plenty of options available. Don't be afraid to pick one that looks a bit shabby. We'll spruce it up a bit later. Once you have your tray, start by cleaning it thoroughly, removing any stuck on debris, dust, and oils so you're starting with a fresh base.
Now, reach for your spray paint. Coat the tray thoroughly on all sides. Allow it to dry completely. In the meantime, measure the inner dimensions of the tray. Cut your gift bag so it will lay flat. Now mark the tray measurements on your bag. Pick a spot with the best pattern. Use your rotary cutter to cut out the piece you want to use on your tray. Once your tray is dry, apply a liberal amount of Mod Podge to the inner bottom of the tray. Now place down your gift bag. It should fit in the tray seamlessly. Apply more Mod Podge to the top of the bag to seal it. At this point Lisa used gold washi tape to give the inner edges a cleaner look.
This DIY is very easy to customize. You can Mod Podge just about anything to the surface of your tray. For instance, if you're a fan of a more rustic, cottage-inspired aesthetic, you can decorate your tray with dried flowers. You can also use fabric to cover the top of the tray if you can't find a gift bag you like. For the inner edges, you can also cover your work with beads or ribbon. Pearl beads would look especially elevated with an elegant pattern.