

Turn Old Frying Pans Into Upcycled Garden Staples With These DIYs
We may receive a commission on purchases made from links.
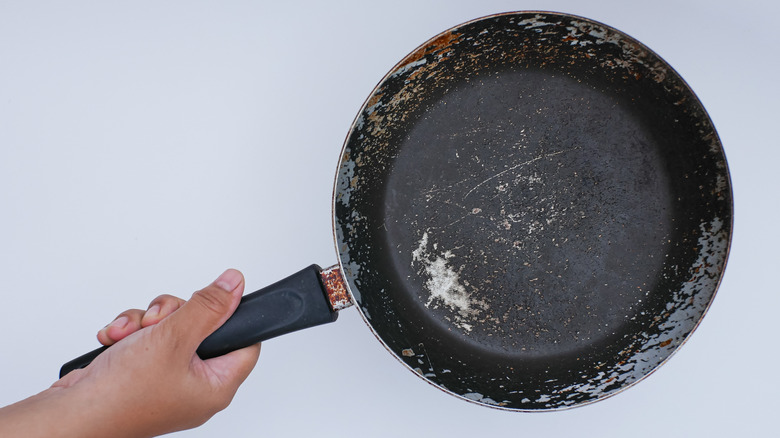
The average lifespan of a frying pan varies according to the material from which it's made. Cast iron leads the pack, boasting longevity of a century or more when properly maintained. However, your basic non-stick frying pan is likely good for only two to five years. Once it needs to be replaced, you'll have to think outside of the box if you want to keep your well-worn cookware out of the landfill. One way is to repurpose the pans for use in your garden. We've curated a handful of ideas for employing these kitchen tools to hold plants and support birds as well as provide garden art and signage.
If you love the thought of repurposing frying pans but don't currently have any that are ready for the scrap heap, it's time to hit the thrift stores and give second-hand pans a second life. You'll want to clean them first to get rid of any greasy residue. Remove the rust, too, unless you're going for a vintage look. Check for any rough edges and smooth them with a sander if needed. If your frying pan DIY project involves holding plants, be sure to drill drainage holes in the pan.
Frying pan chalk paint garden markers
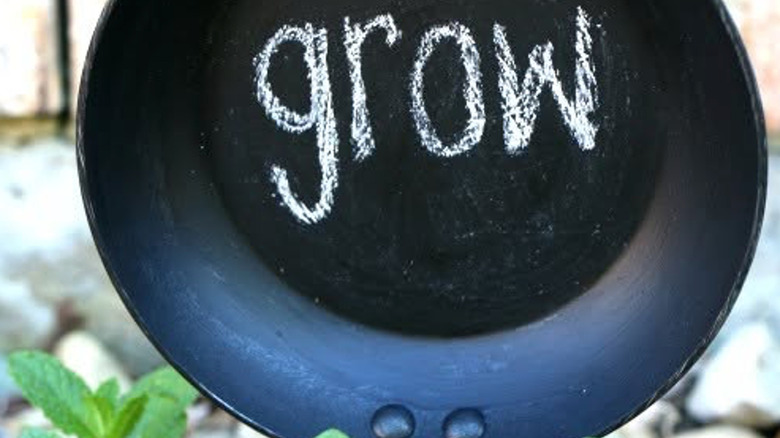
Do you find that typical plant markers fall over, break, or get lost? A small frying pan (about 6 to 8 inches in diameter) can serve nicely as a garden marker or inspirational gardening sign. It's easily visible and offers the heft to stay in place. If you don't have enough small frying plans to mark as many plants as you'd like, visit the thrift stores for more.
Re-purposing frying plans as plant markers is a stunningly easy DIY. After cleaning the pan, sand it so that the cookware is rough enough for paint to stick. Then, all you need to do is apply up to three coats of chalk paint to the inner surface and allow it to dry. Then use sidewalk chalk to write names of plants you want to mark the locations of, or write words of gardening inspiration. Insert the handle of each pan into the soil.
Frying pan bird bath
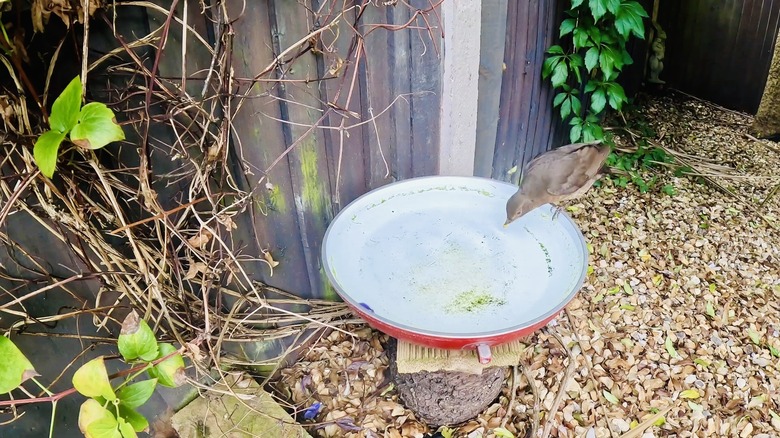
Turning a frying pan into a bird bath is arguably one of the easiest DIYs you can try. You could simply fill one with water and place it outside with no further embellishments. A Facebook user did just that and discovered the birds enjoyed using the pan much more than a real bird bath that arrived later.
You don't have to stop at a bare-bones birdbath. While the pan's handle can make a nice perch, feel free to remove it if it throws the basin off balance when birds use it. You can seal the holes left behind with a product like J-B Weld WaterWeld epoxy putty. Consider decorating the pan as one DIYer did by attaching dry grass to give it a bird's nest look. You could also paint it or even DIY a mosaic bird bath using thrifted or broken plates. Choose a pan that will accommodate 1 to 2 inches of water, a depth many birds prefer.
Fountain-style planter for succulents
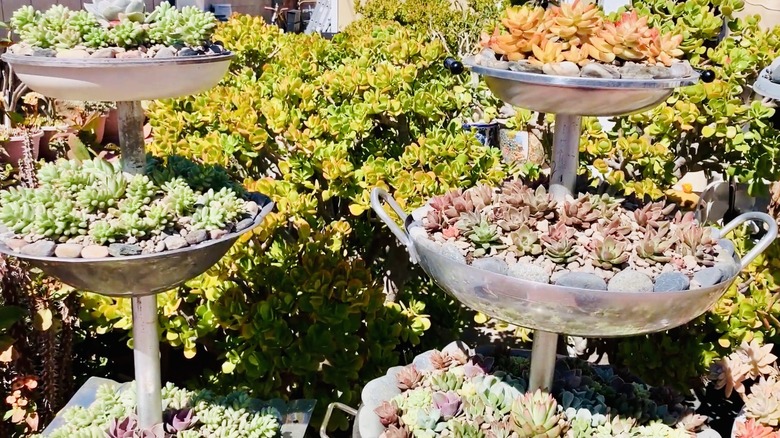
For a more lavish frying pan project, consider a tiered, fountain-style planter for succulents. A few basic materials you'll need include a PVC pipe and a heavy stand to weigh the planter down (consider a repurposed Christmas-tree stand). You should also obtain a thin metal rod that can sit inside the pipe with plenty of space (for instance, if you have a 24-inch-long PVC pipe with a 3-inch diameter, the rod could be 1/4 to 3/8 inches in diameter.) To attach these parts, use Quikrete or similar concrete mix.
To make a three-tiered planter, you would want three frying pans. Additionally, you need spacer sleeves with a slightly larger inner diameter than the long rod. They should be cut to lengths representing the space you'd like between pans. Lastly, you should have two washers with a hole slightly larger than the thin rod's diameter.
Drill a hole in the pans for the thin rod to pass through, as well as drainage holes in the bottoms of the pans. Put the PVC pipe in the base. Mix the concrete and fill the base with it so it holds the PVC pipe in place. Then insert the thin metal rod and fill the PVC pipe with concrete to secure the rod. Once concrete is cured, place the first frying pan on top of the PVC pipe. Add a spacer and washer and then next pan, and so on till all pans are mounted. Now the fun part — adding soil and planting your succulents. These relatively shallow pans are perfect for the short roots of succulents.
Frying pan garden art
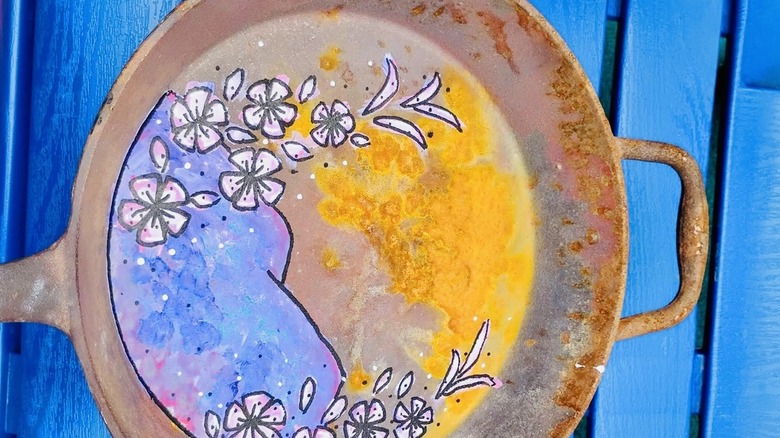
Who doesn't want some cheery garden art to brighten up your outdoor space? Old or thrifted frying pans are well-suited for this purpose. You can use their handles to hang the pieces. While you could simply paint the cooking surface of the pan, you don't have to limit your artwork to that area. The back of the cookware can serve as a canvas as well.
You have nearly endless options for making garden art from frying plans. Paint a design — like a sun, flower, or apple — that conforms to the cooking tool's round shape. Try spray-painting frying pans in multiple bright colors and then applying stenciled designs. Consider gluing glass pebbles on the pan. You could affix various three-dimensional decorations to the sides of the pan. Decoupage pretty patterned paper onto a frying pan. Consider a top coat or sealer made for protecting outdoor art. Hang your prettified frying pan along fencing or on a garden shed.
Frying pan plant saucer
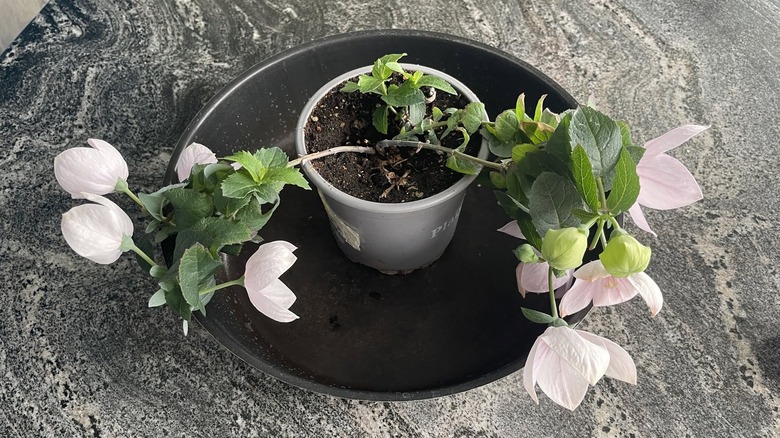
It's not always easy to find appropriate saucers for large indoor or outdoor container plants, but old frying plans are up for the job. The fact that they come in a variety of diameters and depths translates an array of possibilities. Aesthetically, the frying plan saucer will likely look better without handles. So remove them, and be prepared to seal the holes left behind with a waterproof epoxy putty. You may also want to paint the exterior of the pan, especially if it looks worn.
Saucers are a good choice when you want to bottom-water your plants. However they're controversial because root rot can occur after prolonged exposure to standing liquid. Saucers are well suited to thirsty plants like basil that do well with bottom-watering. Even if you select the right plant, close monitoring is required to ensure it thrives. Empty any water remaining in the saucer after 30 minutes.