

DIYer Turns An Old Wood Door Into A Stylish Garden Bench With Just A Few Cuts

Every yard needs somewhere you can sit and take the load off from time to time. You'll find a huge selection of seats and benches for sale, but it can be satisfying and cheaper to make your own. There are many ways to DIY a garden bench, but few are more straightforward than this method by Joe from the YouTube channel Watch Share Save. He can turn an old wooden door into a stylish bench with just five cuts, and you can too.
The key component for this project is a four-panel solid pine (or other wood) door. It needs to have four even panels in the layout for the design to work, and it can't be hollow core because it won't be strong enough. A new door is likely to cost at least a couple of hundred bucks. Joe found his in a clearance bin, so look for one at a salvage yard or garage sale.
The main tools you need are a drill driver and a jigsaw. If you've never owned the latter, it's a tool that can unlock a world of DIY possibilities. The big advantage it has over a circular saw is that, in addition to sawing straight lines, it can cut the curves that will style the ends of the bench. A sander is handy (or you can wrap sandpaper around a scrap block instead), as well as a tape measure and a pen or pencil, and you'll need some wood screws, exterior wood glue, clamps, wood filler, your choice of finish, a spray paint can or something with a similar circular base, and two pieces of wood scraps. The latter is going to act as a brace for the seat and should be less than half the door's width lengthwise.
Only five saw cuts are needed to make the parts for the garden bench
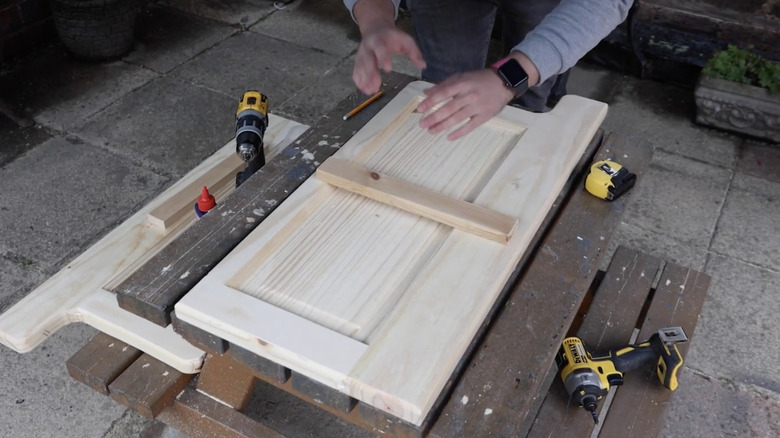
To start, mark a line down the center of the door, and cut along it to create two halves. Sawdust can irritate your nose and throat, so always wear a dust mask. Joe cuts freehand, which is fine if you're confident about what you're doing, but you need to focus to avoid wandering off the line. Alternatively, if you've got a long straightedge, you can clamp that to the door as a guide to run the saw along.
The next two cuts divide the top panels from the bottom ones to form the two bench ends, seat, and back. First, measure the thickness of the top rail and mark the same distance between the bottom of the top panels and the middle rail so the seat and back are symmetrical. The pieces for the ends won't be, but that's dealt with in a moment. Cut the mark across the middle rail to create four separate pieces.
The final two cuts are for the bench ends, to create curves on the armrests where the bottom rail is. Use a pen or pencil to create an L-shape for the armrest. The longer part of the armrest should be the same width as the remaining middle rail, while the shorter section should have a similar thickness as the stile. Use a spray can to trace curves over the angular areas of the armrest. The radius isn't important. A cup or a small paint tin can also work. When cutting, go slowly at the curves, and don't force the saw forward. Let the blade do the work.
Assembling and finishing the DIY garden bench
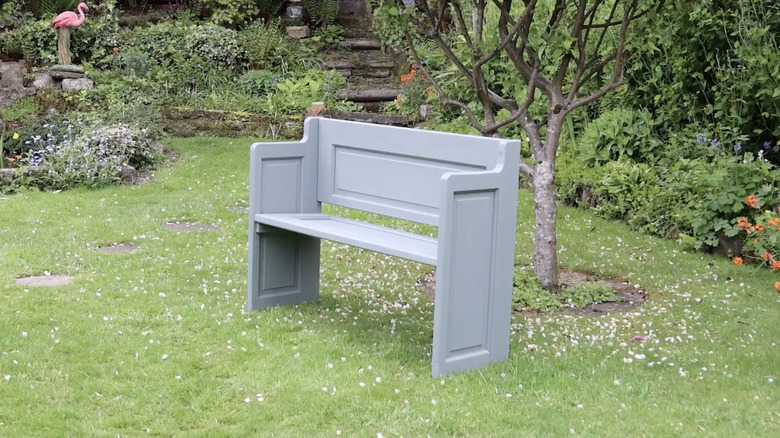
Once all the cuts have been made, sand the edges to remove any splinters. Next, it's time to add the seat supports with the two pieces of wood scraps on the inside of the bench ends. From the bottom of the ends, Joe measures 40 centimeters in height at the front and 38 centimeters at the rear, giving the seat a slight slope to improve comfort. 40 centimeters is just under 16 inches, which is quite low. You might want to use the same measurements as your favorite chair or sofa instead. To attach the wood scraps, you can screw them in place (pre-drill and use a countersink bit so the heads sit just below the surface), but using glue as well makes the joint stronger.
Now it's time to fix the seat and back. Joe uses clamps to stand the ends upright, but anything sturdy you can lean them against is fine. Again, he uses glue and screws. The seat is simple enough, but it's awkward to hold the back in position and drill and screw at the same time. You may be able to rig up something to support it, but having a buddy help at this stage is a better idea. It would be best if the back is flush with the top of the armrest.
Once everything is fully tightened, fill the screw heads with wood filler, and sand smooth. All outdoor furniture should be weatherproofed. If you like the natural look for your garden bench, you can use exterior wood stain (which comes in several tints), or you can paint it to match other garden decor.