

Skip The Towel Rack: Upcycle An Old Lid Into A Simple Storage Solution
We may receive a commission on purchases made from links.
Certain living spaces come with their share of towel organization challenges. Take your washcloths and other small towels, for instance. In normal bathroom setups, you stash them on a bar or a hook near the sink, making them easy to reach post-hand-wash. If your bathroom's wall is sans towel storage, it's likely that you've been forced to just lay them on the counter between uses, or inconveniently store them under the sink. However, if you're the handy type, you can solve this problem with a relatively simple DIY project. All it takes is an old plastic lid and an acrylic craft ring to create a stunning bathroom storage option that gives your hand towels an off-the-counter resting spot between hand washes.
Crafter and YouTube creator Antonia Pires Artesanato used a medium-sized leftover plastic lid to create her towel ring's upper portion. Any sizable enough round lid, like one from a large yogurt container, would work. The lid gets some decorative oomph thanks to a pretty paper napkin, like these NatNarr Blue Decoupage Napkins. Other decorative elements include craft foam, twine, and ribbon. The lower portion of towel holder turns a ring like this Art Cove Clear Plastic Acrylic Craft Ring into a hanger where your hand towels will rest.
Working with the decorative embellishments requires a few tools and supplies. You'll use a couple of kinds of glue: decoupage glue and hot glue. You'll additionally need an old paint brush, a soldering iron, a barbecue skewer or similarly-shaped object, a hair dryer, a small plastic bag, scissors, and a nail file.
Assembling the basic towel holder
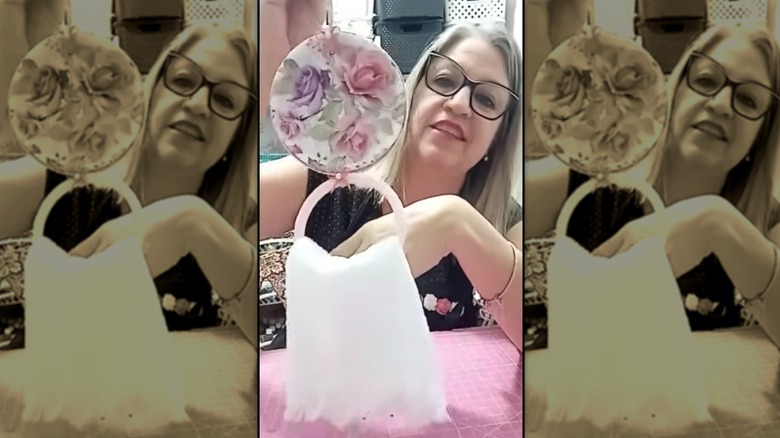
First, use the soldering iron to pierce two holes into the lid on opposite sides from one another, using a conical tip to make round, uniform holes. Next, peel your napkin apart, saving the decorative one-ply layer. Apply decoupage glue to the top of the lid with your paintbrush, then cover the lid with the napkin. Place a plastic baggie over your hand like a glove and use it to gently smooth out any wrinkles in the napkin, then trim it so the napkin's edges only extend about an inch past the lid's lip. Add some decoupage glue to the lip and press the trimmed napkin around it, using a hair dryer to speed up the drying process. Once dry, remove any excess napkin with a nail file. You'll then apply another layer of decoupage glue to waterproof the napkin.
Next, trim a piece of craft foam like this OISAKLD EVA Color Foam so that it matches the boundaries of the lid, and hot glue it onto the back. The napkin and foam will now cover the holes made by the soldering iron, so pierce those back open with your skewer. Finally, glue a length of ribbon all the way around the lid's lip.
Now grab your acrylic craft ring and wrap ribbon around it until it's completely covered, attaching the first bit of ribbon with a small amount of hot glue. Trim the ends once it's done. Moving back over to your lid, cut some twine and thread it through the holes at the top and bottom. Tie the top one into a loop for hanging, and tie the ribbon-wrapped ring to the bottom of the lid with the other. Once you add any other decorative embellishments, it's ready to hang on your wall.
Ways to level up this DIY towel hanger
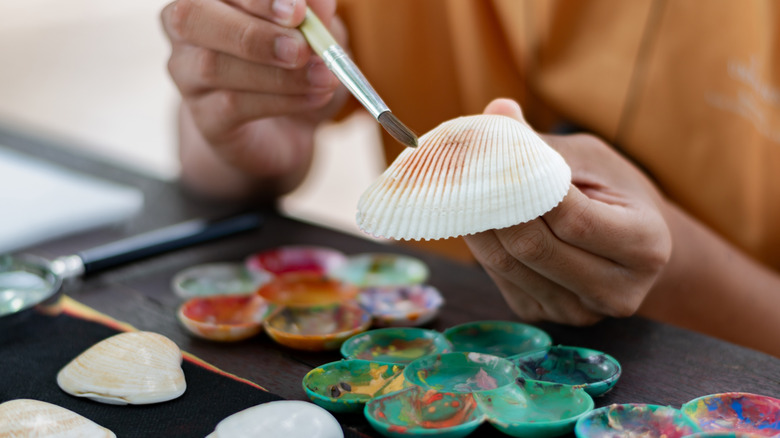
Making this storage solution is pretty straightforward and simple. However, it doesn't have to look like it. Decorative embellishments allow it to blend in with the decor of your bathroom. For example, if your bathroom boasts a nautical theme, cover the lid with a blue napkin. Then, glue some craft seashells you've painted or JIALEEY Nautical Charms to the front of the lid to add texture and visual interest. Instead of wrapping a ribbon around the lip of the lid, you can embellish it with a piece of jute twine to mimic the appearance of nautical rope.
This is also a project that would benefit from your artistic talents. Once the glue on the napkin has dried, you can paint a scene with acrylic paint on top of it, or collage with pieces of different patterned napkins. Then, seal your work of art with decoupage glue to waterproof it like you normally would. This technique is a smart way to personalize your decor's design.
Finally, if you're tired of your towel fixtures but can't afford to change them, use this DIY towel storage solution with a few small wire Command Hooks to create a couple of renter-friendly, removable towel holders. Once you've made several different designs, it'll just be a matter of swapping out your current towel holders for new ones thanks to this space-saving bathroom solution.