

Skip The Pricey Wreaths: DIY A Rustic, Fall One Using Toilet Paper Rolls And Burlap

You caught the slightest crisp breeze in the air this morning, so, of course, you head to your local coffee shop to grab your favorite pumpkin spice latte. Then, you wander, cup in hand, into the newly adorned home decor section of the store next door that's just released its latest fall collection. The autumn colors are so cozy and warm and — whoa, expensive. The price tags on those wreaths are stunningly high.
Fortunately, Dave, of Dave's Wreaths and Things, has your back with a crafty DIY wreath that will hit all the rustic fall vibes we love, without the sticker shock. With autumn colors and textures, from burlap and twine to ribbons and bows, it's just the right amount of elegant, while leaving plenty of space for you to play and make it your own. This simple wreath is the easiest and most subtle way to transition to fall decor. Your family won't even notice if you jump the gun on seasonal changes.
So, while you're out at your local craft store, still sipping on that fall-inspired beverage, you can skip the pricey wreaths and grab a few supplies you'll need to make your own. You'll need a wreath frame, burlap garland, and a roll of thick twine. Once you get home, you can compile your basic tools: scissors, a glue gun, a ruler, and a rotary cutter, if you have one. We bet you didn't know that a toilet paper roll is an everyday item that doubles as seasonally appropriate fall decor, right? Well, be sure to keep one on hand for this DIY, and you'll see just how handy it can be.
How to make your own fall-inspired burlap wreath
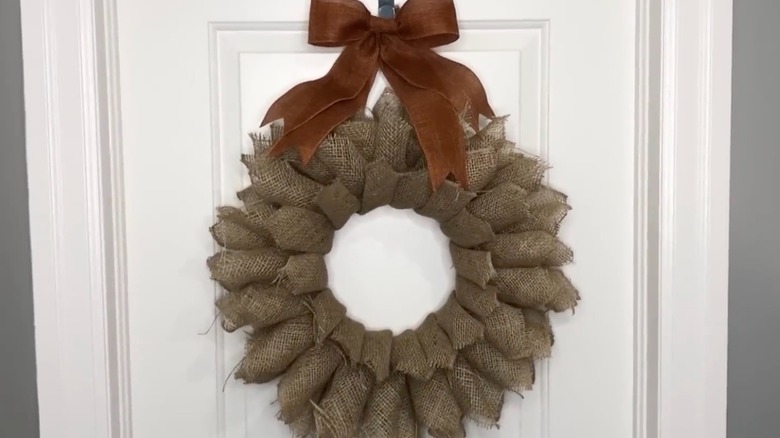
Are you ready for an adorable fall decor DIY you can make using a toilet paper roll? Then let's get started by cutting a 12-inch piece of twine and tying each end to the wreath form as your hanging loop. Then, we'll wrap the form with the burlap garland to create the base of the wreath. You can use hot glue to secure all pieces.
For the bulk of the wreath, we're going to cut 84 5-inch-by-5-inch squares of burlap garland. Then, using our handy toilet paper roll, form cannoli-shaped rolls out each square, quickly removing the toilet paper roll after forming each loop. You're going to glue a layer of burlap rolls around the outside of the wreath form, another along the outer rim of the form, and a third one along the inside of the rim. Once all the glue has dried, fluff it up, and hang in your favorite spot.
This pattern makes a gorgeous wreath as it is, but feel free to make it your own. You can add a few fall leaves to jazz it up or even pine cones as you find them around the yard. The base of the wreath is neutral enough to be used for any season or holiday. If you use a lightweight wire to attach your decorative accents instead of gluing them on, they become interchangeable, and you can swap them out for different pieces in the next season. Dave adds a nice bow to his and uses a hook to hang the wreath on an interior door. You can also use a suction cup or adhesive hook if you want to hang it on a wall instead of a door.