

Keep An Old Egg Carton To DIY The Cutest Hanging Bee Decor For Your Patio
We may receive a commission on purchases made from links.
For many egg lovers, it's not uncommon to find a growing pile of used egg cartons somewhere in the house. And there's really no shame in that. In fact, if you fall into this category and want to try some genius DIYs with egg cartons, you're playing a commendable role in minimizing waste that ends up in landfills. You're also sitting on the makings of an adorable patio project. With a little cutting, painting, and gluing, you can turn an old egg carton into a hanging display of cheerful little bees.
This is one of those simple, budget-friendly summer home DIYs you can do with your kids (just make sure you help with the hot glue and cutting). To make the bees, you'll need an egg carton, black and yellow paint (pink is optional), a paintbrush, a marker pen, plain white paper, scissors, and craft glue like Elmer's Liquid School Glue or a hot glue gun with glue sticks. To hang the bees, get twine, a piece of cardboard, and hanging hardware such as a ring and hook. After a little effort (and fun), you'll hang a work of art to brighten your outdoor space.
Turning an egg carton into a bee decor
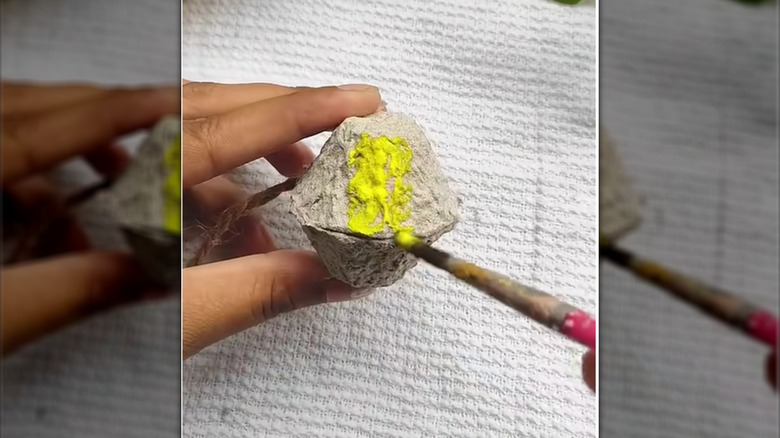
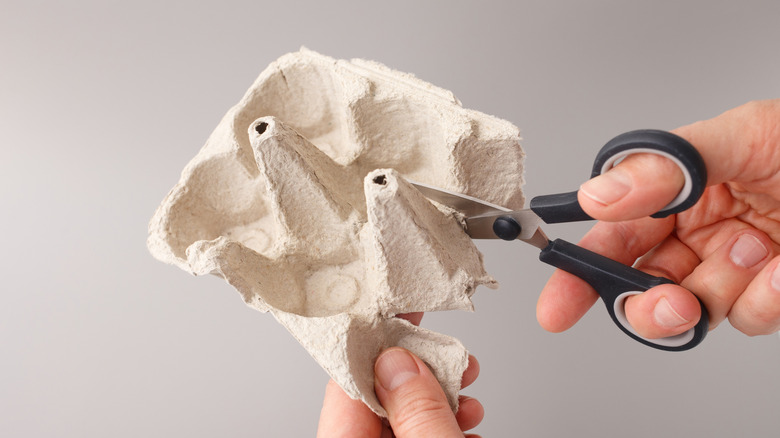
First, create the bee's body from the egg carton, then add the body parts later. Using scissors, cut out the cup sections from the carton, ensuring the edges are neat so they fit together well. Apply glue to the rims on the open end, then attach a second cup. Before the glue sets, tuck a short piece of twine into the seam so it can serve as the hanger later.
Paint the entire body yellow. One end will be the abdomen, so paint black cross-sectional stripes on it; the other end will be the face, so paint the eyes and a smiley mouth. Instead of paint, you can also draw the black stripes and facial features using a marker pen. You could also stick googly eyes on the face. For a pretty final touch, draw two pink dots on either side of the mouth for rosy cheeks.
Now let's make the antennae and a stinger. You can paint the tips of two cotton swabs black, cut them in half, then insert them on each side above the face for the antennae — the stinger goes at the back of the abdomen. Alternatively, use black pipe cleaners cut into short pieces. Finally, cut out wings from plain white paper and glue them on top of the bee's abdomen.
Final touches and installing your bee decor on your patio
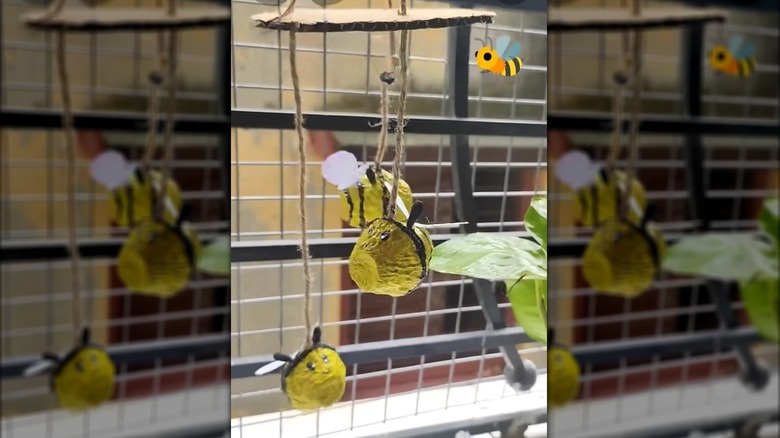
Once you've made several bees (three or more gives the display a fuller look), you're now ready to turn your little pollinators into an easy, colorful patio upgrade that'll brighten up your outdoor space. We want to make something similar to a wind chime, but instead of chime tubes, we'll have the hanging bees. This is where the twine you had attached comes in handy. If you didn't insert the twine earlier, you can do so now. Glue it to the top of each bee at the midsection. You can cut the sections to different lengths to add visual interest.
Next, cut a piece of cardboard into a circular disc and make holes near the edges where you'll pass the twine. Bring together the twine ends on the upper side of the disc and tie them to a ring hook. Before hanging the finished piece, gently tug on each strand to make sure the knots are secure, and the cardboard hangs level. Now, there are different ways to hang this up on your patio. You can install a screw hook on the soffit, make a makeshift hook on a tree branch using a piece of wire, or hang it on a shepherd's hook. Choose a location protected from heavy rain and strong wind so the paper wings and cardboard base last longer.
Don't want to hang up the beer decor? Instead of twine, pierce each bee on a bamboo skewers and stick them into the soil of a planter pot on your patio so they'll appear to be buzzing around the flowers.