

Turn Plain IKEA Baskets Into Stylish And Custom Storage For Less With A Clever DIY
We may receive a commission on purchases made from links.
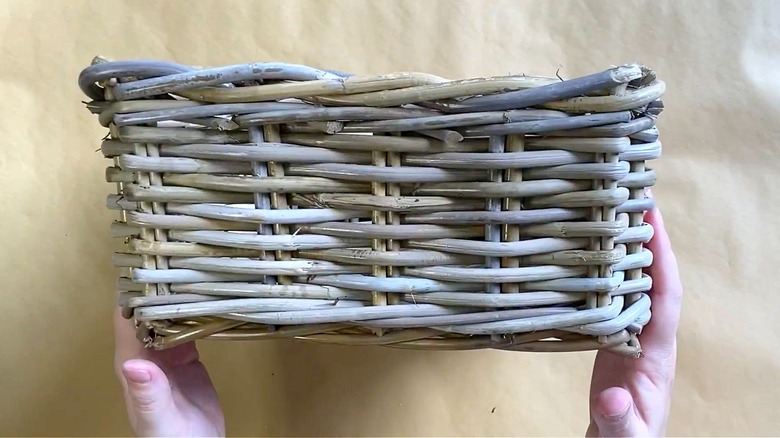
With the continuing popularity of décor styles like cottage core and shabby chic, as well as boho style and French country, cute and cozy are taking a central role in the storage options people are choosing for their homes. And the IKEA Byholma basket is there for it all the way. With its soft gray hues and braided rattan body, the piece is a clever custom-storage DIY in the making. It doesn't even take much to transform it into something more: just some fabric to line the basket and glue. No sewing required.
The IKEA basket measures 9 ¾ inches by 11 ½ inches. You'll need enough fabric to line the interior of the basket, plus enough to fold down over the basket's lip on all sides. Although any style of fabric would work, if you're leaning into décor motifs like shabby chic or French country, choose a piece of material in a lighter hue, like beige or taupe, for this DIY, which is based on a video by YouTuber The Provincial Farmhouse. The DIYer uses plain fabric and then marks it with ink and rubber stamps, so keep that in mind when you're choosing fabrics; yours might already have a pattern. However, if you do stamp the fabric, you could use something like Bobblebro block printing ink (for both fabric and paper).
Finally, since you won't be sewing the liner for your storage basket, you'll need an alternative for pulling it together — in this case, a glue gun. Your tool supply list should also include an iron, a pair of fabric scissors, and a pencil.
How to make the fabric liner for the IKEA basket
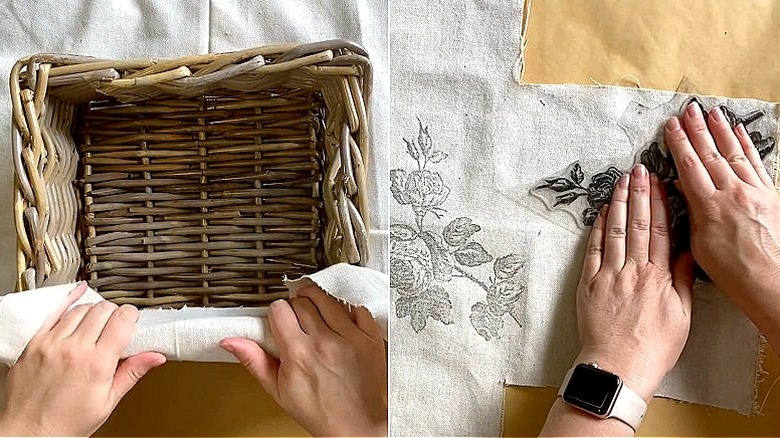
Rather than use a measuring tape to create a pattern for the basket's liner, you can use the basket itself for that purpose. Just place the bottom of the basket over the cloth, right in the middle. As said, the fabric will be lining the IKEA basket and have a short hem that hangs over just the lip of it (as opposed to covering the basket's sides). As such, you'll need to eye the fabric and estimate how much cloth it'll take to do that. If there's excess material beyond that, trim it away, and leave the basket where it is on the cloth. Next, mark the fabric with a pencil where each corner of the basket touches the material. (You may want to test the pencil on some scrap fabric before you mark the piece to ensure it won't bleed through.)
Next, starting at the outer edges of the material, proceed to cut the fabric up to the pencil marks. Then, cut the fabric so that there's one square in the middle and four squares attached to each side. There will be four open, square-shaped holes in each of the corners. Stamp the fabric with an ink stamp like this Ygontak vintage wood rubber stamp. Finally, iron the cloth to smooth out any crease marks. Press the cut liner into the bottom of the basket, pulling the square sides up and over the top.
After that, make four corner ties for the liner out of scrap fabric. Then, fold a hem in one of the sides of the fabric, glue the tie in place, and follow up by gluing the hem down, too. Repeat that on all four sides. Finally, tie the ties in bows to close the corners.
Working more creatively with this DIY design
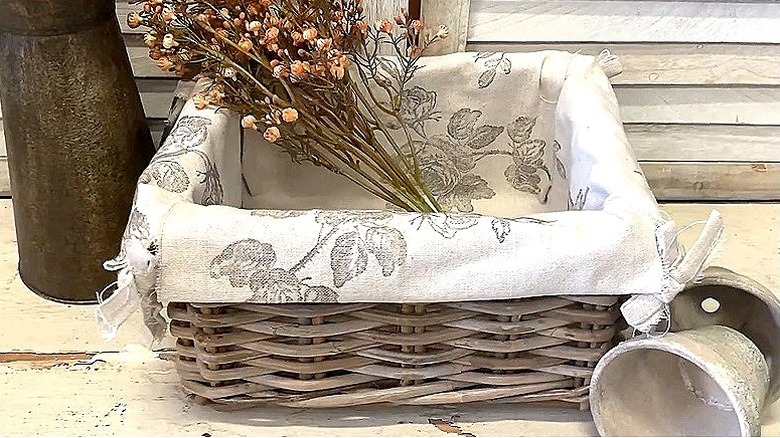
If you're a serious crafter, you don't need to purchase new fabric for this if you have scraps you can use. If your fabric already has hems in it, cut those pieces off to make the corner ties. The sewn hem will keep the edges of the fabric from fraying so easily. Additionally, if you'd like to add texture to the DIY, use some cotton ribbon in place of the fabric ties. It's usually sturdy, and works well with décor styles like country, shabby chic, or rustic décor.
And speaking of country-ish style motifs, this IKEA-basket-turned-cute-storage-option is just waiting for stylish add-ons, like, for example, Masonee vintage wooden buttons with mixed patterns. These you could glue across the hem all the way around the top of the piece. Or, add two buttons to each end of the hems on all sides, right at the point where the corners are held together with the ribbons or fabric ties. This creates a slightly more polished look. However, it isn't so fancy that your storage basket won't still fit in with the casual elegance of shabby chic or French country décor styles.
Finally, you might try mixing and matching the fabric. This is a stylish option if you have some small scraps of fabric that you'd like to use up. Here's how to do it: Make the liner for the basket out of one type of cloth, then use separate but compatible strips from another cloth to create the ties for the corners of the piece. This gives you a way to add pops of color without forcing you to deviate much from your overall light and neutral color palette.