

Use Simple Binder Rings To DIY The Coolest Beaded Curtains

Ah, the whimsical look of a shimmery beaded curtain can add visual interest to any home. If you've always wanted a beaded curtain panel, know exactly where you'd put it to transform your room into a cozy, bohemian sanctuary, and even read up on modern design tips and tricks for beaded curtains, but are a little dismayed at just how expensive they can be, this article is for you.
Fortunately, you can DIY your own beaded curtain for far less than purchasing one at a home goods store, as TikTok user @crafty.sidequests shows. Plus, crafting these yourself allows you to customize it to your unique space. You can coordinate the beads with your room's color scheme or, if you're doing it for a kids' space, let them pick out their favorite beads. These DIY beaded curtains will work for any doorway frame throughout the home. Or, you can turn them into a closet door alternative that gives total '70s vibes.
To keep this budget-friendly, pick up some Dollar Tree binder rings and glass beads for the bulk of the project, both of which retail at just $1.25 for a pack. You can also find unique and inexpensive bead options at thrift or antique shops. Other supplies you'll need include fishing line, glue, and scissors. Fishing line works perfectly because you can buy it in various colors, and it's thin and strong enough to support the beads. You can also grab a few charms for the end of each beaded row. Once it's done, simply hang the finished product from any tension rod or an existing closet or curtain rod by opening up the binder rings.
How to make your own custom beaded curtain panels
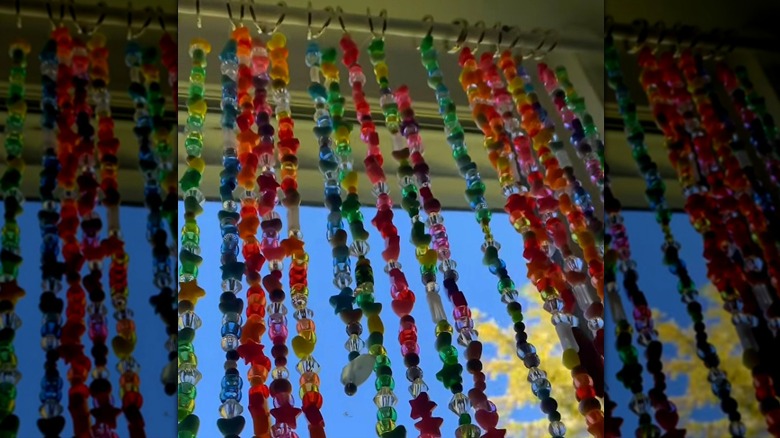
Gather your supplies and get ready to create the cutest beaded curtains. We'll create one beaded row at a time. Begin by measuring the line to your desired length and then doubling it by folding it in half before cutting it. Tie the folded end to the ring by pulling it through the ring and then through itself. Try not to tie it right on the hinge of the ring but just slightly to the side. Add a small dab of super glue to the knot to make sure it stays in place.
Once that's dry, you can begin adding your beads. If you have a particular design in mind, it can be helpful to first lay out the beads in the order you want them to go before stringing them on. Every 10 beads or so, you can stop and tie the line off to keep the beads in place. This will also help distribute the weight of the beads evenly across the line. You can do so by separating the two lines, tying them in a double knot, and then proceeding with the beading process.
When you get to the bottom of the line, you can add a charm or simply end it with the last bead. Tie the string a couple of times and add a dab of glue to it as you did in the beginning for added security. You'll repeat this process to make however many rows of beads you want for your curtain. Once you're done, you can slide the rings onto a tension rod to hang it in an open doorway or attach them to an existing curtain or closet rod by opening each ring, placing it around the rod, and snapping it shut.