

She Turned 100 Egg Cartons Into A Unique, Multi-Functional Bookshelf With An Impressive DIY
We may receive a commission on purchases made from links.
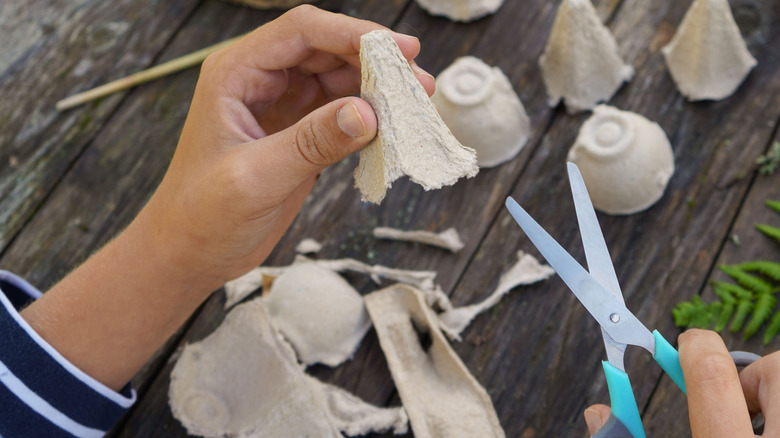
Without question, egg cartons have high recycling and crafting potential. There is, for example, an egg tray DIY that will make planting seeds in the garden quick and easy: you use the tray as a soil stamp. Crafters use egg cartons for all kinds of seasonal decor, too. Aside from gardening and decorating, saving up some cardboard egg cartons — perhaps a hundred of them — can help you try what's probably the largest DIY project you've tackled to date. Artist and designer Sydney Smith of Syds Fab Shop documented one of her biggest papier-mâché projects on her TikTok profile. She turned 100 egg cartons into a tall, tiered, cave-like bookshelf that's equal parts artistic statement and storage for reading materials and knickknacks.
Of course, a large bookshelf made from scratch using papier-mâché cannot — like Rome — be built in a day. You also can't rely on soggy paper alone to support a piece of furniture designed to hold heavy items like books. Like Smith, you'll need to tackle this DIY project in two phases. First, you'll plan and build a plywood, cardboard, and foam frame full of arches, domes, and flat panels. Second, you'll create your papier-mâché and use it to mold the bookshelf's soft, curving, cave-like hollows around the frame. Of course, Smith's bookshelf would tower over many people. If you're intimidated by starting on a project that large, feel free to scale things back. You can create a more compact version of this cave-inspired bookshelf by starting with a smaller frame.
The tools and materials you need to make a cave-like bookshelf

One thing you should do before using egg cartons for this home DIY project is to sit down and create a design plan. You need to gather more materials than you would usually need for most papier-mâché creations, like fruit bowls or vases. To create a stable shelf that holds items securely, you need to purchase the right type of wood for the underlying framing. Get some furring strips that are 2 inches wide and 8 feet long and a three-pack of ¼ inch thick Woodpeckers 12 by 12 Inch Baltic Birch Plywood. You'll also need some cardboard, foam, nails, and masking tape. Get a tub of Goodtake Polymer Cement and Concrete Waterproof Coating to protect the finished bookshelf. For tools, you'll need a hammer, a power drill, and a saw.
To make the papier-mâché mix, you'll need a container large enough to soak about 100 torn-up egg cartons. It's also where you'll store your pulp mix, so make sure it has a lid. (If you don't have a single container that's large enough, you could store the pulp in batches across multiple containers.) If you have an old blender or can find one for cheap online, it will come in handy for processing the soaked egg cartons. Otherwise, a hand mixer or Edward Tools Paint and Mud Mixer Drill Attachment works well. Finally, you'll need some wood glue, joint compound, and, for that stone-like finish, some quick-setting cement. If you have all the tools, the egg cartons, some cardboard and foam from recent deliveries, and you only need to buy the furring strips and paper pulp additives, this DIY should cost less than $150.
How to sculpt a cave-like bookshelf from egg carton papier-mâché
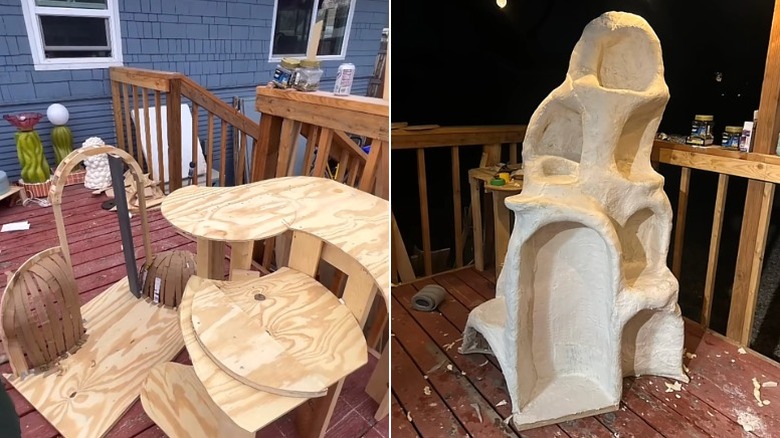
Rip the egg cartons into small pieces and place the pieces into the large container. Cover them with boiling water and leave them to soak overnight. At the same time, build the bookshelf's frame from plywood, furring strips, and cardboard, following your design. It should be a combination of shelves, arches, and domes. Use masking tape to hold the pieces in place, and don't be afraid to adjust the size of the spaces as you work. Once you're satisfied with the look of the bookshelf, fill in any gaps in the frame with foam and extra cardboard.
Set the frame for your bookshelf to one side, giving it a chance to settle a little. To make your papier-mâché pulp, give the container full of water and egg carton pieces a little shake and mix the contents with your hand or a stirring stick. Drain off the excess water, then mix in ½ cup each of joint compound and wood glue and 1 cup of cement for every ½ cup of soaked paper. Keep blending the materials until the mixture resembles wet cement.
Once it looks about right, slather the mixture evenly all over the frame of your bookshelf. Keep adding layers of mixture until the frame is completely covered and the curves are rounded and rock-like. You can use a putty knife to achieve the right look if you prefer. Let the bookshelf dry completely before adding the waterproof coating. Then, all that's left is to move the shelf inside and organize and style your bookshelf with an aesthetically pleasing method — that is, by color-coordinating the volumes.