

Not A Lantern: The DIY Outdoor Lighting Full Of Rustic Charm

We may receive a commission on purchases made from links.
Lanterns as a source of illumination for an outdoor party or family barbecue evoke an old-fashioned kind of charm with their glow that's reminiscent of antique street lamps. However, if you want to switch things up to avoid predictable, possibly even dull decor, the solution is to find something that has all of the rustic charm that you get from a lantern while adding some fresh decorative elements. Enter the simple DIY that turns a twig door wreath into a farmhouse-style chandelier. It lights up your night sky with all the grace of a lantern and adds more rustic charm to the set-up in the process.
A rustic wreath made from twisted branches creates the foundation on which you'll build your outdoor chandelier. If you have a wreath that you don't use, all tangled up in last year's Christmas lights, you can use that to save some cash. If you don't have one, not to worry. You can make an inexpensive wreath out of materials you probably have in your backyard, like branches. Additionally, you'll need either an old embroidery hoop that you're willing to upcycle or a metal wreath form. The latter only costs a couple of bucks at a crafts store.
For the rustic glow, you'll need between six and 12 solar lights, like Utoimkio Solar Light Bulbs. If having colored lights appeals to you more, try some UDIYO Outdoor Colorful Solar Powered LED Bulbs instead. Tools for this are as simple as the project's concept. You just need some jute twine and scissors. And although it's not a requirement, you may find that it's handy to also have a large S-hook on hand.
Building the rustic hanging chandelier
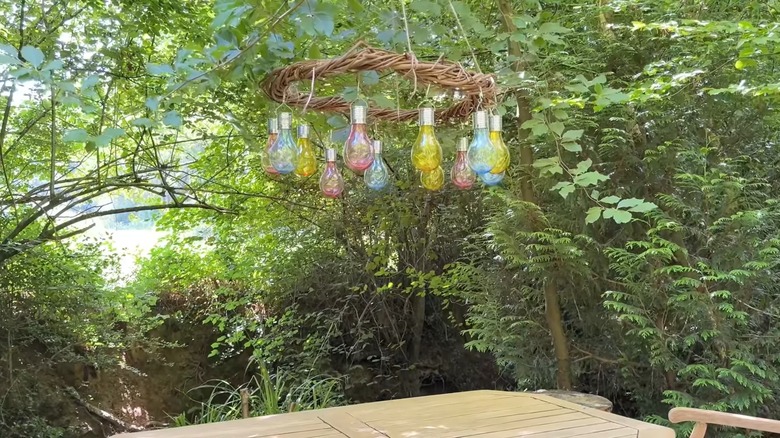
For this project, you'll need to start with the wreath. If DIYing the wreath, the branches you select should be pliable. Willow and pine branches or grape vines are foraged items perfect for a rustic wreath. Wet the branches to make them more flexible, and then twist them around the base-form a few at a time. Then tie them to the base at various spots to keep them in place. Once the wreath is done, you're ready to light it up.
Next, cut four long twine threads and tie them onto the wreath at equal points. Tie the four loose ends together into a knot — this will be the wreath's hanger. After that, attach the solar light bulbs to the underside of the wreath. The bulbs usually have clips on them, which you can hang on the branches directly. Or, if you'd like to add some decorative embellishments to the wreath, make some bows out of burlap ribbon. These JaoZuyard Half-Inch Burlap Ribbons have a size, color, and style that would work for this, matching the rustic decor theme.
When you're ready to hang it up, attach the twine rope to an S-hook and secure it to a branch, perhaps one that hangs over your eating area, or at least protrudes far out so the twine doesn't get tangled in the branches. Finally, keep in mind that since this is a solar-powered light, you'll need to hang it up during daylight hours so that the batteries in the bulbs can charge. It can take up to 10 hours for them to fully juice up.