

She Uses An Old Tape Roll To Turn Cardboard Into Apple-Inspired Jewelry Box
We may receive a commission on purchases made from links.
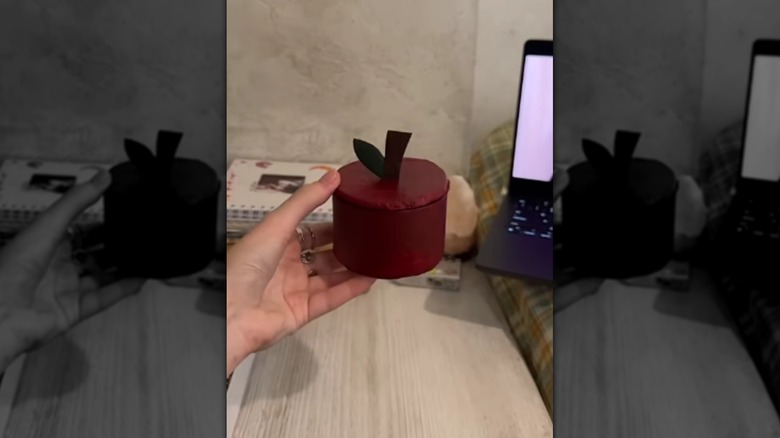
From the tempting fruit in the world's first garden to the golden apples of Hesperides in Greek mythology, apples have held sway over man's imagination throughout history. In less magical settings, they've been items decorators have used to style fall tablescapes, and even occasionally, gifts for a favorite teacher. And, as YouTube DIYer, Yano4kaa demonstrated, they can also inspire the cutest little apple-shaped jewelry box. Despite holding the YouTuber's most treasured belongings, she didn't spend a fortune on raw materials for this DIY. Instead, she made over the cardboard center from a roll of electrical tape to create her tiny treasure box.
The YouTuber repurposed an empty tape roll from a large roll of red electrical tape. She removed the remaining tape until only the cardboard roll was left. If you're doing this DIY at home, you'll do the same. You'll also need a couple of pieces of corrugated cardboard as well as some craft tissue paper. Abaca Teabag Paper Mixed Media Art Paper is a good option. Finally, to make your jewelry box look more like the fruit that inspired it, add something like Apple Barrel Candy Apple Red Acrylic Paint and some green acrylic paint to your supplies list.
Unlike apples, your jewelry box won't grow into its final form courtesy of Mother Nature. Instead, you'll need to have a few items on hand to help you graft your apple together, so to speak. You'll need a pen, some craft glue like Mod Podge Craft Sealer and Adhesive, paintbrushes, and scissors or a craft knife.
Creating an apple jewelry box from a tape roll
Remove any tape remnants from the roll. Then, place the cardboard tube on one of your cardboard scraps. Use the tape roll to create a template for the jewelry box's lid and bottom: Just trace around the outside of the tube until you have a circle. Make two of these. Then, create another circle using the interior of the tape roll as a pattern. You'll have two big circles and one smaller circle when you're done. Cut the circles out. Next, draw some leaves on one of the scraps of cardboard. Paint them green. Cut them out.
Glue one of the large circles to the bottom of the tape roll. Then, glue the smaller circle to the center of the remaining large circle to create a lid that fits inside the opening. Next, glue pieces of teabag paper around the bottom of the tape roll and over the cardboard circles. These additions should give the edges around the bottom of the box and the lid a smoother appearance. The paper also helps reinforce the glued edges and hold the box together.
Next, paint the interior and exterior of the box and the lid. Let the paint dry. Then, glue your hand-painted leaves onto the top of the box to make a knob for the jewelry box. If you want to level up the box, line its interior with some Waddllcor Self-Adhesive Velvet Flock Backing Paper Liner to make it look more like a high-end jewelry box. Or, you could skip the paint and add a layer of gold leaf to the box's exterior to make it look even more luxe. Finally, add your baubles to it. Once you do, you'll say good-bye to jewelry clutter, thanks to your new DIY apple jewelry box.