

Turn A Simple Tissue Box Into Stylish Décor With A DIY Using River Rocks
We may receive a commission on purchases made from links.
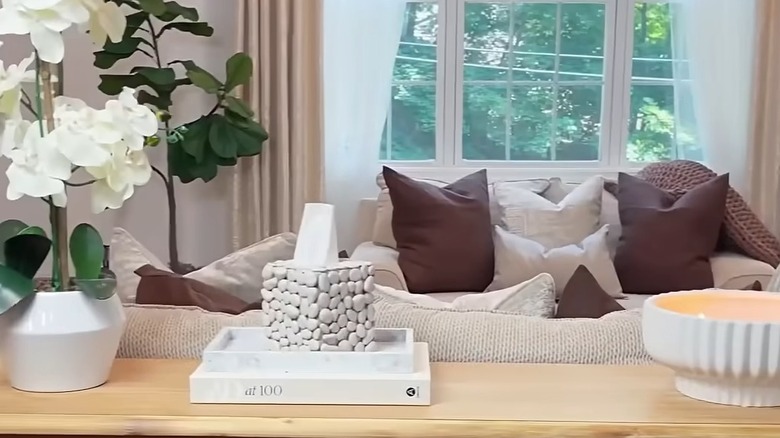
Home decor trends come and go, but a box of Kleenex is the true constant in life. Bonus advantage: you can pluck out a tissue to wipe the tears when the tile trend you bet on gets outdated and turns into yet another fad. But that doesn't mean you should let its basic packaging ruin your overall home decor. If you're looking for a way to take your tissues boxes from drab to fab without spending money on fancy covers, glue river rocks to its surface to DIY a stylish decor piece.
River rocks are a free resource you can find along river banks and strewn about on beaches. And if you maintain a garden with a water feature, chances are you'll find a few spare pebbles there as well. This will bring your project cost to zero. However, if you exhaust all venues and still come up empty-handed, Dollar Tree retails a bag of Multi-Toned River Pebbles for $1.75 only. So, your project will still remain economical. Moreover, your fancy tissue box can double as a paperweight. Plus, it won't skid across your tables (so annoying!) when you pluck a tissue out. Eager to get started? Grab your tissue box, some river rocks, and your hot glue gun. You'll also need a sealant if you'll be placing it in a room with high moisture content, like your bathroom.
How to DIY a rustic tissue box using river rocks
Empty your box of all the tissues — make sure you don't alter their arrangement or you'll have problems drawing one later. Then, wipe it with a damp microfiber cloth to get rid of surface-level dirt and grime. This is also a good time to wash your river rocks (if you foraged them) and set them out in the sun to air dry. Once they're both dry, apply a line of hot glue to your box and begin gluing the rocks on top.
Work in neat lines to avoid leaving wide gaps in between through which your plain tissue box will still be visible, defeating the whole purpose of this DIY. In case you're a perfectionist or just don't like the idea of your guests finding out about your cool tissue box's origins, cover it with some contact paper or paint it before you glue on the rocks. As you continue gluing, you may have to reinforce the cardboard box if it keeps buckling under the weight of the rocks. Don't worry; you don't need any special supplies. Simply glue a few popsicle sticks to your box's interior. After you're done, let it dry and your tissue box will be ready for use. While this will look perfect if you have a rustic decor, you can elevate your tissue box to match your home's aesthetic with another step. For instance, a coat of white spray paint will turn it into a minimalist's dream. Want something funky? Paint the rocks or adhere colorful strips of tissue paper on top before you glue them to your tissue box. Finally, give it a coat of sealant, like Mod Podge Spray, if it's going to come into contact with humidity.