

No More Pricey Curtain Rods: Use Simple Home Depot Items To DIY Your Own

We may receive a commission on purchases made from links.
If you've been shopping around for new curtain rods but are having a hard time finding exactly what you want at a price you like, you're not alone. Pricey curtain rods are tough to fit into your budget. But you also don't want to settle for something that looks mediocre, especially when it's on such full display in your home. Fortunately, you can skip the basic curtain rods and DIY your own using basic supplies from Home Depot that come with a much more palatable receipt at the checkout stand.
Doing it yourself isn't just less expensive, though. It's also a great way to create customized curtain rods that fit perfectly into your home's decor scheme. Plus, you don't have to be an experienced carpenter to make these DIY curtain rods. Anyone can do it with a little time and a few tools. While there are tons of tips and tricks to help you choose the perfect curtain rod, sometimes the old saying is true — if you want something done right, you have to do it yourself.
For this DIY, you'll want to stop by Home Depot and pick up two corbel brackets like these Bracket w/ Keyhole Plate and Mounting Hardware for $11.76 each. They come with a pre-installed keyhole plate and are already sanded, so you can finish them however you want. They also come with screws and anchors for installation. While you're there, grab a dowel like this Hardwood Round Dowel for $6.78. You'll also need a measuring tape, drill, and a saw. Optional supplies include sandpaper, stain or paint, and a paintbrush.
How to DIY a curtain rod with corbel brackets and a wooden dowel
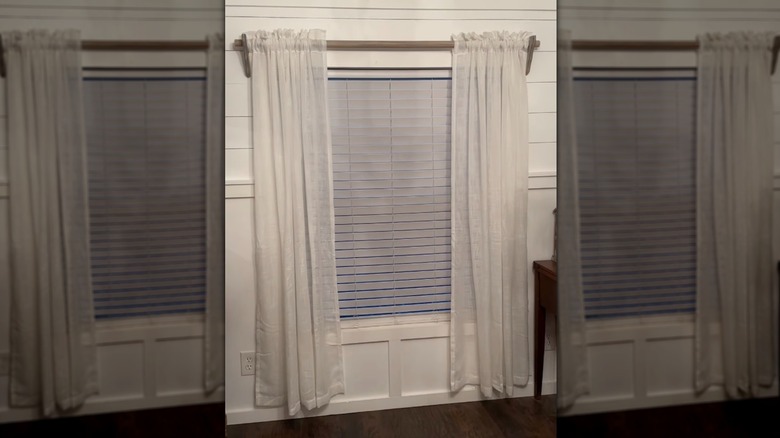
We're going to start by preparing our wooden corbel brackets. The first thing you want to do is create a half circle along the top edge of the bracket. This is where the rod is going to sit. A hole saw works best here. Measure and mark the bracket where you want the hole, making sure to use the same calculations for each bracket. You want them to be identical so the rod sits evenly between them. Carve out your half circle and use the sandpaper to gently smooth out the cuts.
To install the brackets on the wall, drill a hole and insert the screw almost all the way in. Leave a bit extended from the wall and use that to set the corbel bracket on, using the pre-installed keyhole plate. Do this for both brackets, remembering to measure the same on both sides of the window in order to mount them evenly. To prepare the dowel rod, measure the distance between the two brackets and add a few inches to each side so that each end will extend over the bracket. Cut the dowel rod to size, sand down the cut ends, if needed, and set each end into the half circle you cut from the top of the corbel brackets.
Ways to customize your DIY curtain rod to fit your space
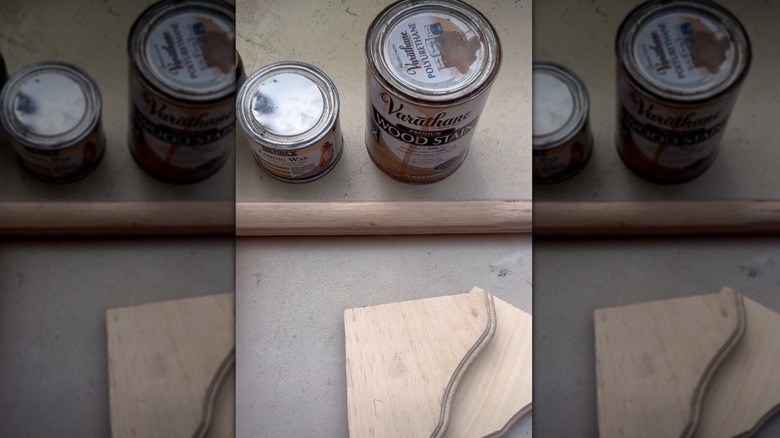
These DIY curtain rods will work great for your standard-size windows. But a brilliant curtain rod hack for big windows is to use multiple wooden dowels. Connect them with Headless Dowel Screws from Home Depot to create a longer rod. Then add a third corbel bracket in the center of the extended rod for added support.
Whether you are creating a standard-size or extended version of these curtain rods, there are some fun things you can do to make them your own. For example, instead of cutting a half circle to set the rod onto, you can cut a full circle into the center of the bracket to slide the rod through. Simply measure the diameter of the rod to cut a hole big enough for it to fit in.
You can paint the brackets and rod, too. A coat of paint to match your existing color scheme can help them blend in. Or choose a complementary shade for a pop of color that stands out. If you like the natural vibe, you can use a wood stain to elevate the look. The brackets and dowel from Home Depot come pre-sanded, so you can skip that step before painting or staining. If using other products, they might need a gentle sanding beforehand. You can also use the sandpaper to give the curtain rod a distressed look after it's painted. Adding bits of white or gray paint as you're distressing can take the look to the next level.