

Cover Plastic Bottles With Air-Dry Clay To Make The Cutest DIY Fairy House Decor

There are some DIY projects that are just too cute to pass up. They're often those small crafting ideas that are the perfect way to spend a cozy Sunday afternoon. Put in the time, and you'll end up with a piece of decor that's truly unique and unlike anything you could buy at the store. For example, you can create a cute decorative fairy house using a plastic bottle and air-dry clay instead of buying an expensive one from Etsy or a local gift shop. It's a great way to jump on the fairy house trend. Plus, you can customize your creation however you like using different colored paints and unique shapes and details. In the end, you'll have a fairy house that truly matches your style.
This brilliantly cute DIY comes from YouTube creator Aashy Art & Craft. They cover a plastic bottle with air-dry clay and paint it once the clay has hardened to turn it into an adorable fairy house. It can be used as stunning mantel decor, taking your space to the next level, or you can place it on a shelf, coffee table, or nightstand. You can keep the lid on the bottle and display it as an art piece, or leave the lid off and use it as a vase for flowers. For this DIY, you need a small plastic bottle, Mod Podge or PVA glue, and some air-dry clay. You also need some specialized air-dry clay tools and a bit of clay glaze or varnish. All of this can be purchased in a pack, like this Eigtwen Air-Dry Clay, Glaze, and 29-Piece Tool Kit.
How to craft a fairy house out of air-dry clay and a plastic bottle
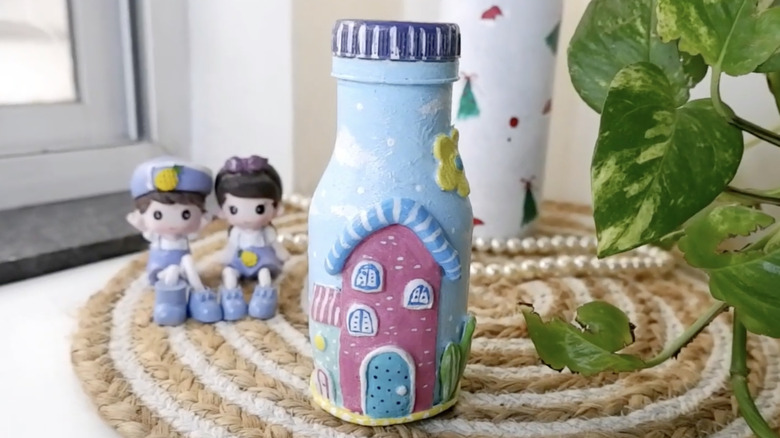
To create your fairy house, start by cleaning the plastic bottle thoroughly inside and out. Pro tip to get rid of sticker residue: use a bit of rubbing alcohol. Then roll a piece of air-dry clay into a flat sheet using a clay rolling pin. Take your knife tool and cut small pieces out of the clay to create the shape of the house. Use whatever style you like — wavy, bubbly, cloud-like, or straight. Then cut smaller pieces and glue them on top of this background, creating windows, shutters and doors. Place other adornments around the house, like grass, flowers, and trees. Finally, using your fingers, roll out some pieces of clay for details such as roof guttering and a door frame. The idea is to add dimension wherever it's needed. Let the clay dry completely before moving on to the next steps.
This is completely optional, but you can cut small shapes out of painter's tape and stick them to the plastic bottle before painting. For example, cut the tape into the shape of tiny clouds, a sun, or birds, then peel off the shapes after painting. Then it's time to paint your fairy house. Start with a primer, then use fine paintbrushes and acrylic paint to add details. Be as creative as you wish. If you plan to keep the cap on the bottle, paint it to match the rest of the house. Let the paint dry, then cover the entire bottle with clay glaze or varnish. If you want to create more fairy houses, use bottles in different sizes and shapes. Or use your leftover clay, paint, and glue to transform a pickle jar into the cutest fairy house.
How to customize this DIY fairy house for any occasion

There are many occasions you might decide to try this craft project. For example, it's perfect for creating cute gifts for your loved ones in fall and winter, whether you're giving one to your Thanksgiving hosts or handing them out to friends at Christmas. If that's what you decide to do, swap out the original pastel hues for some Christmas colors that are on trend, like pinks, blues, and oranges. Or go traditional and use red, green, and gold to make the fairy house look like Santa's workshop. You could also paint it in shades of brown like a gingerbread house. (Why not add a matching gingerbread man?)
Another option is to use hot glue to cover the clay with layers of fake moss and leaves to make it look earthy or like a troll's house. Keep the pastel colors and cut small bunnies and chickens out of clay to make it Easter-themed. You could also wrap yarn around the neck of the bottle or tie a bow around it. At the end of the day, it's your tiny fairy house, so decorate it however you like!
A final option is to turn this little piece of decor into a small lantern. To do this, use the painter's tape technique mentioned above to create small transparent sections around the bottle. Then place some micro LED string lights inside the bottle. When you turn the lights on, their glow will shine through the transparent sections. This is especially cute if you leave the window unpainted so that it looks like the fairies living inside the house have turned their lights on for the evening.