7 Best Tips On How To Prune Your Roses

Roses can be a beautiful addition to your home garden. Not only are they affordable, but they can also light-up your yard with color and beauty. Although caring for rose bushes may seem like a daunting task, House Digest is here to help with the best tips and tricks to keep your roses looking their very best all season long.
One of the most important parts of keeping your roses looking top-notch is thorough pruning. According to Master Gardener Newspaper, pruning encourages new and healthy flowers to grow by getting rid of the dead and diseased parts of the plant. Pruning has the potential to make your roses grow faster and more abundantly when their blooming season comes around. Although pruning roses is not a difficult task, there are some tips you should keep in mind the next time you prune your rose bushes. Here are some of the best tips to try the next time you go about this task.
1. Prune roses before the bloom season instead of after
Each flower has a blooming season, which is the time of year in which their buds unfold into the flower they are meant to be. Flowers thrive during this season and are at their pinnacle of health and beauty. Pruning should align with a flower's blooming season to ensure the best outcome. Garden Design insists the best pruning is done close to the beginning of the next blooming season. Depending on the climate, this could be anywhere between January and May because roses bloom most commonly in the spring.
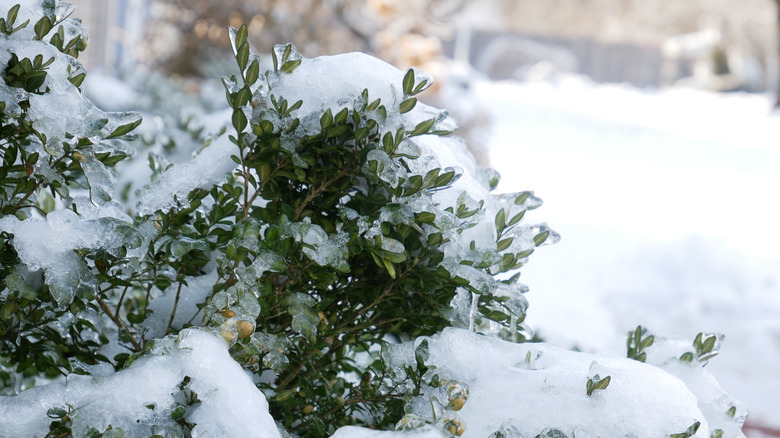
Pruning after the blooming season, however, should be avoided. When the temperatures drop during the winter months, roses bushes are at risk for winter damage. If you leave your roses unpruned going into the winter months, the new buds will remain protected from the cold weather, per HGTV. Pruning them would expose the new buds to the harsh weather, therefore, affecting the next blooming season.
2. Prune roses at least once a year
As already mentioned, roses should be pruned during the months prior to the flower's blooming season. Pruning during this time is best done once a year. Better Homes & Gardens also suggests shaping the plant near the end of their blooming season to maximize their bloom potential for the next season, but pruning should never be done during winter months to avoid damage to the plant.
During the blooming season, Better Homes & Gardens also recommends a bit of light pruning. This just consists of ridding the plant of faded blossoms and dead leaves. It will help your roses continue to thrive throughout their blooming season and add a crisp look to the blooming bush. During the mid-summer months, you can also do some more light pruning to shape the bush for next season, but this should be done in very small increments because pruning healthy portions of the plant can lead to a decrease in buds for the next blooming season.
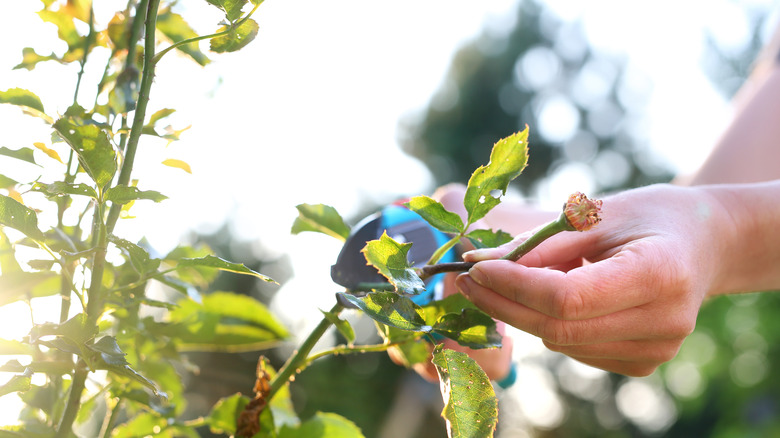
3. Trim no more than 1/3 to 1/2 inch

Wellfield Botanic Gardens shares their recommendation of pruning 1/3 to 1/2 of the overall growth of the rose bush during an annual prune, though that's dependent on the type of rose. Removing too much, however, can cause stress to build at the bottom of the plant. To avoid trimming too much, you should monitor the branches at the bottom of the plant. If there are a large number of dead branches near that area, it could be a sign that you are trimming too much. In that case, plan to cut back on the amount of pruning you do before each blooming season.
When pruning a specific stem, start by finding a healthy bud before trimming. Once you find a healthy bud, trim at least 1/4 inch above that bud. Doing this ensures each bud will grow into beautiful, healthy blossoms. Cutting to close to a bud could endanger it and prevent it from growing the next blooming season. Cutting out bud completely could also drastically decrease the amount flowers on the bush.
4. Start with the dead leaves and loose branches
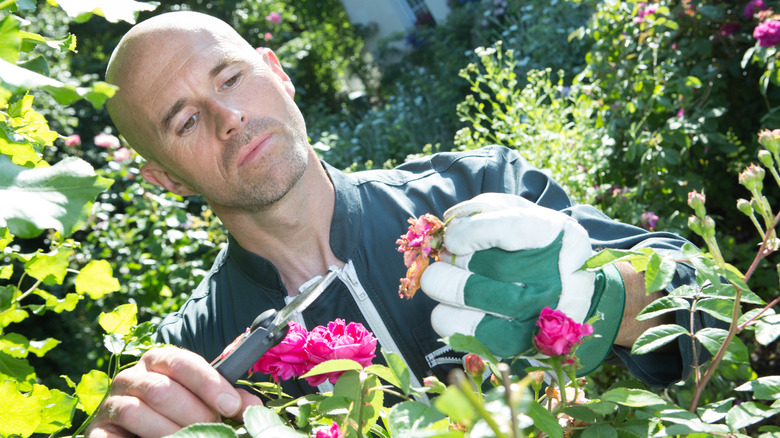
Finding what on the plant needs to be pruned may be the most difficult part of pruning your roses. To start, always clear away dead leaves and loose branches. Once those are cleared out of the way, you can better see what you are working with. Better Homes & Gardens recommends starting with cutting damaged and diseased branches back to a healthier portion of the branch. You can easily see diseases on your rose bush as they cause discoloring. Diseased leaves will have spots of a lighter tint throughout the surface. A diseased flower will have half-opened, droopy petals. The petals will also have small, light-colored spots (per Clemson College of Agriculture)
Thin and weak branches should also be removed completely from the bush. Branches that cross through the center of the plant should also be cut short, as well as branches that rub against each other. To finish off, the plant should be trimmed to a dome shape to influence further, healthy growth.
5. Have the proper gardening tools
Most rose branches can be cut with simple hand pruners or loppers (per Miracle-Gro); however, a pruning saw would be more useful for thicker branches. Bob Vila recommends the King County Tools Anvil Loppers for the best quality, making yard work more comfortable and efficient. Fiskars All Steel Bypass Pruners also come highly recommended by Rural Living. Not only are they cost efficient, but they are also easy to use and have great warranty. Even though you are less likely to use a pruning saw compared to pruners or loppers, Popular Mechanics recommends the Corona Razor TOOTH to cut branches up to 6 inches in diameter. Even if not used for your rose bushes, it is great gardening tool to have for your bigger gardening needs.
Because rose branches are covered in sharp thorns, it is also recommended to wear a pair of gardening gloves when pruning your rose bushes. Oak Hill Gardens specifically recommends Haode Rose Pruning Gloves, which have a number of advantages starting with their thornproof exterior and clawed fingertips, which are great for digging and raking through soft soil.
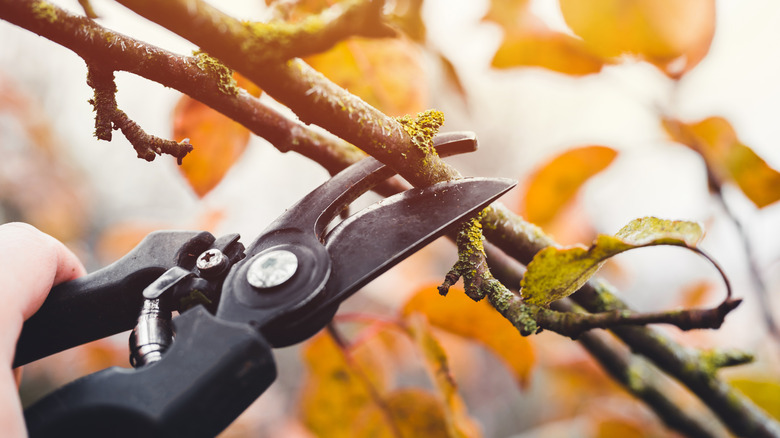
6. Cut at a 45 degree angle

When it comes to pruning a rose bush, pruning in the proper place is vital for a healthy and successful blooming season. Gardener's Path proposes cutting each branch at a 45 degree angle, angling down toward the center of the plant. This technique encourages the plant to grow outward, allowing air to circulate easily throughout the center of the plant. Air circulation is just as important as the soil, water, and sunlight your plant needs to survive because it plays a main role in promoting water evaporation, reducing the condensation build-up on a plant's leaves and blossoms. It can also reduce a plant's risk of infectious diseases (per Balcony Garden).
Trimming at a 45 degree angle also encourages rain and water droplets to travel behind rose buds and towards the center of the plant, further preventing moisture build-up around the flowers. The build-up of moisture can be harmful to a flower because moisture encourages the growth of mold and bacteria. Cutting each stem at an angle also encourages the plant to grow outward, creating a luscious bush of roses in your home garden.
7. Finish off with lime sulphur
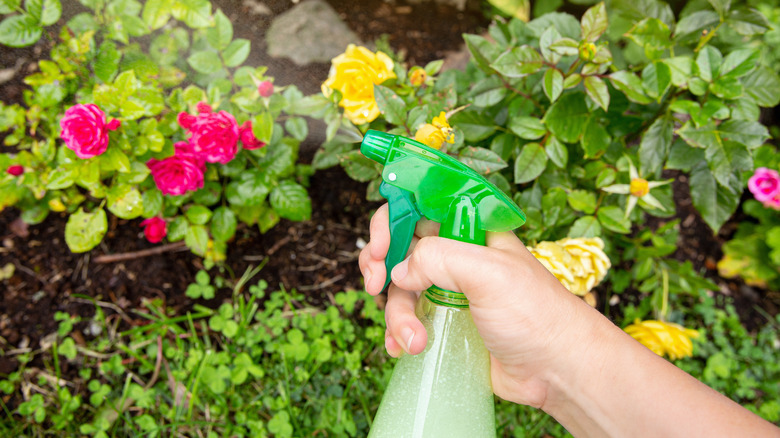
Because rose stems seal themselves after pruning, there is no need to physically seal a rose bush, per the University of California. However, Treloar Roses does share a few techniques to use after pruning that could help your roses during their blooming season. Spraying your roses with lime sulfur helps get rid of fungal spores and pest eggs that might be infesting your plant. This technique is highly recommended for gardens with mildew and black spot issues during growing seasons.
Simply follow the instructions, and thoroughly spray the stems and the ground surrounding the rose bush. Do not use any other fertilizer or chemical with the lime sulfur. Once the bush is coated, wait 15 minutes before using a garden hose to rinse the plant with water (per Fine Gardening). Although the lime sulfur may smell, it's an environmentally safe process that saves you time and money with the best results for your roses.