How To Take Apart And Deep Clean Your Blender

Creating meals in your kitchen can be incredibly rewarding, fun, and, of course, messy. From piles of dishes, food remnants, and the inevitability of splatters and spills in order to keep your cooking area in tip-top shape, you should stick to a solid cleaning routine. However, even if you are one of those people who cleans a dish right after you use it and hang up the dishrag the second you are done, there may still be germs hidden in the nooks and crannies of your kitchen.
A 2011 study carried out by the National Sanitation Foundation found that items in the average kitchen contained the highest amount of bacteria compared to other rooms of the home. That's including the bathroom! Among these germ-ridden items are dish sponges, coffee reservoirs, and cutting boards.
Because the kitchen is where you prepare food like raw fish, chicken, beef, and eggs, as well as where you clean your fruits and veggies, this could lead to the formation of dangerous bacteria, such as salmonella and E. coli. Symptoms of salmonella and E. coli infection include headaches, stomach pains, and diarrhea, according to the U.S Department of Health & Human Resources. So, to protect yourself and your loved ones from getting bacteria-related illnesses, it's important to properly clean and maintain the items in your kitchen. One appliance that might not get the cleaning it deserves could be your blender.
Reasons to clean your blender
Those fresh morning shakes are just the thing to start your day on the right foot. However, if you're not cleaning your blender thoroughly and regularly, then your healthy eating habits might be interrupted by harmful germs. After you're done blending those nutrient-rich fruits and veggies, it might not be enough to just simply rinse your blender out afterward.
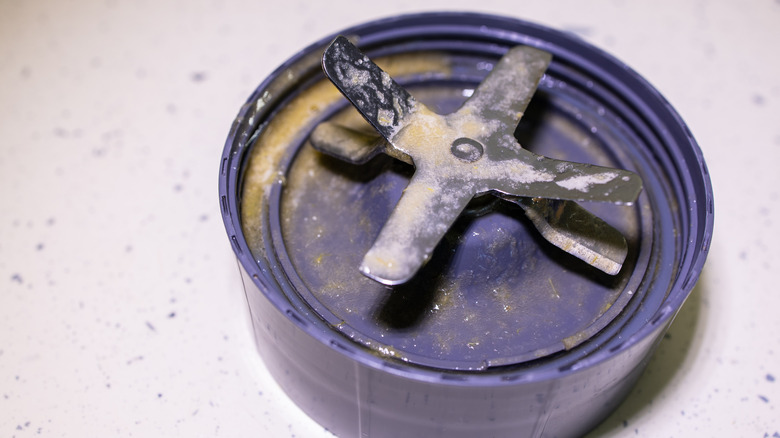
The leftover residue from the liquids you use in addition to tiny food particles could get trapped in the rubber waterproofing ring at the bottom of the blender, according to Men's Health. This, as well as the tough-to-reach areas of the appliance, could create a breeding ground for bacteria. To ensure that your blender stays free of germs, it might require a proper daily cleaning or even a deep clean. Whether you have a hand blender, immersion blender, or countertop model, you should take it apart so that you can get into all the areas where dirt and grime can be found.
Steps to deep cleaning your blender
Firstly, get together your cleaning materials. The Spruce recommends that you have dish soap, a sponge, and even baking soda or lemon on hand to do the job. For safety reasons, make sure that the appliance is unplugged, that way you can avoid dangers from the sharp blade. Then take off the lid and unscrew the bottom of the jar or pitcher. Carefully remove the sharp blade — you might want to use a dishtowel to avoid direct contact — then pull out the rubber waterproofing ring.
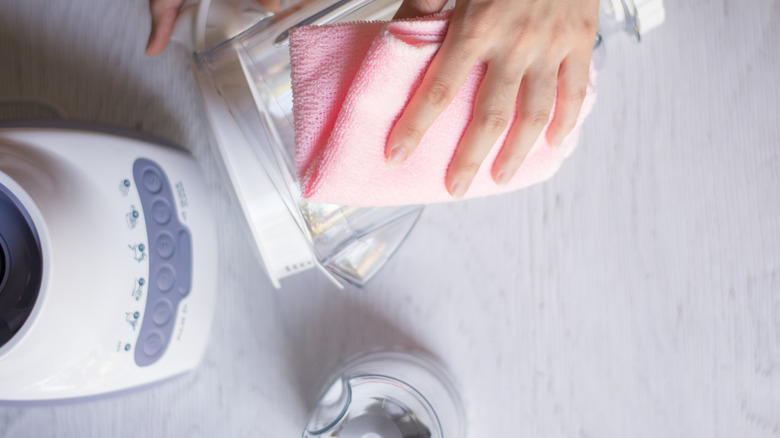
Once your blender has been completely disassembled, place the larger items in a sink filled with warm water and liquid dish soap. Then handwash the items with a sponge or dish brush. Do not use steel wool as this will scratch the blending jug, which could lead to grooves that will allow for even more germs to get trapped. You can use baking soda and lemon to get rid of stuck-on bits of food and provide an anti-bacterial clean. Next, wash the smaller items and either dry everything with a dishtowel or leave it to air dry. Lastly, clean the base, or housing, of the blender. Once everything is dry, you are ready to reassemble your blender and have it pristine for the next time you need it.