Hacks On How To DIY A Distressed Painted Look
So you've decided to DIY a furniture piece, and now comes the difficult part of choosing a paint color. Not only is the process of transforming a piece with a fresh coat of paint time-consuming and labor intensive, but there is also a lot of importance placed on the end result since the color you choose is going to be one you will have to look at every day, and if you don't like it, you will have to go through the process all over again. However, the end result is important not only in regards to the way your piece looks upon completion but the way it makes your home feel.
Dr. Mary Gregerson, president of the American Psychological Association's Society for Environment, Population, and Conservation Psychology says via Architectural Digest that paint color affects your mind and body and the way they work together in responding to outside stimuli –- meaning that your paint job can totally affect and influence your mood. Gregerson also notes that everyone responds and is affected differently by colors, so it all basically comes down to personal preference.
Walla Painting also says that not only does the overall color of your paint affect your mood, but other factors such as saturation, color purity, and brightness level also play a major role -– with My Decorative adding that the overall design and style of your furniture piece can affect the overall mood and vibe of your space just as much as color can.
Out with the new, in with the old
While there are many beautiful furniture styles and techniques that DIY'ers swear by, Re-fabbed notes that the distressed look is among the most popular right now. You are likely familiar with the "shabby-chic" aesthetic that is common throughout the homes of farmhouse fanatics and vintage enthusiasts, where the furniture is distressed in an effort to make it look older and worn -– but in a new and beautiful way. The popular style has caught on among DIY'ers everywhere who are looking to add rustic and vintage character to their space through their furniture pieces –- without actually investing in pricey vintage pieces.
Not to mention, many older, vintage furniture pieces need a lot of professional love and care to make them useable and beautiful again -– beyond just adding a coat of fresh paint. In fact, HGTV notes that choosing to DIY true vintage furniture is incredibly risky, especially if the piece was made prior to 1850, as refinishing furniture from this period can drastically diminish its value. HGTV suggests consulting an expert if you suspect your piece might be vintage, in which case, it is likely better to preserve and stabilize the piece as it is now, as opposed to refinishing it. With all the risks associated with refinishing true vintage furniture, many DIY'ers opt for the distressed look instead -– allowing them to add vintage flair and character to more recently made furniture.
Wet distressing

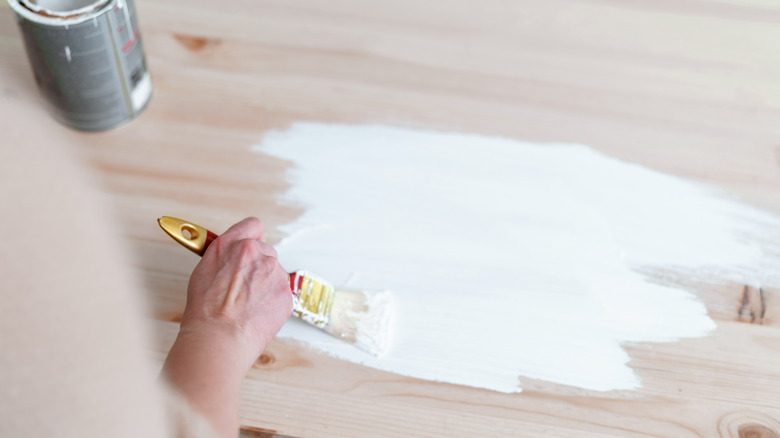
When it comes to distressing your furniture, there are several methods commonly utilized among DIY'ers -– one of them being wet distressing, which Re-fabbed notes involves mixing your acrylic furniture paint with water. According to Country Chic Paint, this method is a good option if you are layering paint coats of different colors or if you want the natural wood color to show through the paint.
If you are utilizing a single color, Re-fabbed suggests barely dipping your brush into the watered-down paint mixture and then adding a single coat of paint to your furniture. Going in lightly with the paint and watering it down helps avoid the paint being too thick or concentrated, which can take away from the distressed look you are going for. This single coat method is the most dramatic when using light paint on dark furniture, which can play up the contrast between the two colors.
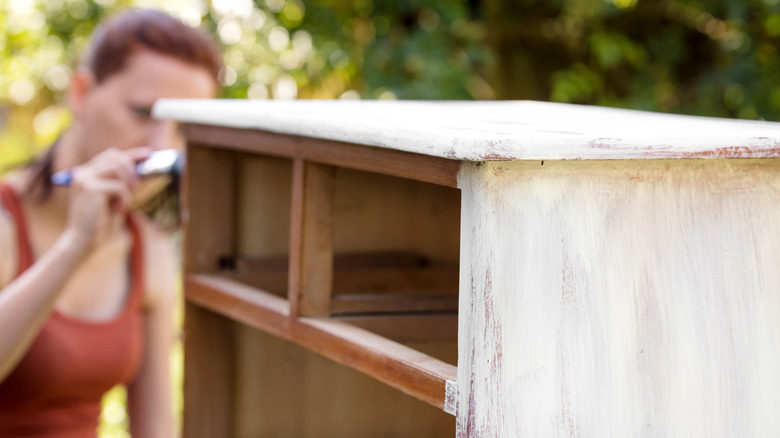
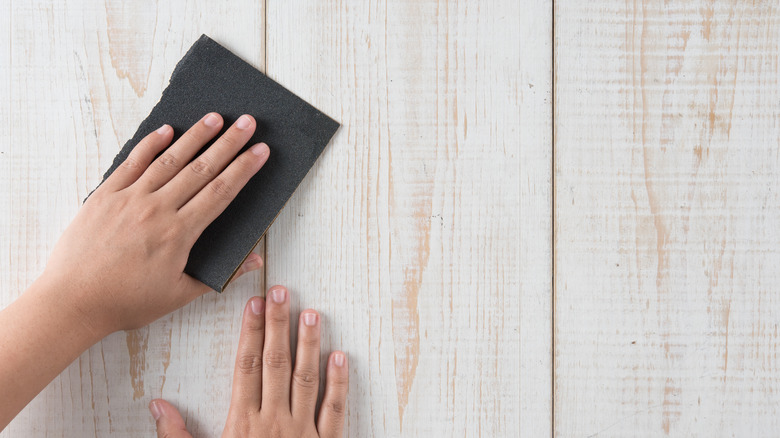
If you plan to layer multiple colors on top of one another, Country Chic Paint recommends adding one layer of paint to your piece and letting it dry for at least 24 hours before adding the second coat of a different color. Once the second coat sits for an hour or two, you are ready to start distressing using water -– which involves gently running a wet rag over the second coat of paint before it fully dries. This will remove enough paint on the top coat to expose the layer beneath it, creating a weathered look.
Resistance distressing
Resistance distressing with wax is another unique DIY method to give your furniture piece a distressed and weathered look. And while there are a few different methods for utilizing various types of wax in your DIY project, the end result will no doubt be beautiful if you follow these expert tips.
Country Chic Paint recommends painting your piece with one coat of paint and letting it dry completely for at least 24 hours. After the first coat dries, you can apply your "resistance" method, which can be any type of wax. Country Chic paint recommends adding the wax to parts of the furniture that would normally get the most wear and tear, such as along the edges of the piece, to give it a more natural finish. After the wax is applied, you can immediately go in with the second layer of paint, letting it dry for an hour or two before distressing it with either a wet rag or fine-grit sandpaper. Distressing over the areas where you applied the wax will easily remove the second layer of paint and reveal the first coat, giving you the perfect shabby-chic look.