What You Need To Know To Spackle A Wall
No matter how careful you are with your interior space, damage is bound to happen. Furniture, doors, nails, wall hangings, seasonal temperature changes — just about anything can create small holes and cracks in your walls. You can patch most scratches, dents, and holes by spackling your wall. Spackling is a term used to describe the process of repairing a wall with a spackling compound. However, if you are dealing with a larger issue like filling drywall seams or a hole that's larger than ¾ of an inch, a denser plaster called joint compound is the best material to use, per Paint Rite Pros.
Unsightly blemishes are typically discovered when we realize it's time to add a fresh coat of paint. DAP says that 90% of painting a wall is actually just preparing it, which of course includes spackling. If you're looking to save money and up your DIY game, it's important to know how to repair a wall yourself. There are two basic steps — preparing the wall and applying the compound — and we've got all you need to know below.
Preparing the wall
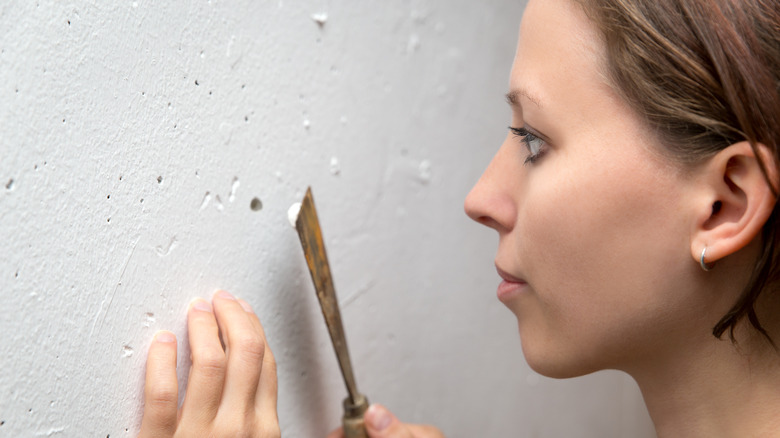
Before applying the spackling compound, you'll first need to prepare the wall. The wall needs to be clean so that the spackling compound can adhere and fill in the hole. True Value says to begin by scraping the area with a putty knife or sandpaper. This is because the edges of the hole may peel back and stick out from the wall. Scrape and sand the wall until the surface is smooth and even. When doing this, you'll likely remove some paint as well. There's no need to worry about this, because you'll be painting over the area later anyways. Once all the debris has fallen, wipe around the area with a damp cloth.
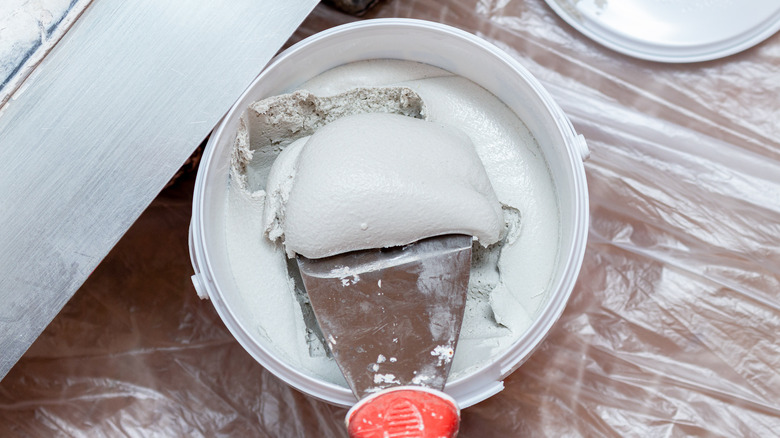
Before spackling, you may also need to prepare your spackling mixture. Spackling compound comes in two forms: a pre-made paste and a powder. If yours is a powder, it will have to be mixed with water to become a paste. If it's already a paste, give it a stir and you'll be ready to go.
Applying the spackling paste
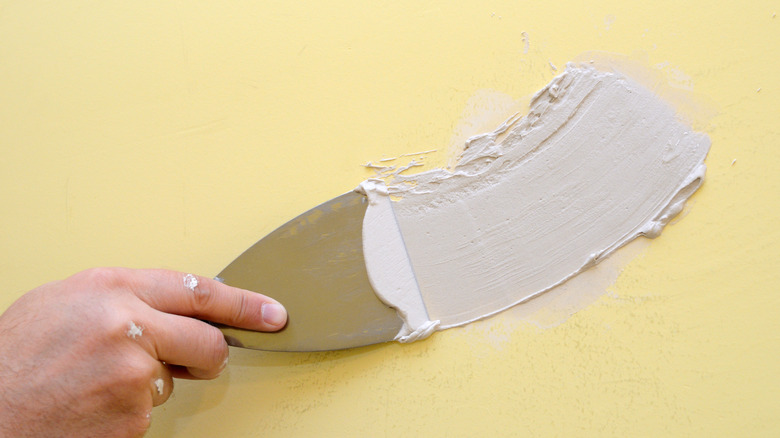
After the wall is prepared, the spackling paste can be applied. According to True Value, you only need a small amount to get started. Use a putty knife to scoop it out of the container and apply it to the hole or crack evenly with one fluid fanning motion. Make sure to completely fill the hole. Use the edge of the knife to scrape away any excess putty, and wipe the wall around the hole or crack with a damp cloth. Next, allow it to dry for a few hours. Once dried, inspect the hole to see if the putty has sunken into the wall. Homedit says that spackling paste shrinks as it dries, so this is normal. If needed, apply more paste and allow it to dry again. If the spackling compound protrudes from the wall, you'll need to sand it down with sandpaper and gently wipe with a damp cloth again.
Finally, once the repair is finished, you can repaint the wall. If the area is small, you could just do some touch up painting over the spackling paste. For a larger area, priming and painting the whole wall is best. In general, you should repaint your walls every seven to 10 years.