5 Tips For Perfectly Painting Your Bathroom

Bathrooms can be a really relaxing space in your home. For some people, soaking in the tub or having a prolonged, hot shower can be just what you need after a long day, and, according to Swirlster, it's the best way to relax. But just like any room in your house, bathrooms need redecorating and touching up to keep them looking clean, modern, and fresh.
Of all the rooms in your home, this area probably needs the most preparation and care. Bathrooms are damp and can be prone to mold, so making sure you are prepped and have everything you need at hand is essential. In addition, according to Glidden, if you cover this room with paint that is not specifically made for humid areas, you run the risk of the paint peeling and cracking as the moisture seeps into the walls, ruining the fresh new look you've just created, not to mention all your hard work going to waste.
1. Choose your paint wisely
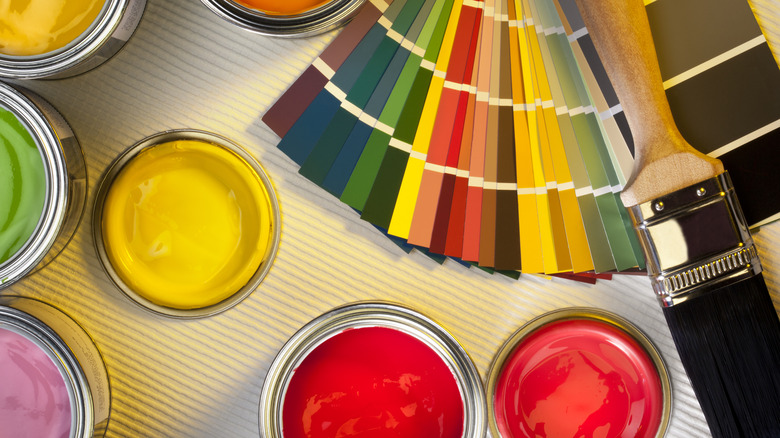
The first thing to consider when painting your bathroom is what type of paint you need and what color you should choose. Bathrooms are damp rooms, and consideration needs to be taken when selecting the pigment type. The Paint Shed suggests an acrylic eggshell, semi or high gloss, and satin would work well for low moisture bathrooms. It's worth noting that paints specifically for bathrooms are around twice the price of tints that are suitable for all other rooms. This is due to the mold-resistant properties that these pigments have.
Colorwise, obviously, it's a personal choice, but Wild Creative Project states that if your bathroom is small or windowless, then a simple white might be all you need. They also point out that blue and yellow, if bright enough, can do wonders for areas that are lacking in natural light. On the other hand, if you have a large bathroom, you can really play around with colors, and bringing some bold shades in can give your room a fresh, new vibe.
2. Preparation is key

According to Homebuilding & Renovating, the most important thing to remember when beginning to paint your bathroom is not to use the shower beforehand. Condensation on the walls and in the air is a big no-no. Next, ensure you have all the tools you need ready, including your bathroom-friendly paint, filler, masking tape, sandpaper, or de-glosser if you are painting over a gloss paint, paint brushes, rollers, paint tray, and old sheets or tarpaulins.
Plumbworld says that you should fill any imperfections in the walls, such as holes, with a good quality filler that is specifically for bathrooms and allow it to fully dry before sanding it flat and smooth. If there was gloss paint on the walls before, you could first de-gloss them as it replaces the time-consuming job of hand sanding and allows the new paint to stick properly. Next, wash all the walls with a sugar soap solution and dry them well.
Once all these steps have been completed, the last thing to do before you start painting is to use a primer, making sure to choose one that is for bathrooms.
3. Paint the walls
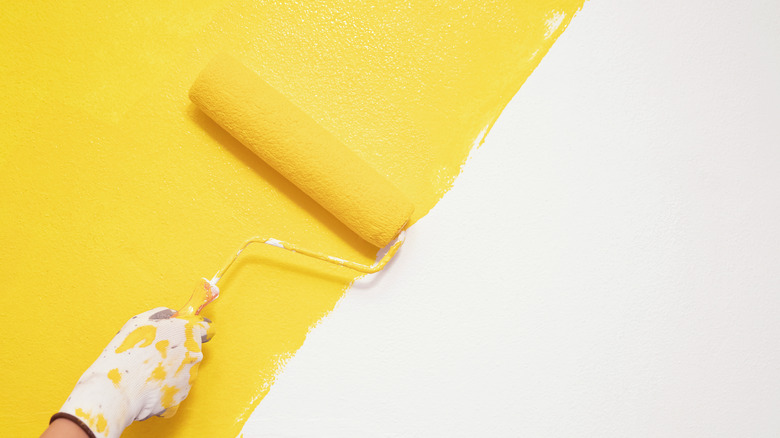
Before starting to cover the walls with pigment, you will need to decide whether you would prefer a brush or a roller. Nix says that paint brushes are good for those small fiddly areas and cutting in around ceilings and skirting boards or tiles. Rollers absorb more paint and are better for covering large surface areas while leaving an even coat.
Next, ensure you've got the right pigment. The best ones for bathrooms are water-based paints as they keep their color and dry faster than oil-based tints. With this in mind, Eco Paint My House suggests using a foam roller as this works best with water-based paints. Use masking tape to protect door frames, sockets, and skirting boards; then, after stirring your paint well, pour it into the roller tray and begin covering the walls with your roller in large strokes in an M or W shape, being careful to leave a 2-inch gap around the masked off areas. You can use the brush to cover these small areas then.
If you have different colors for adjacent walls, put masking tape down the corner length to protect the walls from differing paint colors. After waiting for it to dry for an hour, apply a second coat if it's needed.
4. Cut in and paint the ceiling
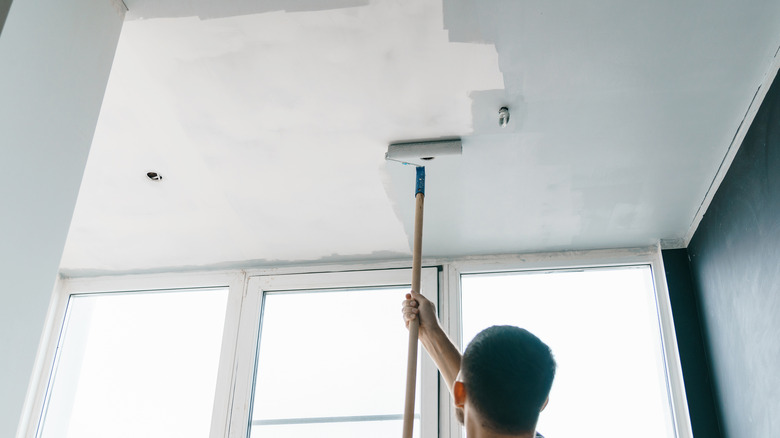
The edges near the door frames, windows, and skirting boards that you previously covered with masking tape are ready to paint now. A 1.3-inch angled paintbrush is the best tool for the job here, says Crown. Its angled edge allows for small, delicate paintwork and gives a neat, straight edge. Hamilton says that as paintbrushes and rollers leave a different finish after you have cut in with your angled paintbrush, take a mini roller and go over the wet brush strokes as close to the edge as you can to ensure you cover the area.
When it comes to your ceiling, make sure you have prepped it in the same way you prepped the walls. Painting this area is done in the same way as the walls: You can either use a step ladder or a long-handled roller for the majority of the ceiling space, but either way, you will need a step ladder for cutting in the corners. Because the steam rises up in a room, don't use the shower or bath for at least 24 hours after revamping to allow the newly painted bathroom to fully dry.
5. Prevent and clean paint splatters
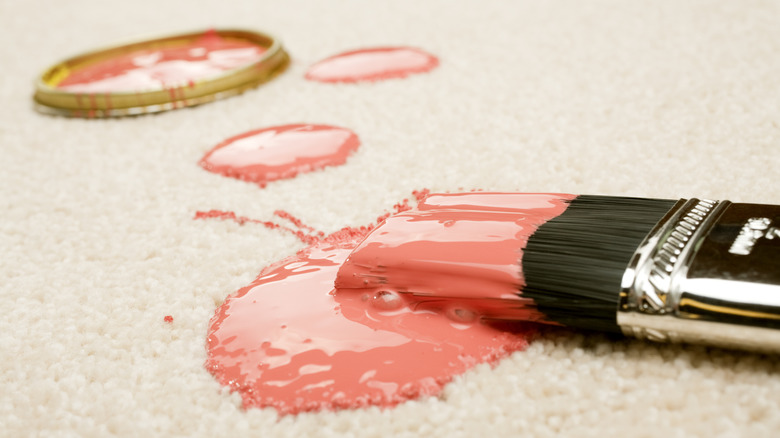
The best way to ensure you don't spoil your bathroom with spilled paint is to take anything out that can be easily removed and cover everything else with old sheets or tarpaulin. But, if you accidentally splatter paint on your bathroom furniture, tiles, or hardware, what can you do? If you notice it straight away, simply moisten a cloth or cotton wool ball and wipe it away, but if it dries before you notice it, The Creek Line House suggests rubbing alcohol. Cover the paint with rubbing alcohol and leave it for 30 minutes, and it'll just wipe away.
What if you have splattered some on the hallway carpet or a bathroom rug? Carpet Cleaning London Pro says to get a blunt knife, lukewarm water, dish soap, a spray bottle, an absorbent cloth, and a vacuum cleaner. If the paint is fresh, act quickly. Gently scrape the excess away with the blunt knife and blot it softly with the absorbent cloth, being careful not to push the pigment deeper into the fibers.
Mix 1 teaspoon of dish soap with 8 ounces of lukewarm water in a spray bottle and liberally sprinkle onto the paint and leave it for five minutes. Soak a clean cloth with the cleaning solution and blot the stain, using a fresh area of the cloth each time until no paint remains. Dry the area with a towel and use a vacuum to lift the carpet's fibers once it is fully dry.