5 Clever Ways To Weather Wood For A More Rustic Look
We may receive a commission on purchases made from links.
Homeowners who are striving to create rustic-inspired styles within their homes may be doing so because the rugged look tends to ignite a sense of natural beauty and character that soothes and relaxes the environment, Vevano Home explains. When looking for ways to roughen up your home and incorporate rustic decor, weathered wood is the perfect material to include. From flooring to cabinets, weather-beaten wood can replace many items within your home to develop the style you truly desire. But how exactly can you acquire this unique material?
According to Reclaimed Flooring Co, wood weathers naturally as it is exposed to various outdoor elements. To speed up this process, which takes several years to undergo in nature, an artificial process has been developed through technology. Although you can easily purchase weathered wood for your next do-it-yourself project, there are several alternative techniques you can try on regular lumber to match the style on your own. Some of these procedures won't physically deteriorate your wood, but they'll still give it that distinct rustic look you can then boast throughout your home. Let's take a closer look at five of these clever approaches.
Beating up the wood
One of the easiest and most fun ways you can create a weathered look on an average plank of wood is by physically beating it up. As logs and other natural materials are exposed to the many elements of nature, they get scratched, beaten, and bruised, which is exactly what you need to do to recreate that rough, rustic look.
The DIY bloggers at Young House Love suggest starting with a plastic bag of screws and whacking away at the surface. You can also use the sharp tip of a screw to scrape and scuff up the otherwise smooth exterior. Using a hammer to hit a few dents into it is another way to add a few unique distress marks.
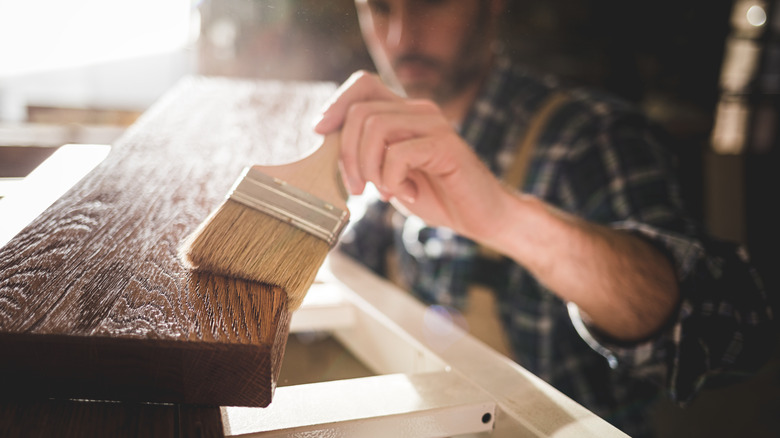
After you finish taking out your aggression on the wood, the Young House Love team advises sanding down the entire surface. This will add to the weathered appearance of your textural damage and get rid of any splinters that could potentially cause harm when the finished piece is implemented into your home. After sanding, choose a stain color that fits the rough aesthetic you wish to portray and complete the rustic look.
Attachable wire brush
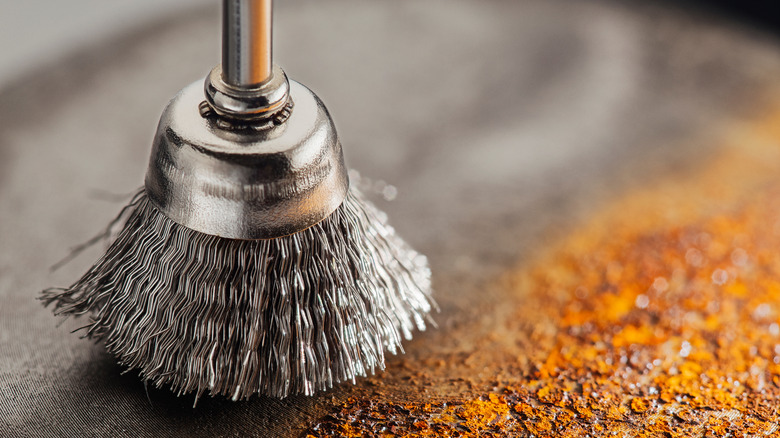
Mr DIY Dork (via YouTube) claims that one of his favorite ways to weather down a piece of wood is by using a corded drill and an attachable wire brush, like Harbor Freight's Wire Cup Brush. By using these tools, you are gently scraping into the surface of your plank in a circular motion to create a rough texture, which can then be stained and painted to match the aesthetic of your home. Mr DIY Dork specifically uses a brass brush attachment for this process, however, steel and nylon attachments are also available to create slightly different textures.
As you start brushing your wood, be sure to lean the drill into the direction that it's turning. For example, if your drill is turning clockwise, angle your tool slightly to the right and vice versa. You don't want to press your drill straight down or lean it in the opposite direction of its spin because that could cause you to lose control and create unwanted marks on your plank's exterior. To get the perfect rustic appearance, it is advised to mechanically brush over your wood in both directions, clockwise and counter clockwise.
If the results turn out to be too deep for your taste, you can smooth the whole thing over with a bit of sandpaper. Once you've reached your desired depth of texturizing, complete the project by adding your choice of finish, like stain or lacquer, and let it thoroughly dry before doing anything else.
Steel wool
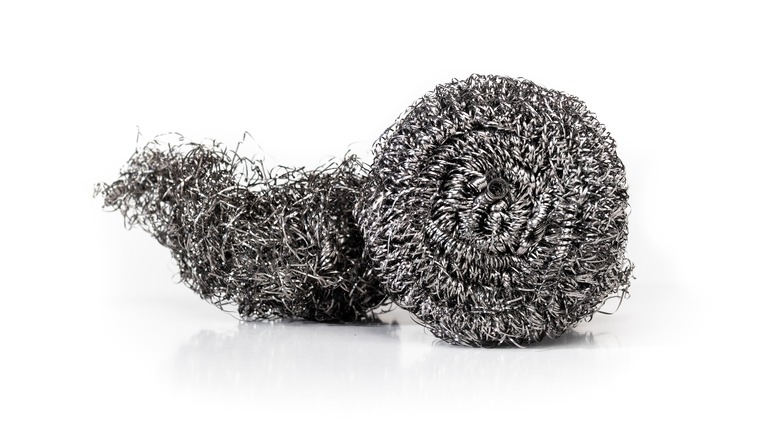
Unlike the other weathering techniques mentioned so far, lifestyle blogger Ashley from Cherished Bliss prefers using a process that involves staining the wood before adjusting its texture. To start, she recommends using Minwax's Dark Walnut Interior Stain and applying it to the plank's surface with a brush or a lint-free cloth. Before repeating the staining process to create the exact color tone you're looking for, sand the surface between coats for the best results.
After your stained wood is completely dry, the next step will be to use a dry brush painting technique over the stain with a standard white acrylic or latex paint. If you are unfamiliar with the dry brushing process, start by dipping a dry brush in a very small amount of paint. Only the tips of the bristles should be lightly dabbed with paint before applying it to the surface of the stained wood. Before adding a second coat, it's important to ensure little to no paint is left on the brush.
With a very thin layer of paint over the exterior, let your wood dry before sanding over the surface with a bit of coarse steel wool. Finally, brush off any dust or debris that may have come loose during the sanding process and glaze over the top with the blogger's own homemade wood stain, which she creates from a combination of distilled white vinegar and instant coffee.
Paint and stain
If you're interested in creating an authentic rustic appearance without causing physical damage to your wood, you can also recreate the look with a simple stain and paint technique. To do so, Taco Stacks (via YouTube) uses a wood stain, like Minwax's Wood Finish, and any type of white wall paint or primer. You can use whatever you have lying around your house.
Start by applying the stain to your plank. Taco Stacks specifically uses a sponge brush for this process, but a regular paint brush will work just as well. Regardless, ensure the stain is applied thickly over the entire surface. Then, while the stain is still wet, use another clean brush to apply the white paint on top. As you do this, the stain and the paint will automatically start to mix together.
Finally, while the wood is still wet, take a spackling knife and scrape over the surface to remove as much excess paint as possible. This will give your piece of lumber an artificial texture and bring out a clash of colors to create that rough and weathered appearance.
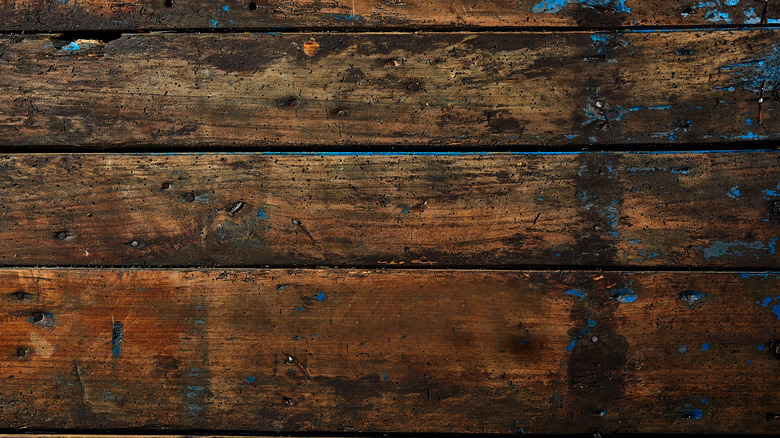
Vinegar and black tea

Beyond paints, stains, and physical damages, MasterClass shares another clever way to apply a weathered look to your wood. Before jumping right in, however, it is advised to first test it out on a small piece of scrap wood. This will allow you to determine if the process creates the rustic look you desire before applying it to the lumber you'll be using for your project. If it doesn't, you can either adjust this method to create a lighter or more dramatic look, or switch to one of the other techniques.
To start this all-natural procedure, soak a piece of steel wool in white vinegar for at least eight hours (or overnight) to create a solution that will give your wood a grayish appearance. The longer you let the wool soak, the more intense the gray will be.
While the wool is soaking, steep several bags of black tea in a mason jar for approximately one hour, or longer if you wish for a more intense color. Before applying your solutions to the wood, sand away any old paint or stain to create a smooth exterior for the new stains to penetrate. Also, don't forget to add whatever scuffs, scrapes, or dents you want to recreate a rough and rustic texture. Then, paint the tea and steel wool solution evenly onto each plank and repeat several times until you reach the appearance you desire. When it's dry, apply polyurethane to seal the surface.