The Fastest Fix For Scratched Wood Flooring
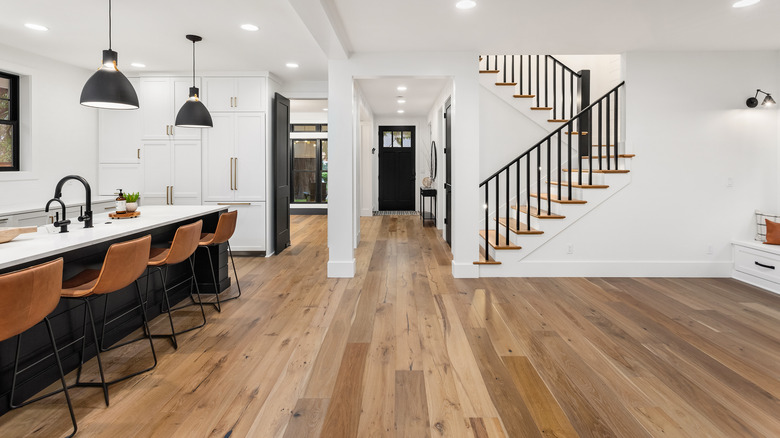
Hardwood floors make a home look sleek, sophisticated, and... homey. According to a study by the National Association of Realtors, 90% of homeowners that installed hardwood floors felt like spending more time in their personal space, with 77% deriving more enjoyment in those rooms.
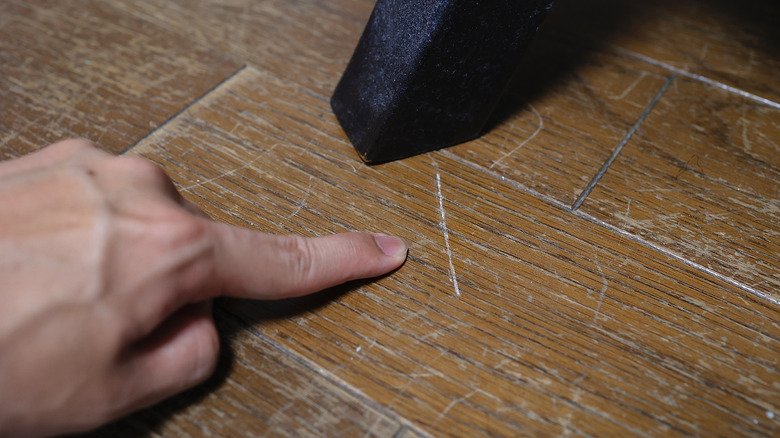
The downside to installing wood flooring is the possibility of scratches, gouges, or divots tarnishing its clean, lovely lines, especially if the wood is of a softer variety, such as pine. Sparkle Surface Care notes that floors can easily become damaged through day-to-day life. Mindfulness can help solve the problem — for instance, you can move furniture by picking the item up, not by sliding it along the floor to keep damage at bay. But, sooner or later scratches may occur, and when they do, try not to worry too much. The good news is that many of these scratches on your wood floors can be removed with minimal DIY effort — most of them are inexpensive and easily fixed, even if you are a beginner.
Smooth it out
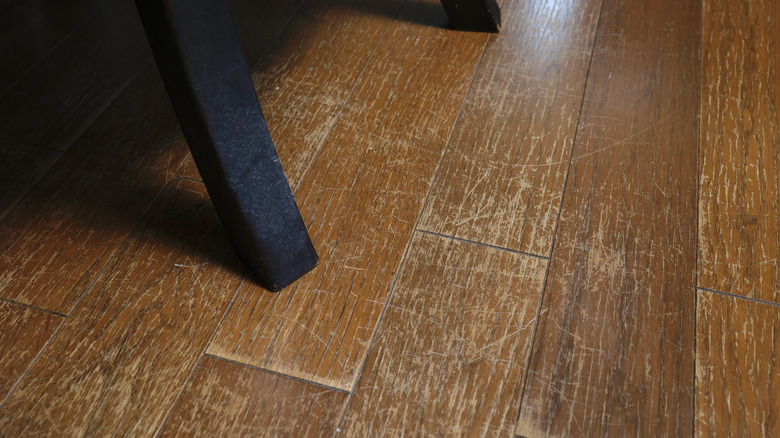
There are two basic types of scratches: a light one that rests on the surface and a deeper depression that actually dents the wood. Both require a similar methodology to fix, according to Build Direct. For surface marks, you can try using mineral spirits and a fine steel wool pad. Start by rubbing down the scratch, making sure you are going in the same direction as the grain (if you go against it, you can actually cause more scratching.) When everything seems smooth and the scratch is blended into the flooring, rub on the mineral spirits to finish.
Deeper scratches may require more work. Plan on spending a day restoring the floor to its full beauty. Start with lightweight sandpaper, again working with the grain. While you want the area to become smooth, don't sand too vigorously. When the floor feels even, you are ready for the next step: wood filler. Wood filler is available in a range of hues, so matching the color to your floor is more likely. Fill in the spot, and don't worry about using too much. After the drying process, you can sand down any extra, you want a nice, clean finish at the end, not a granular texture.
Touch it up with stain
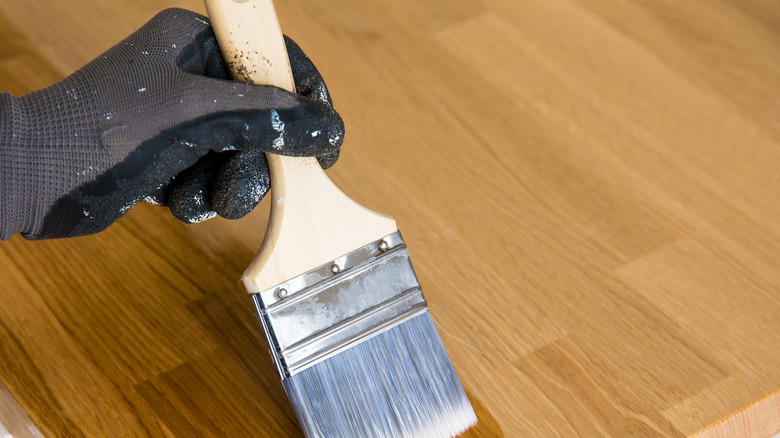
A scratched floor doesn't always require sanding, though. Sometimes you can get by with just some stain. By blending a bit of color stain into the marred flooring, whether it is engineered or solid hardwood, you can touch up any imperfect marks. Lovely Etc. advises that you find a stain that closely matches the color of your floors. You always want to test the product on either an extra piece of wood or in an out-of-the-way spot before using it on your floor, said Instructables Workshop. Don't ever experiment on a section that sits in the middle of your kitchen.
Take a Q-tip and gently paint the stain onto the scratch, being careful not to saturate the area. When the section looks improved, rub off any excess with a cloth. However, this method isn't perfect, and you might still see some marks if you look closely.
Wood filler kit
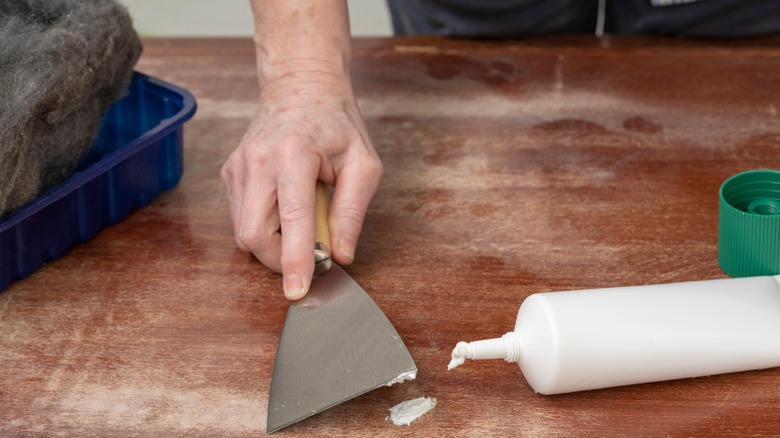
If you find that the damage is more of a hole than a scratch, a wood filler kit can help restore your flooring. Wood filler is most effective for deep marks up to ⅛-inch deep. Essentially your goal is to use the product in the hole, sanding off any excess with fine sandpaper without touching the flooring around the repair, said Twenty & Oak.
You can purchase a wood-filler kit, (which usually uses resin wood filler tubes in several flooring colors,) at most hardware stores or online. The idea is to find the best match for the type of wood in your home. This is usually an easy endeavor unless you have a custom color, then you will need to mix the various tube options until you find the closest match. Lovely Etc. does warn that some products have an overly thin texture and are more appropriate for cleaning up blemishes in furniture than floors. So choose your product wisely.
Wood repair marker and crayons
Wood repair market kids come in several shades and work like magic markers. Instead of drawing pictures though, you use these markers to touch up light scratches, said Lovely Etc. Some kits contain wax sticks somewhat like crayons, which come with a sharpener so you can get a good point for fine work. The colors may appear darker than expected so start with a hue that is a bit lighter than the shade of your floor — you can always deepen the color later.
Instructables Workshop recommends warming the crayons with a hair dryer to make the wax easier to apply. Additionally, you can take a plastic putty knife (or any other material with a firm surface such as a credit card,) to help with placement and to remove any excess. Divide the work into smaller sections, that way you can work more quickly and efficiently. When you are done, buff the area with a clean rag to ensure it is fully blended in.
Become a kitchen mixologist
For the DIY enthusiast, there are a few remedies that you can cook up in your kitchen to treat small scratches on your wooden floor. Nadine Stay suggests that oil and vinegar aren't just good on your salad. Try blending 3/4 cup of vegetable oil with 1/4 cup of white vinegar and then rub the solution on a scratch using a paper towel or rag, which should improve small marks.
You can also try using pecans or walnuts to rub out the blemishes on hardwood floors, according to Impressive Interior Design. Simply take the nut and lightly pass it over the mark, which will often eliminate it! Another product that works is mayonnaise. Rub it into the area and leave it there for a few hours before wiping it off. By the time you remove it, the oil should help conceal the mark.
Another hack comes from Abbots at Home and is perfect for those who want a homemade stain. This simple recipe requires either coffee or tea. Just place two pieces of fine steel wool in a mason jar, then add two cups of white vinegar and 1 tablespoon of coffee grounds or steeped tea. Let this solution sit for three days, shaking the container once a day (if you want a darker color, you can leave it longer.) Next strain the contents, shake well, and apply with a foam brush.