5 Tips To Help You Finish Your Basement Walls

Many homeowners live in properties that incorporate ample basement space. The Washington Post estimated in 2015 that roughly 42% of standalone, single-unit homes had some form of basement footage. The basement can be an immense source of additional utility or a space that takes up your attention and not much else. An unfinished basement offers a wealth of opportunity for a homeowner. The space can be turned into a new bedroom, a laundry area, a home gym or office, or any combination of these.
Finishing a basement can feel like a daunting task, and the truth is that it can be difficult to hammer out a plan to develop this space into a fully functional part of the home. But finishing your basement doesn't have to be an insurmountable challenge. Breaking the process down into a few easier-to-manage steps along with a plan for how you will utilize it can make this process far simpler and allow you to find the confidence necessary to finish this project once and for all.
Of course, the first step in finishing your basement is always going to be the establishment of a plan of attack. In order to properly address this task, you'll need to create a firm understanding of how you plan to use the space in the future. But once this has been achieved, it's smooth sailing to the finish line for a homeowner with patience and a strategy.
Manage moisture penetration before starting construction

The first step to finishing any basement space lies in addressing moisture issues. Unfinished basements do not incorporate the same kinds of insulation products that are critical to the construction process in the main parts of the home. This means that your basement is naturally going to be lacking in some of the insulating and moisture-preventing features that are a standard in the common living areas of the property. What's more, your basement sits partially or fully buried underground and as a result, is exposed to increased sources of moisture over the above-ground segments of the property (via Triad Basement Waterproofing).
Handling any moisture issues that may be present in the basement is the first step in the building process after you've established how you intend to use your ultimately finished basement area. It's possible that you won't have to do much to eliminate existing moisture and will only need to prevent future sources of leakage during this part of the process. However, if there is existing moisture penetrating into your basement space already, you'll need to use fans or some other type of drying solution to eliminate this source of future problems before you can start building timber framing or finishing the walls.
Draw out a comprehensive plan for finishing the space

Integral to the proper planning of a finished basement is the layout of the space itself. You'll need to spend a considerable amount of time thinking about how you will use this finished feature. Depending on the way you plan to make use of the space, interior walls that extend beyond the existing dimensions of your unfinished basement may be required as a part of the building process. Similarly, different applications may lead to different types of flooring installations after the walls have been put up (Finished Basements Plus recommends vinyl as your go-to flooring or as an underlayer if you want something softer on the feet for a living space).
Any kind of building you might do around your home will likely require permits from your local authority, and speaking with a contractor or contacting your city government directly if you plan to engage in this project on your own will be necessary when determining the reporting and permitting needs for your particular building plans. For instance, one important consideration to make is the type of outlets and wiring you use to power any kind of appliance or amenity in the basement. By nature of their location in the home, basements are more prone to flooding and moisture retention than other areas of the structure. This means that specialized equipment that is rated to withstand these additional pressures is likely required in this part of the house.
Install adequate sealant, gap caulking, and insulating foam
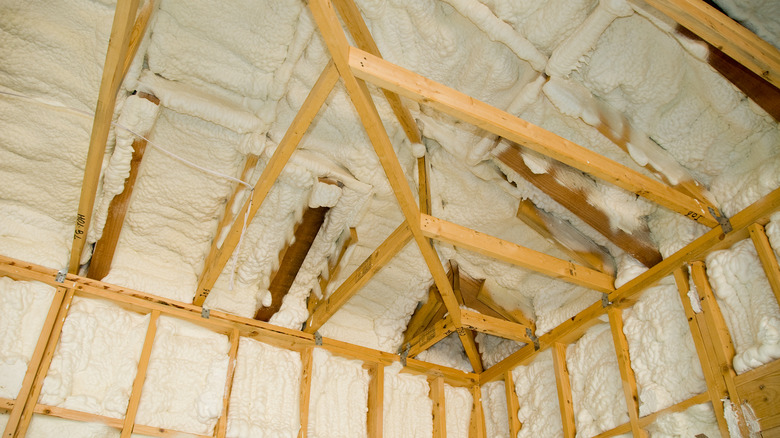
Before you can start building your walls in earnest, you'll need to shore up any structural vulnerabilities in the space that will lay behind them. First, you'll need to install blocking segments between the joists. This will give you a solid structure to begin installing foam insulation across the bare wall. Insulation and additional moisture prevention products (including the creation of an air seal) will ensure that the wall you construct will bring this space up to everyday living standards that persist across the remainder of your home, according to RetroFoam of Michigan.
Insulation needs will be different for homeowners depending on local weather conditions and other factors that persist across the country, so looking into region-specific information about what type of insulation to use will give you the best result possible here. You might also consider asking for guidance at your local hardware store when purchasing the materials themselves. Local professionals can give you a quality assessment of the standard materials used in construction where you live. Lastly, you'll want to use caulk to seal up any gaps that may be present around the edges of your existing structure. These tasks will put you in prime position to finish the walls and start using this space as a part of your living area.
Construct and place timber framing for the new interior walls
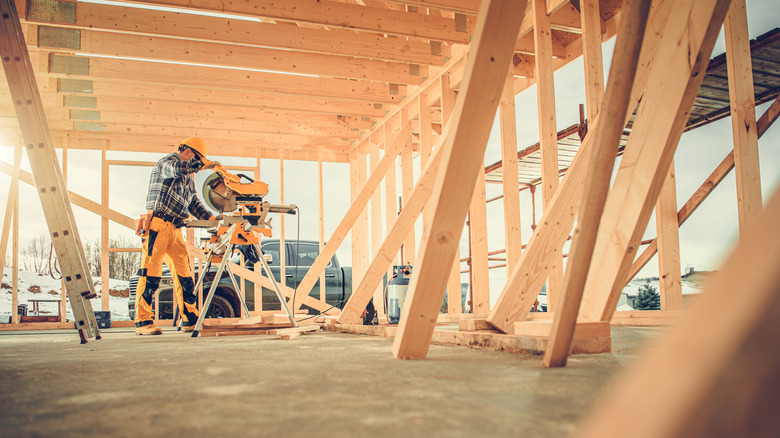
Timber framing is the next step when preparing to finish off your basement. Finished Basements & More reports that you'll absolutely need to use pressure-treated lumber for the basement because the area's vulnerability to moisture goes beyond the above-ground portions of your home. Timber framing might seem like a daunting task but it's quite straightforward once you get the hang of it. Taking measurements and laying boards on the ground will give you an excellent foundation from which you can build the wall units that will transform this space from an unfinished basement into a usable and functional room.
Build the framing from one corner and work your way across, adding new posts every 10 to 14 inches along the distance (in a uniform layout), according to Hardwick Post & Beam. It's also important to remember that you'll need to include cutouts for doors, windows, and any other obstructions that may be found along the space of the wall segment you're working on.
Once you've finished the framing, lift it up into place and secure it to the floor and joists, as well as each of the other adjacent framing sections.
Consider your drywall needs against other finishing options
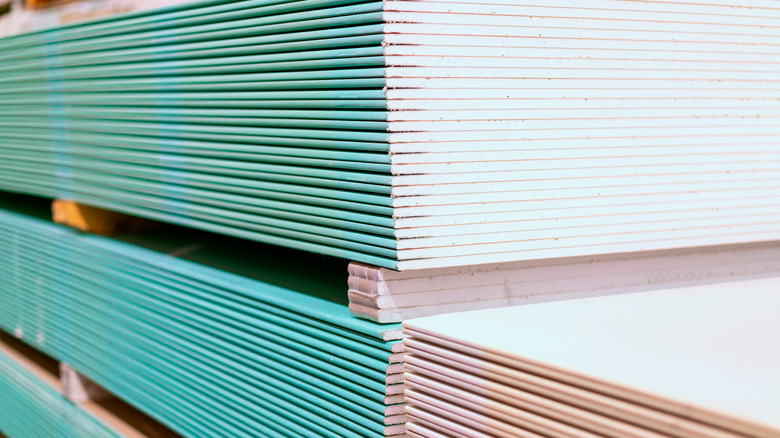
Once your timber framing is lifted into place, all that's left to do is add the finishing touches. Here you'll want to think about wiring, air conditioning, and plumbing needs. In order to place these in the right positioning, you'll need to finish off the wall features. In many home applications, drywall is the preferred method of transforming a bare timber segment into a livable, walled-in space. Drywall may be the perfect option for your basement, but you could also opt for plywood sheeting or another type of simple walling material instead (via Omega Industries). Plywood is typically more expensive than drywall sheets; however, plywood walls are able to withstand a greater beating than drywall and may be the preference for homeowners thinking of constructing a home gym or any other area that will see significant utilization (rather than office work or relaxation activities).
Regardless of the walling material you select, mapping out where electrical sockets, wall fixtures, and any other features will be positioned in the room is a must before these elements go up. As with any other cutting procedure, measuring twice is always a good idea. Then, run wiring and other utilities through the still-bare walls space and attach your exterior layer to get the job done with ease. All that's left to do at this point is style additions that will make the room feel like it's always been a part of your home.