Creative Ways To Revamp Your Light Fixtures
We may receive a commission on purchases made from links.
Changing up your lighting is a fun and simple way to add some fresh flair to your spaces, but purchasing brand-new items can be expensive. Instead of shelling out $100 on a new light, consider upcycling what you have. DIYs are a great way to bring some new light to an old space, give you the creative freedom to make exactly what you're looking for, and even improve your mood. According to the Home Improvement Research Institute, over 80% of homeowners took on a do-it-yourself project in September 2022. Big or small, it's clear that creative ideas and home improvements are taking over.
Social media is full of imaginative ways to upgrade your existing items, but digging through Pinterest for the perfect post can get tiring. There are plenty of inexpensive and easy projects that will leave you with stunning results in no time, so we decided to compile five of our favorite lighting improvement ideas to get you started.
1. Add a fresh coat of paint
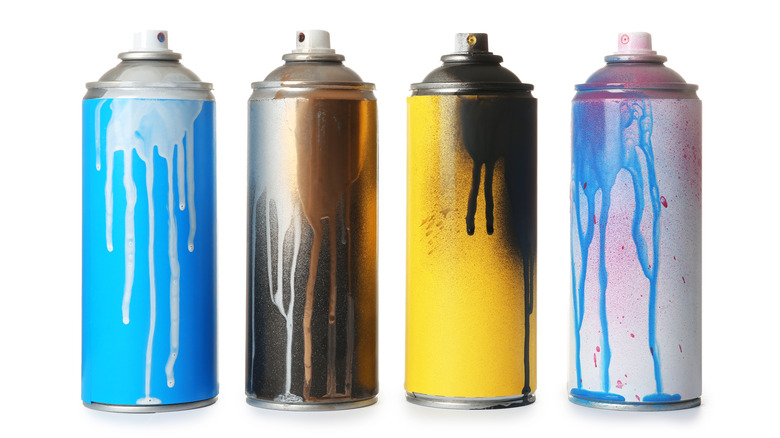
This project is a no-brainer. Picking up a can of spray paint is an easy way to recolor an item to update it or tweak it to match your aesthetic. According to The Home Depot, using a primer can help you get seamless results and full coverage on your item. From there, apply thin coats of your chosen color, making sure to hold the can far enough away from the item to prevent drips. Allow everything to dry based on package instructions, and you have what looks like a brand-new item.
Spray paint is great for metal, stone, wood, and plastic, so that old lamp that's been collecting dust is the perfect candidate for a fresh coat of paint. Consider going for a bold, trendy hue to add a pop of color, or pick up a can of metallic or textured spray paint to imitate the look of metal or stone.
2. Recover your lampshades with new fabric

Tired of the pattern on your old lampshade? Think twice before trashing it. Building your own lampshade from scratch is a bit of an undertaking, but you can easily add fabric on top of an existing base to create a new look. Most lampshades are made of cotton, silk, or linen, so look to those fabrics when you're on the hunt for the perfect replacement material (via Pooky.com).
Once you find your ideal fabric, simply measure out the size of your lampshade and cut everything out. Fold under the raw edges (or leave them out for a natural, distressed look) and hot glue your new look to your old shade. It's a quick fix — no sewing necessary. If you're planning on doing this project, however, make sure you take into account how your fabrics will layer together. A basic white shade will allow your new pattern to shine, but a pattern on top of a pattern might show through once the lamp's turned on.
3. Bring the boho with basket shades
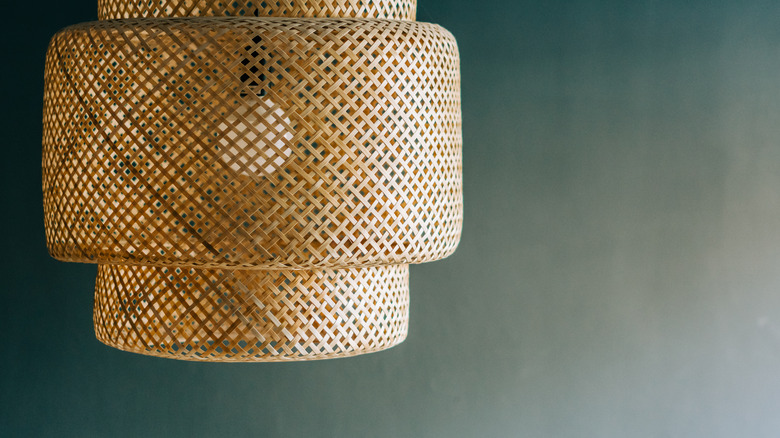
Natural textures and fabrics have been all the rage this season, but if you find yourself with sticker shock after online shopping for rattan fixtures, there's a simple — and cheaper — way to get the look. Rattan is a type of vine that's been used in furniture, home decor, and baskets for centuries (via Patio Productions). New pieces can be expensive because they're so trendy, but the material has had many resurgences in popularity throughout the years. Look to your local thrift store for woven baskets that are a similar size and shape to a lampshade. One simple flip, and you've created your own custom piece.
Because rattan is such a flexible material, this is a pretty simple DIY project. Find your basket, and then measure a hole the size of the lamp socket and cut it out with wire cutters or shears. From there, just feed everything through and screw in your bulb like normal. Quick, easy, and inexpensive.
4. Let your inner sculptor shine with air dry clay

Air-dry clay may remind you more of childhood crafting than a stylish home decor project, but this versatile material can be the perfect way to add some pattern and texture to a lamp. According to The Art of Education University, air-dry clay is an alternative to traditional kiln-fired clay that, you guessed it, air dries to cure. It's popular because of its versatility and simple curing process. Most of us don't have a kiln lying around, so air-drying is a great option if you still want to sculpt without heading to the pottery studio.
You can use this clay to add fun textural details and patterns to an existing piece, or you can go all out and completely change an item's silhouette. Once you achieve the desired look, let it sit for 24 to 48 hours to completely cure, then leave it as-is or go in with some paint to make the look more cohesive.
5. Paint it with plaster for a high-end look
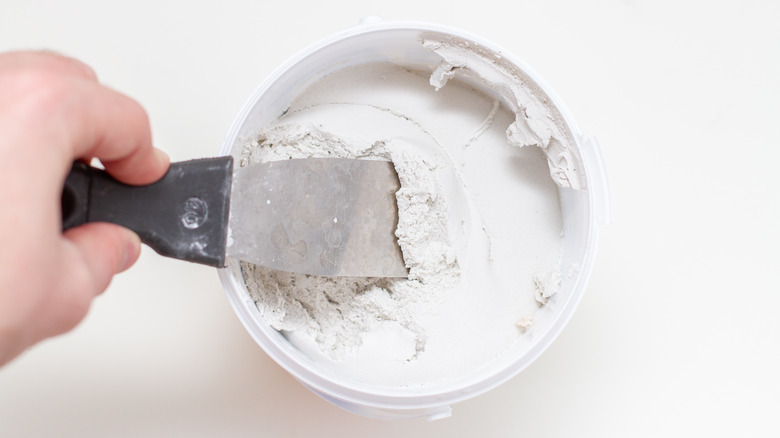
Venetian plaster has been used for centuries to mimic the look of marble, so who says you can't give the same treatment to your tired old lamp? This material is a mixture of lime and marble dust or resin, and is a common choice for adding texture to walls and ceilings (via Impera Italia). For this light fixture DIY, sand your chosen piece, mix some plaster with water, and add a few coats to whatever item you want to update. After it dries, smooth out any bumps with a wet brush or sandpaper. Once it's complete, either keep it raw for a classic look, or add a coat of matte paint to showcase the texture.
Trends are always changing, and if you're looking to keep up, consider getting creative with your existing pieces to save some money and flex your DIY muscles. Who knows, you may even like your own project more than something brand new.