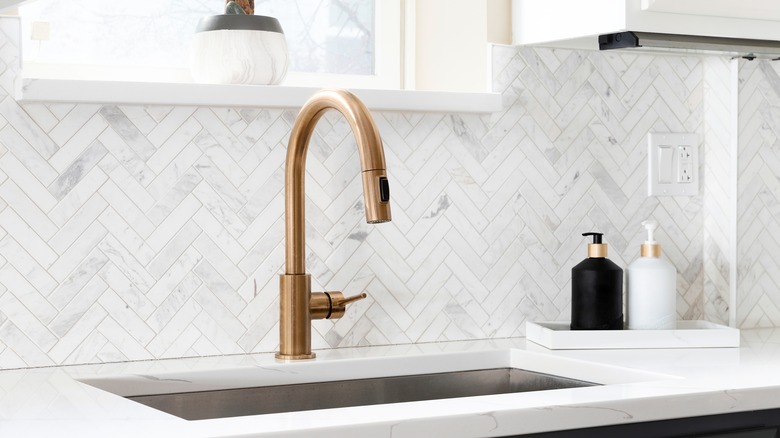
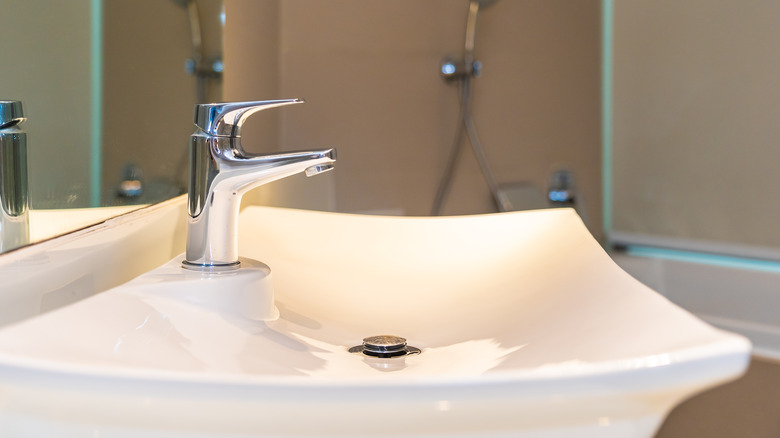
Here's The Best Way To Clean All Of Your Household Faucets
Household faucets are one of the most highly touched surfaces in your home. It doesn't matter if they're in the kitchen or the bathroom; chances are you use them frequently throughout the day. This is why it's essential to give them a routine cleaning at least every other week, if not more. While faucets themselves are not difficult to clean, they're easy to ignore, and when the time comes that you do wash them, water and calcium have built up so much that you'll need a little extra elbow grease to remove it all.
According to Crystal Blue Plumbing, if you notice a lot of calcium buildup on your faucets, it's probably because you live in an area with hard water. And if you don't take the time to care for your faucets by cleaning them regularly, you will spend a lot of money on repairs. But the nice thing about faucets is that even with buildup, they are typically easy to clean and require minimal equipment. If this is your first time really cleaning faucets, follow the steps below, and schedule regular cleaning sessions to keep ahead of the buildup.
Give all faucets a routine cleaning
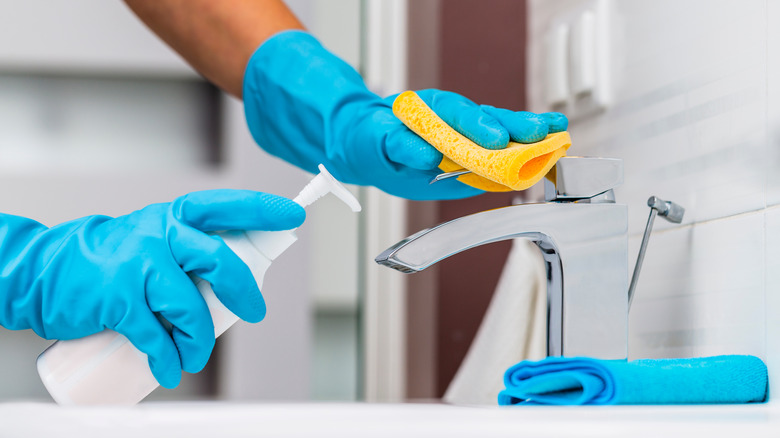
In order to see how tough the buildup is and what you're working with, the first thing you should do is to give every faucet in your home a routine cleaning. This is nothing more than taking a bathroom-specific cleaning solution, a rag, and wiping them down. Depending on the make and model of your faucets, you may need to steer clear of certain chemicals. You can find this information by reading the manufacturer's website. It'll offer tips and tricks on what you can and cannot use on its faucets.
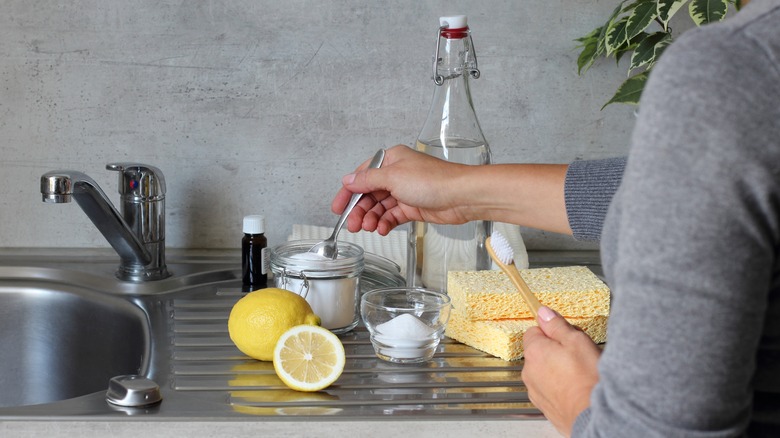
If you're unsure what your faucets are made of, your best bet is to use a mild cleanser. Rapid First Plumbing recommends combining a little bit of dish soap and water to make a simple and versatile cleaner. Spray the mixture directly on the rag and never on the faucet itself. You'll want to do your best to get to every nook and cranny, as this will really help show you how much buildup you are working with. If you notice a cracked fixture, loose fittings, or mold, you should contact a plumber, as there may be more damage than you're capable of fixing. But for the most part, your faucets will be in good working order, and this routine cleaning prepares them for the next steps.
Use vinegar for stubborn buildup
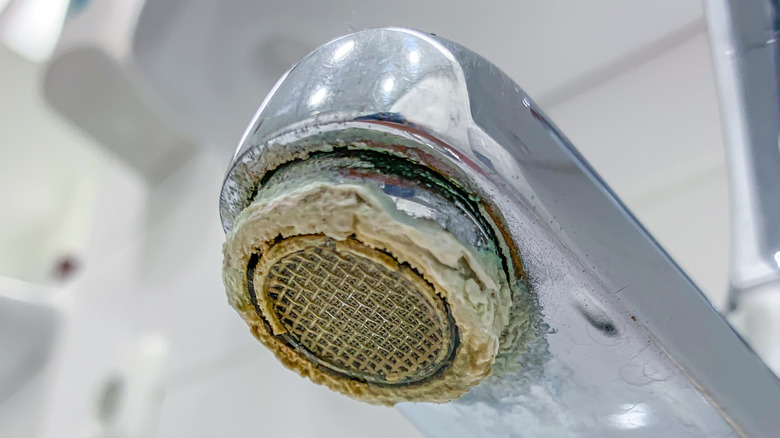
After you clean with a mild solution and notice a ton of buildup on the nozzle, you'll want to remove as much of that as possible before moving on. This is where the majority of hard water gets trapped, and getting rid of it may require a few rounds of this step. You've probably seen or heard about this method before. It's quite popular in removing calcium buildup, not just on faucets but on showerheads as well. First, you're going to need a few supplies. They include white distilled vinegar, a plastic bag, and a hair tie or rubber band. Using equal parts vinegar and water, fill the bag, tie it around your faucet, and that's it. According to Kitchn, this method is low-effort but produces incredible results.
It's best to leave the solution on your faucet overnight, as this will al it plenty of time to seep and encourage the buildup to loosen. The vinegar itself does more than break up calcium. It acts as a natural deodorizer, removes grease, and kills bacteria. If you can't leave the bag on your faucet all night, try and keep it on for at least four to six hours. And if you're really pressed for time, you can get rid of enough buildup by leaving the bag on for 30 to 60 minutes. When you're ready, remove the bag, and run hot water for a few minutes to remove any lingering buildup or vinegar. Depending on the amount of buildup you have, you may need to do this a few times. But once you make it a habit, your faucets will be better off and last longer.
Use a lemon to make it shine
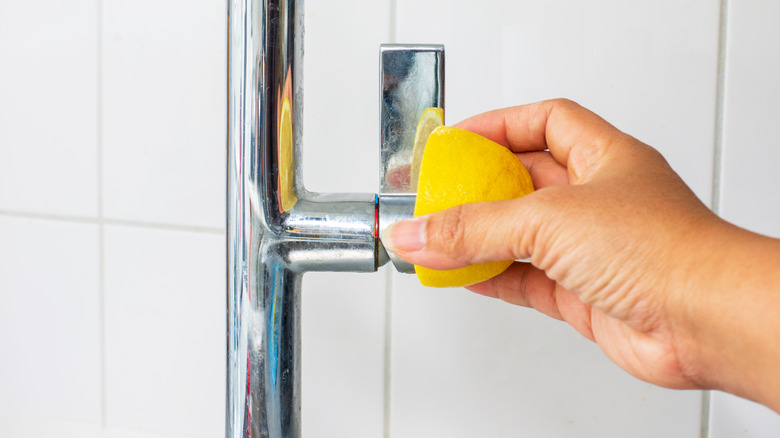
If you look at most cleaning solutions on supermarket shelves, you may notice most of them contain some type of lemon. Lemon is a standard cleaning ingredient that works in two ways. For starters, it smells nice, and it also packs a powerful cleaning punch. As Kitchn notes, lemons are natural cleansers, mainly due to the acid within them. Any acidic fruit is a good cleaner because it naturally removes stains and tough buildups like hard water and grime. If you look at most DIY cleaning solutions, lemons are a prime ingredient, and when mixed with alkaline compounds, like baking soda, they create a chemical reaction that works wonders.
Lemons are great to use on your faucets to not only remove buildup and bacteria but also to make them shine. If you notice a lot of leftover streaks when cleaning your faucets, cut a lemon in half and run it along the fixture. Then use a rag to remove the juice, and there should be no streaks. Other ways lemons can improve the quality of your faucets are by neutralizing odors, working as a natural antibacterial agent, and removing tough stains. So the next time you go to the supermarket, pick up a few extra lemons that you can use specifically for cleaning.
Don't forget the edges
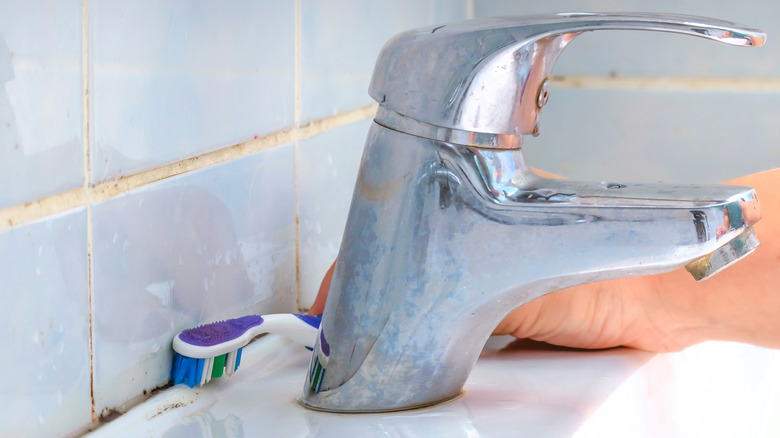
Common areas to ignore when cleaning faucets are those hard-to-reach corners and nooks that seem impossible to get to. But those are the spots you want to concentrate on the most, especially if you don't routinely clean your faucets. While most of the hard water and bacteria will be present on the nozzle and handles, those little sections are where buildup can cause major problems, including cracks, leaks, and clogs. So how do you make sure you take the time to clean those spots as well as the faucet itself? You bust out an old toothbrush and get to work.
Toothbrushes make great cleaning tools and, according to One Good Thing by Jillee, are essentially little scrub brushes that can get into those spots that feel hard to reach. And we're not just talking about regular toothbrushes. Electric toothbrushes are even better since they often come with additional layers of bristles. Plus, the added power of the battery means they break up more grime than their stationary counterpart. In the end, it really doesn't matter what toothbrush you use, so long as you use one. Pair it with a natural cleaning solution like vinegar, lemon, or baking soda and watch the buildup and grime come away with ease. By taking the time to clean those hard-to-reach nooks, you're ensuring the longevity of your faucets by keeping hard water and bacteria from slinking too far in and destroying the interior.
Concentrate on the drain area
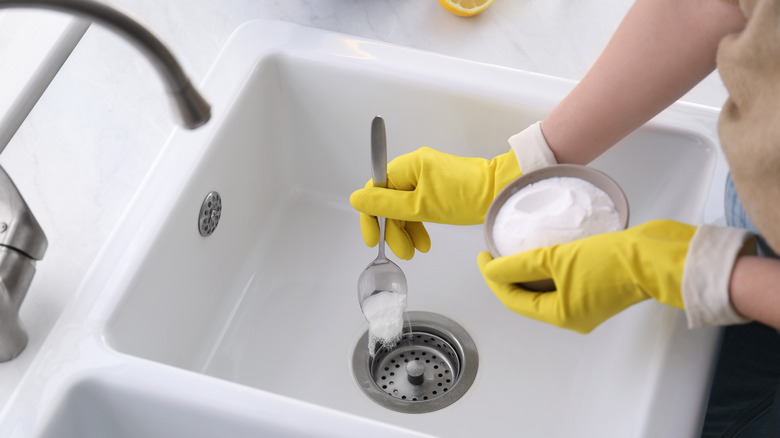
The drain in your sink deals with as much buildup as the faucet itself. That's why the next step in maintaining your faucets is to concentrate on cleaning the drain. Remember the power of using a toothbrush for cleaning your faucets? They can work wonders in this section. And the best part is all you need to clean the drain is a mixture of baking soda and vinegar, as per Creative Explained. After adding both ingredients to the area, let it sit for 10 minutes. Then pour hot water and use a scrub brush or a toothbrush to break up any grime or buildup along the outside and inside the drain.
Keeping your drain clean is as important as keeping your faucets clean. The two work in tangent with each other, which can be annoying when one is not working properly. A lot of stuff goes down your drain, and as Express Sewer & Drain suggests, keeping them clean offers a ton of benefits. For starters, a clean drain means fewer clogs and more efficient drainage. Like routine cleaning helps your faucets last longer, general upkeep of your drain will do the same. You'll also limit odors as drains are a stockpile of bacteria. And you can prevent damage to the pipes, which in turn, can cause unwanted leaks. So once you've done a major clean to your faucet, turn your attention to the drain.
Remove the faucet for a deeper clean
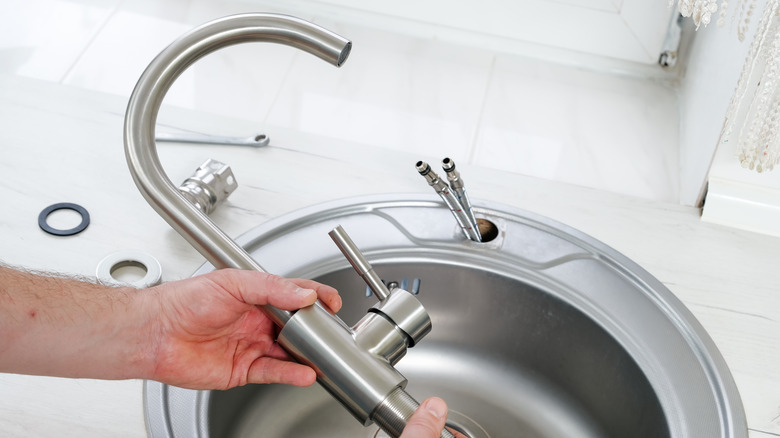
This step is not always necessary, but it's essential if you feel the faucet is not working to its usual standard. It also helps in giving your faucets a deeper, more thorough clean. That step is removing the faucet and checking that all the internal working parts are fine. When you remove faucets to clean, the main things you want to focus on are the washers and aerators. According to RS Components, washers control the flow of water and prevent leaking. If they're damaged, you can wind up using more water than necessary, which will increase your bill. Replacing washers is fairly simple and you can find them at just about any home repair store. What you want to make sure of is that you get the right size.
Another thing you want to check is the faucet's aerator. This is the small screen at the end of the faucet that adds air to the water when the tap is on. As Denver Water notes, aerators do more than add air. They also reduce the amount of water that comes out, maintain water pressure, and catch debris. Together, the washer and aerator keep the water flowing smoothly. And keeping them both clean and in good working order eliminates lead exposure as well as improves the water's flow. If you're not confident in removing faucets yourself to check these internal pieces, contact a plumber or someone you know who has experience doing this. The last thing you want to do is damage your faucet while trying to remove it.
Wipe everything down one more time
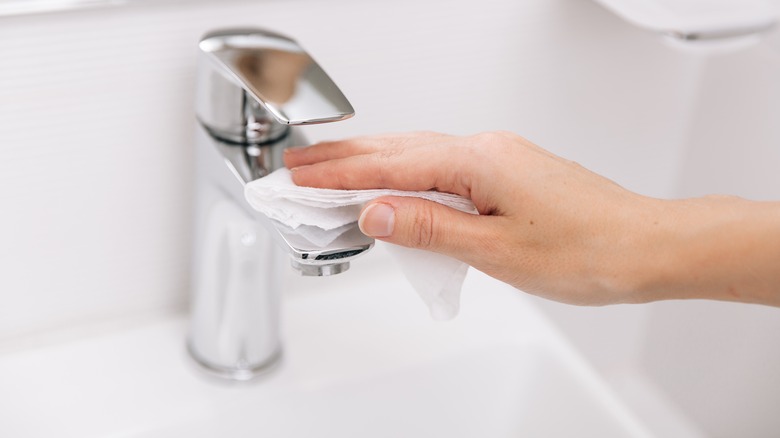
At this point, you've done everything possible to ensure your faucets are clean and in good working order. If you removed the taps, it's time to get them back on for the last step in the process, which is to give everything one final wipe-down. This step is important because even though you've already used vinegar to remove the nozzle buildup and cleared all the nooks and crannies with a toothbrush, you've handled it quite a bit so that there may be some lingering stains or bacteria.
Moen recommends wiping faucets with a damp cloth and mild cleanser. You can use the mixture of dish soap and water that you used earlier for this step. You're essentially giving the exterior a final cleanse, removing anything that may have added back on it while deconstructing its pieces. It may seem like an unnecessary step, but it's going to give your faucets a final face-lift. After you wipe them down with the mild cleanser, take a clean, dry rag and clear away any leftover residue. What you have now are thoroughly cleaned faucets that shine.
Schedule your next clean
How do your faucets look? Are they shiny? Can you see yourself reflected in them? Depending on their material, you may not, and that's fine. Chances are high that you have fresh and bacteria-free faucets at this point. And while you don't have any more steps to do in terms of cleaning, there's one more important thing you should do to maintain the longevity of your faucets going forward. You need to schedule the next time you're going to clean them. It may seem weird to schedule faucet cleaning, but as mentioned earlier, faucets are a highly touched surface, so routinely cleaning them is vital for keeping them pristine and in good working order.
Do you need to go through these steps every single time? No, but you should at least go through them once a week. Even implementing a daily wipe-down will be enough to keep them clean, though you should do a thorough, deep clean once a month or so. Some things to focus on when checking your faucets, according to Benjamin Franklin Plumbing, are the water pressure, minor leaks, sputtering water, squeaky handles, and unexplained clogs. If you notice these at any point during your routine cleaning, it may suit you to call a plumber. The best way to protect your home from water damage is to start with something you use every day: your sink. A plumber can locate the exact issue quickly.
Apply this method to other surfaces
Germs tend to build up on highly touched surfaces like faucets. But many other things in your home are touched and handled many times throughout the day. One thing you can do to eliminate germs is to apply a similar cleaning method to those types of surfaces and items. Obviously, you may not need to do such a thorough process when cleaning certain things, but routine cleaning is vital for maintaining a healthy and germ-free home.
Some of these other highly touched areas, as reported by Houston Methodist, include cabinet handles, doorknobs, light switches, remotes, towels, countertops, and more. Make a plan to give these areas a routine cleaning at least every two weeks. While once a week is better, it may not always be feasible, so two weeks is a better alternative. Depending on what you're cleaning, you may only need to use a simple cleanser, or you may need to buy specific supplies. What matters most is focusing on those highly used areas, as most germs will permeate there. So once you thoroughly clean your faucets, see what else you can tackle in the coming days.