Don't Make These Common Mistakes When Starting Seeds Indoors
Homeowners everywhere are in constant search of ways to improve the living space of their homes. One thing that can make an enormous impact on your property is the establishment of an outdoor garden. Whether your planting space is in the front or backyard, growing fruits and vegetables, flowers, and even trees from seed can be immensely rewarding. Healthline notes that spending time outside is an excellent way to improve your quality of life, mental health, and even aspects of your physical wellness. Planting a garden and keeping your creations healthy and growing is an excellent way to boost the value that your free time brings to your life.
The importance of gardening and plant care is well-established and obvious for many, but the process of successfully cultivating plant life at home is a little more challenging. Plants can often be a bit finicky, and when it comes to seedlings, the relative vulnerability of these plants to the changes in the environment is magnified. Homeowners can quickly become frustrated with the growing process if their seedlings continue to die on them before they even make it outside. This is a natural outcome in a gardener's evolution from novice to experienced grower but that doesn't make the failure to establish leaves or branches any less potent in the early days.
Fortunately, many of the things that prevent your seeds from sprouting and flourishing into the fully mature plants that they will become can be avoided.
Overwatering and underwatering
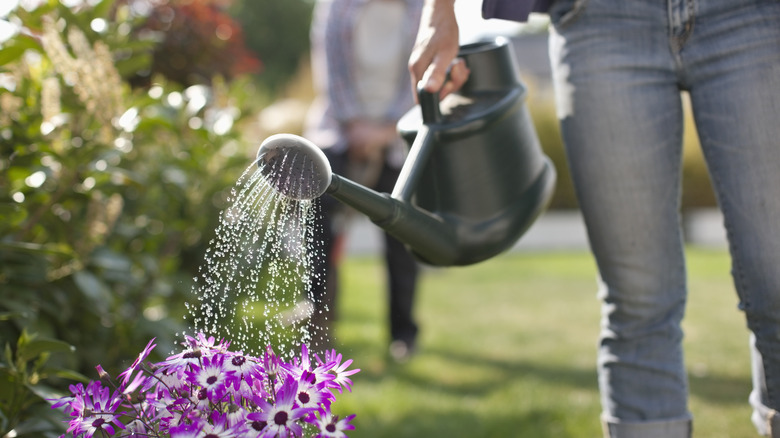
One of the first things that comes to mind when considering potential problems in seed viability is the amount of water used to continue the cultivation process. It can be difficult to judge how much water your seed trays need in this early stage of growing. McGregor's suggests soaking the seeds themselves before planting them in the soil in many instances. This will give you your plants enough moisture to start their germination process and a head start when it comes to producing a seedling and eventually growing into a fully mature plant.
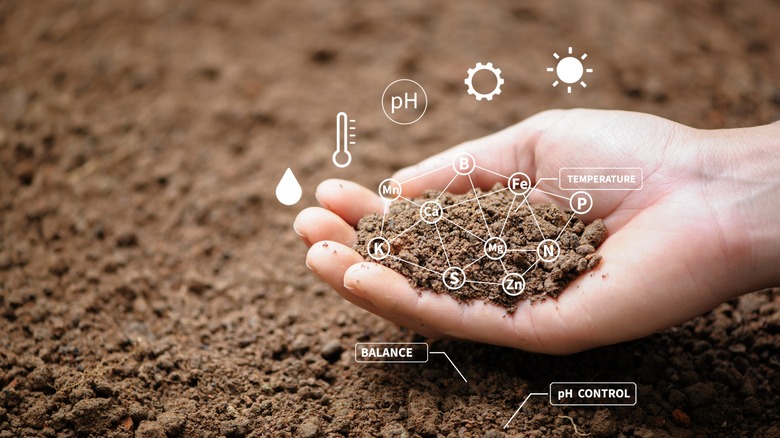
Homesteading reports that you should only water your seeds when the soil begins to dry out – feeling a moist sponginess in the soil should be your indicator. Underwatering is a surefire way to kill off your seeds before they have a chance to establish themselves. However, overwatering can also saturate a plant's soil and lead to fungus growth or other problems within the growing medium that prevent the seed from germinating and establishing itself. Watering your seeds sparingly is the best way to ensure a healthy and stable soil environment for the plants that you are hoping to cultivate in the coming season. Getting the watering right can be tricky, but it doesn't have to be an impossible task. Generally speaking, a good soaking can last for a few days at a time when it comes to watering, however, any plants that you are growing from seed will typically come packed with information on the seed packet itself. Reviewing the guidance that your seed supplier offers about when to water, when to sow, and more will help you get the early seedling stage right.
Mistiming your sowing process
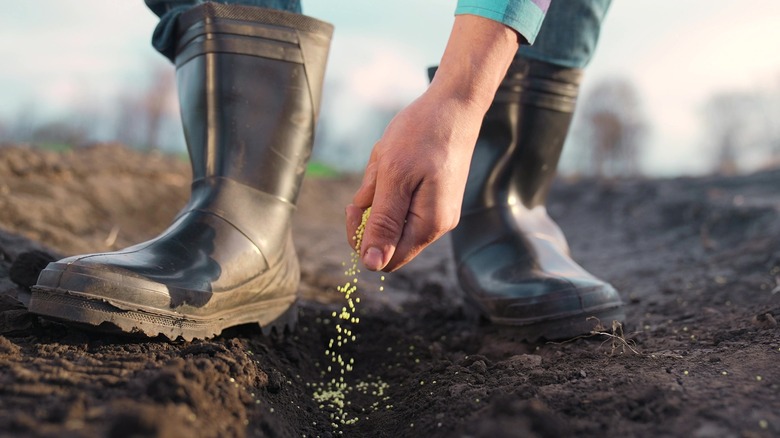
Another important feature that is easy to overlook when planting new seeds is the time of year that you are working in. Peppers, for instance, will perform best when planted outside in the warmer months of the year. Many plants fall within this sort of growing season and will generally flounder if you plant them at another time during the year.
This means that it's important to think about when you start your seeds as well as the timeline for moving them outdoors. The Ripe Tomato Farms notes that winter is a great time to start seeds for a large volume of plant species. Many seed packs will note when the prime growing time is for the plant that you'll produce, and they will also suggest the best possible time to sow the seeds either indoors or elsewhere.
Starting your seeds at the wrong time can lead to a severe decrease in productivity and overall plant health. Warm weather crops planted out of season may ultimately yield a functional plant and the fruit or vegetable that you hope to harvest, but growing out of season will result in a severely diminished total yield in the same way that a shortened growing timeline will affect productivity, according to the University of Maryland Extension. Similarly, growing cold-weather crops during the warmer months can result in the same or similar outcomes. Garlic, for example, can be grown at any time throughout the year, but if a growing bulb isn't exposed to cold temperatures for at least six to eight weeks then it won't split into individual cloves and instead will produce a single mass, according to Savvy Gardening.
Of course, these guidelines don't pertain to growing that's done in a greenhouse. Climate control allows you to set and maintain temperatures throughout the year, and so growing in managed conditions rather than outdoors allows you to plant whatever you want at virtually any time of the year. Still, when sowing seeds and then transplanting them into their final growing destination, you'll want to follow the timeline instructions on the packet. Even if you're growing out of season with the help of modern technology, a seed that takes three weeks between sowing and transplanting will require the same timeline.
Failing to keep seedlings appropriately warm
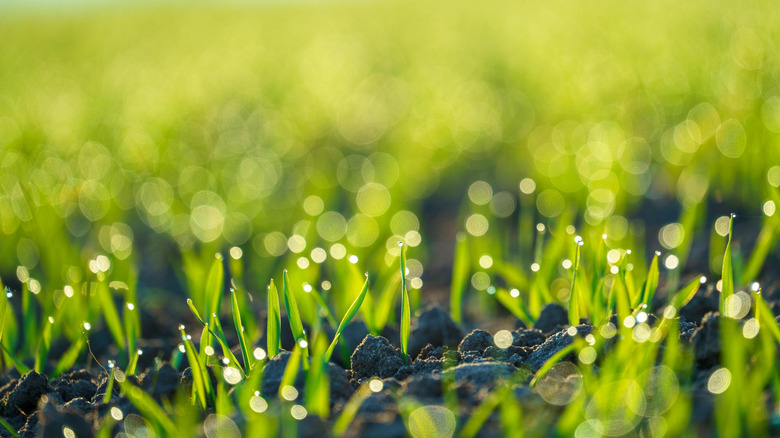
One major problem that home growers face is the ability to keep seeds warm enough so that they can grow with full vigor. A seed that isn't provided with enough warmth may still sprout, but you're likely to require a much longer timeline between the initial planting and subsequent transplanting. Using a heat mat is a great way to provide ample support to seeds as they go through the process of sprouting and growing into healthy transplants (via Greenhouse Today).
As a tomato plant, apple tree, or grapevine matures, you can take cuttings and expect the plant to withstand damage to some of its limbs via a cold snap, excessive wind, or even attacks from pests or young children. But in their infancy, all of these plants begin as incredibly vulnerable seeds and then seedlings. A seed will typically sprout after a few days or weeks and produce two starter leaves. These tiny limbs help the plant soak in sunlight as the seed continues to perform its magic under the soil. Eventually, the plant will begin to grow with new aerial components, and mature leaves will start to form above these initial guideposts. It can take months for your new plant to develop enough structure that damage can be withstood without killing the plant entirely. Certainly, in the early days and weeks of aerial growth, the loss of leaves or stem material often results in total failure.
Warmth is a critical asset, especially in the early stages when the plant is at its most vulnerable. Using a heat mat and ensuring that your plant pots are located in a sunny and protected area inside your home will help give them the best chance of survival.
Using the wrong kind of soil
Soil plays a major role in the success or failure of a plant. Once the plant is established, you'll want to consider the specific soil it will need as it grows to maturity. However, seeds and seedlings simply require a general-purpose potting mix that incorporates fine grains (via Gardens That Matter). If there is some other recommendation for a specific plant that you are cultivating, then the seed packet will likely make note of it. In the same way that young pets require a different blend of vitamins and minerals in their food than older, adult pets, seeds demand a unique blend of nutrients and soil conditions that typically varies from the soil properties that the plant will thrive in later on.
Unless you are growing a plant that thrives under very specific conditions (perhaps conditions that are regionally specific and don't exist in your local environment, for instance), GrowVeg notes that a simple potting mix is usually the best approach during the seed starting phase. It's important to bring light and airy potting mix together with vermiculite, perlite, or some other elements that will promote ample drainage. Depending on your seeds, you may also want to add clay, sand, or coir to this mixture.
Drainage in particular is an incredibly important element when starting any seed. If your seeds are saturated in the soil then they will become susceptible to rotting, fungal growth, and other issues that will kill the seed before it has a chance to establish itself. As well, even after your seed has sprouted it's important to refrain from overwatering and ensure that the soil remains moist but not sopping wet. Early-stage roots remain vulnerable to rot if they are exposed to too much water. A good, well-draining potting mix, along with proper watering techniques, will help prevent these issues when starting seeds.
Providing inadequate lighting
Heat, moisture, and lighting go hand in hand when starting a new seed. Even though your seed is located beneath the surface of the soil, the light from the sun or a lamp that you place above a seed tray indoors plays an important role in the biological clock of the plant itself and provides an additional application of heat, according to the University of Maryland Extension. Plants are photosensitive and many won't sprout until the seasons change and a certain, required amount of daily light and heat touch this soil.
While most seeds don't need light to sprout, it's essential to provide them with plenty of light once they've germinated. Seedlings need 14 to 16 hours of light (via Horticulture), however, the seed packet will be able to tell you more specifically about the lighting requirements of any particular plant that you're hoping to grow in your greenhouse, raised bed garden, or yard.
Moving seeds outside before hardening them off
Another problem that gardeners can face if they aren't careful is the shock of moving plants outdoors which can kill some or all of the crop under certain circumstances. You won't always be severely punished for not hardening off plants, but failing to do this can certainly lead to the failure of at least part of your crop during a growing season. The Royal Horticultural Society notes that hardening off is a process of adaptation. When you start a seed tray indoors or in any other protected environment, you are dictating at least some of the terms by which these plants will grow. In an indoor environment, you are likely controlling the water, heat, and light that will support healthy growth. But once you move your plants outside all of these factors become impossible to dictate. In addition to these three key features, a plant that's outdoors will be exposed to the wind that was not initially present.
Hardening off is the process of preparing your plants to deal with this change in environment. If you have kept plants indoors for an elongated period of time, it's possible that their stems simply won't be able to hold up to even the lightest breeze. A change in circumstance can shock plants and lead to their demise. RHS notes that hardening off can take two or three weeks, but this can vary depending on the growing conditions that you are leaving and the environment that you are moving the plant into. If you're moving seedlings from a warm indoor environment to a chilly and breezy outdoor space, then you may want to consider an even longer hardening-off period to fully prepare your plants for success.
Hardening off can be done in a few ways, and none involve a particularly difficult process. At its most basic level, hardening off involves moving a plant outdoors during the day to take advantage of the sun and warmth, and then bringing it back inside overnight in order to protect it from the coldest temperatures or potentially the risk of frost. If you have a cold frame, you can also place plants inside this facility to harden them off. Essentially, all you're doing is preparing the plant to continue growing in a new environment. Moving your seedlings back and forth between the protected environment during the harshest times and out into the new growing area while conditions are favorable will allow for greater success when transplanting your seedlings.
Planting seedlings too densely
It may be tempting to plant multiple seeds in a single cell of a seed tray. This will give you multiple opportunities to successfully produce a plant in each cell: Not all seeds are viable, and not all seeds will sprout. The more seeds you do you sow at a time, the more likely you are to arrive at the desired number of viable plants after sprouting has occurred and transplanting is done. It's always important to overestimate the number of seeds that you'll need to achieve your growing goals.
However, it's possible to plant seeds too densely in seed trays or seed pots. Gardener's Supply Company notes that two or three seeds per cell are often adequate when trying to make full use of your growing space. It's also important to note that if you decide to double or triple up on one or more of the cells in your seed tray, you'll eventually need to separate these new seedlings away from one another to continue growing one or more of these successfully started plants. Thinning your seedlings isn't complicated, but great care is required during this process in order to prevent damage to seeds, stems, and leaves that remain in a vulnerable state at this stage in their life.
This additional transplanting process can lead to shock or even physical damage as you handle the seedlings. Killing seedlings during the thinning out process happens, so even if you are doubling up on planting, you'll still need to overestimate the number of seats that you start to account for this additional factor in seed loss.
It may also be tempting to simply dump in seeds across the tray rather than meticulously adding a set number of seeds to each cell. This will force each one to compete for critical space in the early process of root development, potentially leading to the failure of every seed in the cell.
Ensuring that you haven't planted your seeds too densely or that you practice careful thinning processes in order to deal with dense, yet appropriate planting is a crucial step to successful cultivation.
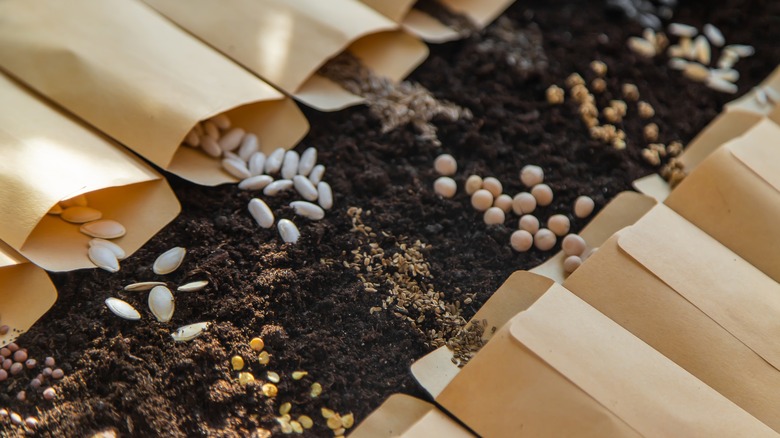
Failing to use labels on seed trays or pots
Lastly, a common mistake when starting seeds that many novice growers encounter is a failure to use labels on their seed trays or seed pots. This isn't necessarily going to lead to the failure of the seed's growth, but failing to label something that is growing in your home or garden can create confusion when it comes time to move seeds, harden off plants, or plant a successful seedling in the appropriate place outdoors (via Dave's Garden). A label should list both when a seed was planted and what type of plant the seed is. If you don't use labels, you'll have to keep a mental record of everything that you're growing. This is simply an impossible process to maintain long term. Because growing anything takes patience and time, you simply won't dedicate enough active time to the process of caring for a seed tray to constantly remember when something was planted and what it is.
In the least extreme set of circumstances, this can lead to an asymmetry in your garden when you move plants into their final growing spaces. It's also possible to end up planting something in the wrong spot, jeopardizing the well-being of the plant, or of your garden as a whole. For instance, mint is a commonly grown herb in many home gardens, but the plants become increasingly invasive as they continue to spread underground. Mint fires out runners in every direction that can choke out other plants' root systems and lead to the failure of even the most robust plant life (via Gardeners' World). If you place a mint plant in the wrong section of your garden, it can quickly overtake a raised bed or an unprotected section of ground-level soil.
By following these tips, seed starting can be fun and rewarding, and you'll end up with the lush, colorful garden of your dreams.