An Expert Explains The Best Way To Paint Your Ceiling Without Splashing
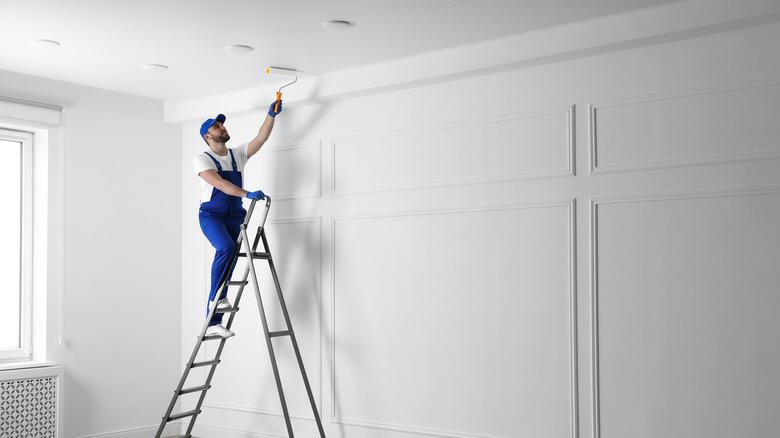
Painted ceilings can add a new dimension to your home's aesthetic. For instance, incorporating a new color to complement your walls or decor can be a powerful upgrade. Additionally, Forbes suggests that painting your ceilings can add a new depth of color to the room or brighten up a space if you select a white or similarly bright tone. But, the physical act itself can be a daunting task. As such, some homeowners avoid the project as dripping and splashing might seem inevitable, not to mention the arm strain required.
In an exclusive interview with House Digest, Damon Lee, the founder of On A Roll Painting, offers some words of advice regarding getting this job done cleanly and efficiently. "Painting ceilings is difficult because the surface is directly overhead, and if you aren't used to painting, you will be looking up and holding your arms overhead for a long time. If you use some or all of these techniques, you can make a difficult job a little easier and splatter-free when you are finished," says Lee.
Don't dunk the roller into the paint
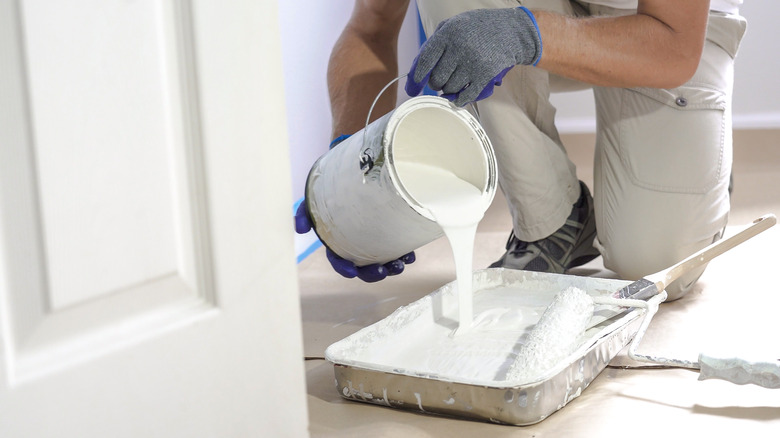
As with any DIY task, preparation is critical. When starting a new project, you'll need the right equipment to do the job. A roller is a must-have, as are a few quality trays. However, instead of dunking your roller into the tray when it's time to begin, you'll want to employ a more cautious approach. In short, any pro will tell you that dunking makes a hard job even more difficult. "This will result in too much paint on the edges of the roller and cause dripping," Damon Lee says.
Properly using your tray may take a couple of extra minutes, but it can save your home's carpets. Thankfully, it's not a difficult skill to master. "Using the sloped surface, roll the roller into the paint about a quarter of a turn, then lift the roller and repeat several times until the entire surface has been covered evenly. Then push the paint into the roller by continuing to roll the roller over the sloped surface," Lee explains.
Lee also has some valuable advice on getting ready for the job. "Don't overfill the tray — you should use the bottom reservoir to hold the paint, and the sloped surface with the pattern to push the paint into the roller," Lee says.
Use minimal pressure

While prepping the roller is essential, the touch you use as you apply a fresh coat can be the difference between beautiful walls and an absolute mess. Also, throughout your project, you'll need to continue to return to the tray. When lifting out the roller, you're facing off against a perilous part of the process. "Once the roller is loaded, turn it sideways so any drips run down the roller rather than onto the floor. Move the roller swiftly and smoothly to the ceiling and create a stripe that is diagonal in the area you want to apply the paint. This can be 6 to 8 feet long and should be no wider than two roller widths. This gives you paint to pick up and spread out as you go," says Damon Lee.
Just as it's important to keep your touch light, you'll want to work your way across the ceiling strategically. "You don't want to run out of paint in the roller, so don't work past the original 12- to 16-square-foot area before you refill it. If the roller is short on paint, you will end up using too much pressure, which can cause splatters, drips, and edges on the painted surface," Lee cautions.
Be strategic with the direction you roll in

Understanding the task upon beginning the endeavor is critical. Not only will you need to ensure that you have enough paint to get the job done without having to frantically return to the store, but you'll also need to think about the cohesiveness of the "grain."
Paint covers a surface but leaves traces of directionality and pressure. A novice painter likely won't be able to build a seamless product on the simplest of mediums, but a pro can blend multiple coats and each roller stroke into a singular look.
"If you need two coats of paint to properly cover the ceiling, we recommend rolling in a perpendicular direction for the second coat," Damon Lee says. "Another pro tip: Roll in one direction. Move the roller from one side to the other, lifting it off the ceiling and going back to the same side and rolling in one direction again. That way you end up with a pattern from the nap that all points in the same direction. When this dries, it will help create a uniform finish."