How To Fix A Leaky Bathtub Faucet Without A Professional
We may receive a commission on purchases made from links.
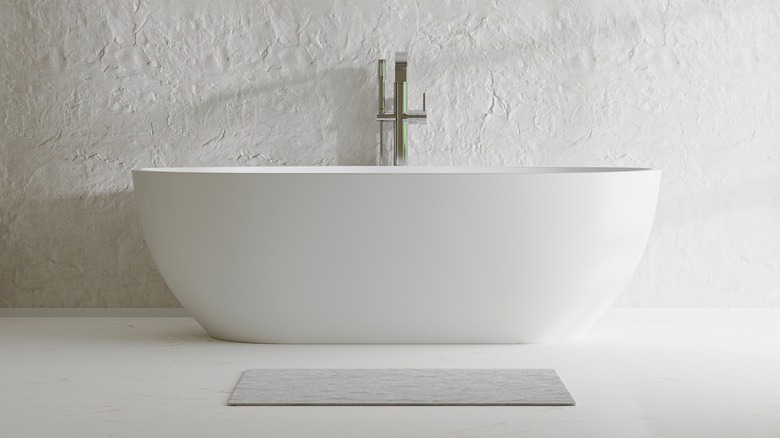
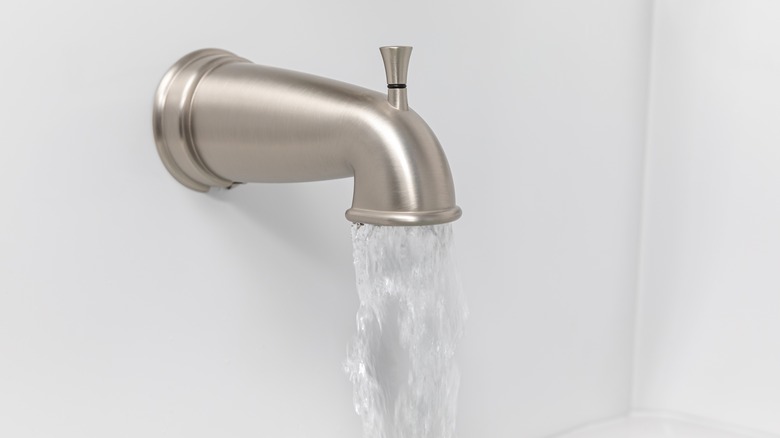
Drip. Drip. Drip. A leaky bathtub faucet can be really frustrating. However, it can also be a potentially serious problem that shouldn't be left unfixed. While a few drops of water may not seem like that much, even a small leak can waste a lot of water over time. According to the Environmental Protection Agency, a faucet that is only dripping once every second will still end up wasting over 3,000 gallons in the course of a year. To put it in perspective, that is the same amount of water that you'd need to take about 180 showers. That means that leak is not good for the environment or your bank account.
Plumbing & A/C Medic adds that a leaky faucet may also wear out more quickly, requiring replacement sooner than would have otherwise been necessary. The constant dripping places unnecessary pressure on the washers, which can cause them to become damaged. Acting quickly to fix a leaky faucet can help you prevent this unnecessary wear and tear, while also helping you reduce water waste. While you could hire a plumber for this task, if you have some basic plumbing knowledge and are willing to roll up your sleeves and get your hands wet, you may be able to fix the issue on your own. Here's how.
What causes a leaky bathtub faucet?
Unfortunately, there are a few different reasons why your bathtub faucet may leak, so there isn't a cut-and-dry solution to fix the dripping. Ranshaw Plumbing & Heating shares that the three most likely causes for a leaking bathtub faucet are a worn-out washer or O-ring, a faulty cartridge, or a corroded valve seat.
Depending on the style of your faucet, it will either have a washer or an O-ring. Washers — which are found in taps with separate hot and cold water handles that you need to twist — are made of either plastic or rubber. They help control the amount of water that comes from the faucet, but can get worn out over time or because of corrosion. O-rings are seals that help prevent water from coming out of the faucet when it is turned off. They are found in cartridge-style faucets with handles that turn part-way to allow water flow. Age or corrosion can also damage these components, leading to a leaky faucet.
If you notice a leak by your handles, that probably means you have a corroded valve seat, and if you see drips from the faucet itself, it can also mean you have a worn down cartridge or perhaps sediment buildup, which ate through the metal. To fix your problem, you must first figure out which one of these culprits caused your leak.
Turn off the water supply to the faucet
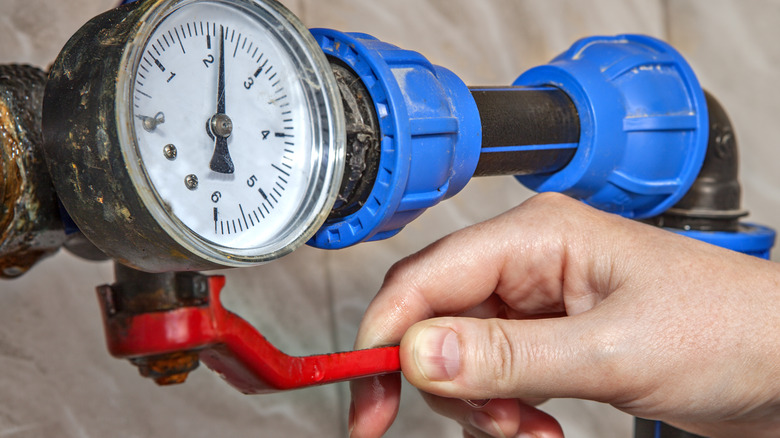
Before you remove the faucet and look for the leak's source, you'll want to turn off the water supply. Mr. Kitchen Faucets explains that there may or may not be a dedicated shut-off valve for your bathtub faucet. If you're unsure whether there is a shut-off valve, the first step will be to look for one. Begin by looking around the bathtub for an access panel. This may be in a different room on the wall behind where the tub's plumbing is located. Depending on the layout of your home, the panel may be in a closet or hallway.
If you cannot see an access panel, you can look to see if there are stops in the assembly for the faucet. Take the handles and trim off to reveal the inside valves. Look for a screwdriver slot inside the hot and cold stems. If you see a slot, use your screwdriver to turn off both the hot and cold water supply.
In some cases, you may be unable to find a way to shut off the water supply to your bathtub. If this is the case, you'll need to turn off the water to the entire home. You can find the shut-off valve near your home's water meter, which may be outside or in a laundry room or basement. Before shutting off the water to the entire house, be sure to alert everyone else in the home that the water will not be flowing while you're fixing the faucet. After turning off the water, turn on the tap to drain out all the water before you start working.
Remove the faucet from the wall
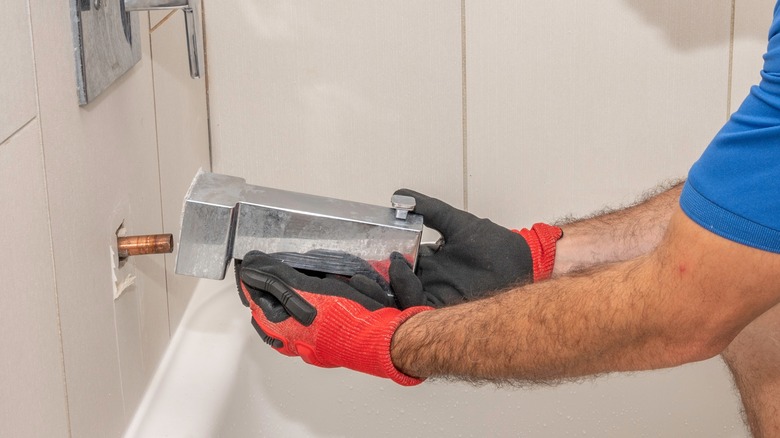
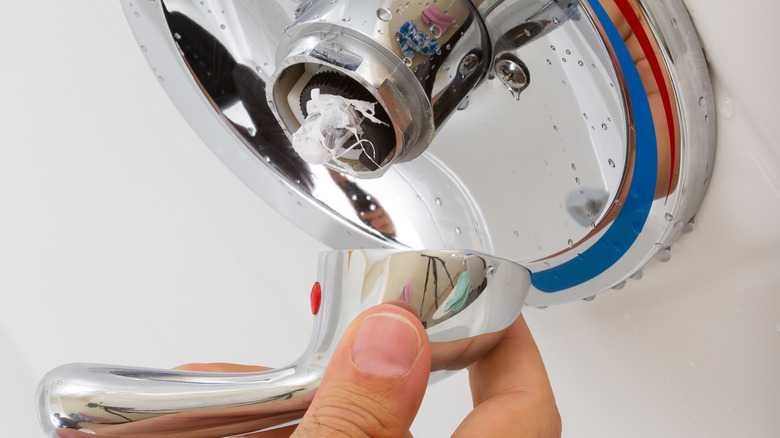
Now that the water supply to the tub has been turned off, you can remove the bathtub spout and escutcheon plate to help you assess the cause of the leak. According to The Home Depot, the best way to remove the tap will vary based on whether it is a threaded spout or a slip-on spout. If you have a threaded spout, you'll need to use a pipe wrench or locking pliers to turn it counterclockwise until it slides off. You may want to place a cloth between the wrench or pliers and the spout to avoid scratching it.
Slip-on spouts are a bit easier to remove. Start by using a screwdriver or Allen wrench to loosen and remove the screw at the base of the faucet. Then, carefully pull the spout straight out using your hands. Once the tap is out, you'll also want to pull out the escutcheon plate covering the hole behind the faucet.
Remove the handle, escutcheon plate, and stem assembly
To check for the cause of the leak, you'll also need to remove the handle from the wall. The handle is attached to the bathtub wall with a screw. However, that screw isn't always easy to find because it is hidden to create a more cohesive look. According to HomeServe, the screw is sometimes found on the underside of the handle. Other times, you may need to remove the decorative cover around the handle to access the screw.
After you've located the screw, use a Phillips head screwdriver to loosen and remove it. This will release the handle and allow you to remove it as well. If it has been a long time since the handle was removed or replaced, corrosion may make it more difficult to pry it off the wall. A little bit of plumber's lubricant should help loosen it up and make it easier to remove.
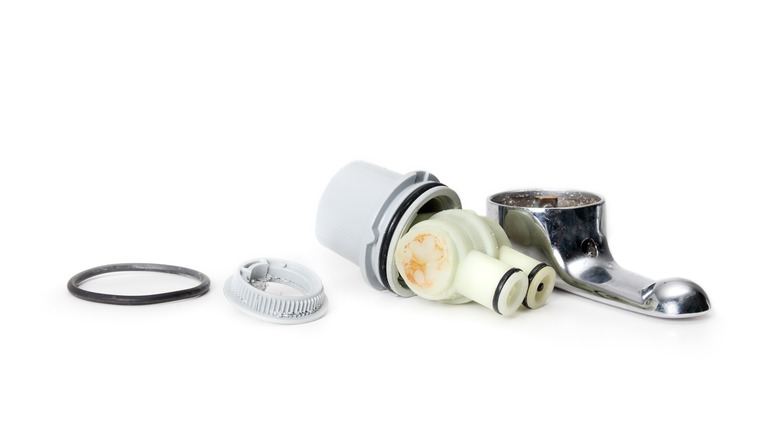
Once you've removed the handle, take out the escutcheon plate sitting behind it, followed by the stem assembly. DoItYourself explains that you'll want to use channel locks or a special stem wrench to remove the stem assembly from the wall.
If necessary, replace the washer
We're finally ready to find the reason for the leak. Earlier, we shared that worn-out washers are one of the most common culprits for a leaky bathtub faucet. As Newcomb and Company share, as the washer comes into frequent contact with the water flowing through the faucet, it can become cracked and brittle. If the washer is damaged, it won't be able to properly do its job and ensure a secure seal, which can result in the leak you've discovered.
Look at the washer on the end of the stem assembly. If it looks or feels dry, cracked, or damaged, you'll need to purchase a new one. Fortunately, this is a simple job, as you can just take off the old one and slide the replacement in its place. If you don't have a spare washer at home, bring the damaged one to your local hardware store to find one that will work in its place.
If necessary, replace the seat
After checking the washer for damage, you should also inspect the seat. That is the ring at the valve's bottom that allows water to flow. It usually gets damaged through corrosion, especially if you have hard water. The minerals accumulate on the ring, slowly eating away the metal. It is possible for both the washer and the seat to be damaged, or for just one of these components to be responsible for the leak. However, if you do not address a damaged seat, it could end up damaging the washer as well.
HowStuffWorks explains that you'll need a seat wrench to replace this particular part. Using the wrench, turn the seat counterclockwise to remove it. After you've taken it out, bring the part to your local hardware store. This will help ensure you buy a replacement that will fit your faucet. Because there are different styles, you don't want to try to purchase a new valve seat until you see what kind is in your tap.
Put the faucet back together
Replacing the seat or washer will hopefully have fixed your leaky faucet, but you won't be able to tell until you put everything back together. Work in reverse order for how you took everything apart, starting by putting the stem assembly back in place and covering it with the escutcheon plate. Then, reattach the shower handle and secure the screw.
PlumbingSupply explains how to reattach your tub spout. If you have a threaded spout, wrap the pipe coming out of the wall with thread sealing tape and add a little silicone caulking along where the pipe connects with the wall. Then, line up the slot inside the spout with the pipe and slowly spin it to tighten it and line it up properly.
If you have a slip-on spout, start by cleaning the pipe coming out of the wall to remove build-up and debris and ensure that it is smooth. Then, line up the spot and slide it over the pipe, pushing it securely back against the wall. Replace and tighten the setscrew along the faucet's base.
When to hire a plumber to fix a leaky bathtub faucet

Fixing a leaky bathtub faucet is often a task that homeowners can complete on their own. As John the Plumber shares, tackling this project yourself instead of hiring a plumber can be much less expensive. You may be able to get it fixed faster than a plumber would be available to come out to your home.
However, there are times when you may find it necessary to call a professional plumber to fix your leaky faucet. First, leaving it to the pros may be best if you're not comfortable performing any of the steps above or are worried that you will damage something or cause a bigger problem. You should also contact a plumber if you run into any issues when you're working or discover further damage that is beyond the scope of your abilities. After you've replaced the washer and the valve seat, reach out for professional help if the leak has not been resolved.
While there are benefits to handling basic plumbing tasks yourself, there are also some benefits to hiring a plumber to take over. With their experience, they'll be able to quickly assess the damage, determine the best course of action, and identify whether any further repairs are needed. They will also be able to alert your attention to other potential problems that you may not have realized were an issue, such as mold on the pipes in the wall.