What To Know Before Recreating Fixer Upper's Staple Shiplap Look
Are you wanting to join the shiplap craze but aren't sure where to start? The boards are a popular wall finish that's certainly been trending in a big way. HGTV hit show "Fixer Upper" skyrocketed shiplap's popularity thanks to Joanna Gaines and her ingenious uses of it. Plus, it can make for a transformative feature in just about any interior space.
Interestingly, the construction itself was initially designed to create watertight siding on ships — hence the name. However, shiplap eventually evolved from nautical uses and became a staple in home construction. However, it was a purely functional material at the time. As Jamie Hammel. founder of the wood company The Hudson Company, tells House Beautiful, "When shiplap made it to interiors, it was not intended to be exposed or showcased. Instead, prior to plywood, shiplap planking was often used as sheathing and then covered with fabric, wallpaper, or even muslin."
However, now the look is used to create a distinct rustic aesthetic that can blend with other styles. Many shiplap-lovers have put their own twist on the finish using varying board sizes or unique color choices. Thanks to the versatility of the finish, it can fit right into nearly any space in your home. The process isn't difficult, but it will take some time and planning. Plus, depending on your level of DIY skills, you made decide installation yourself or let a professional do the job for you. Here's everything you need to know before embarking on a shiplap adventure of your own.
Why do Chip and Joanna Gaines love shiplap?

Joanna Gaines is known to love shiplap as a simple, rustic feature in the home for many reasons, but perhaps the most important lies closer to home. When they were renovating their Waco farmhouse, the family found unexposed shiplap features throughout the property. As Joanna explains in a post on her Magnolia blog, "It was during the first few days of demo that we discovered shiplap in nearly every space of this house. I had spotted this material before in other projects and was immediately drawn to its timeless style and organic texture."
The ability to repurpose a feature from the original construction and honor the home's past was special for both her and Chip. Classic and timeless design styles weigh heavily on her interior decorating approach. Gaines explains her ongoing excitement noting, "I was also happy that it presented an opportunity to highlight the history of the house and its original construction. The more shiplap we found around the farmhouse, the more I knew that I wanted to expose it throughout our home."
The "Fixer Upper" couple consistently turns to shiplap as a feature in homes for others as well. Throughout the series, they've proven that the unique texture is fitting in a variety of home styles aside from just their historic property. Their affinity for shiplap has bolstered its popularity with both interior designers and home decor DIYers.
Potential areas to use shiplap in your home

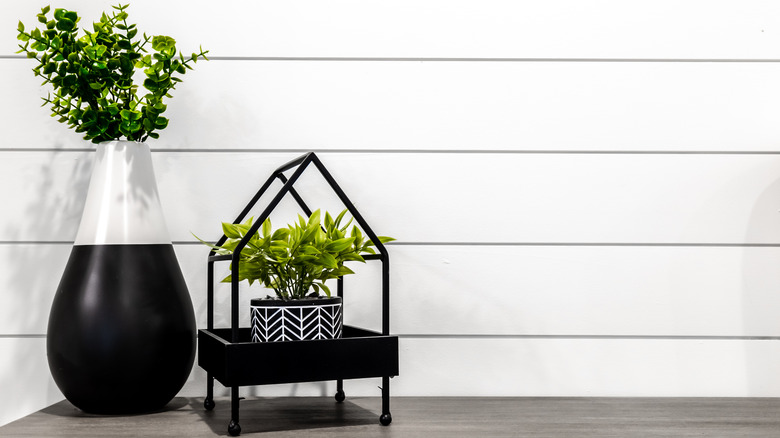
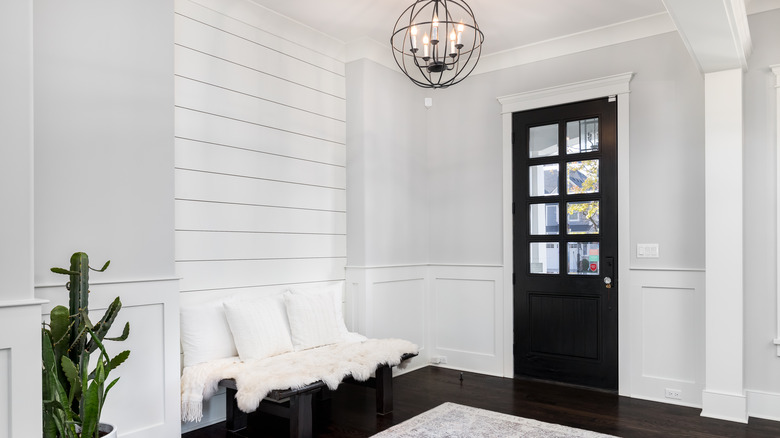
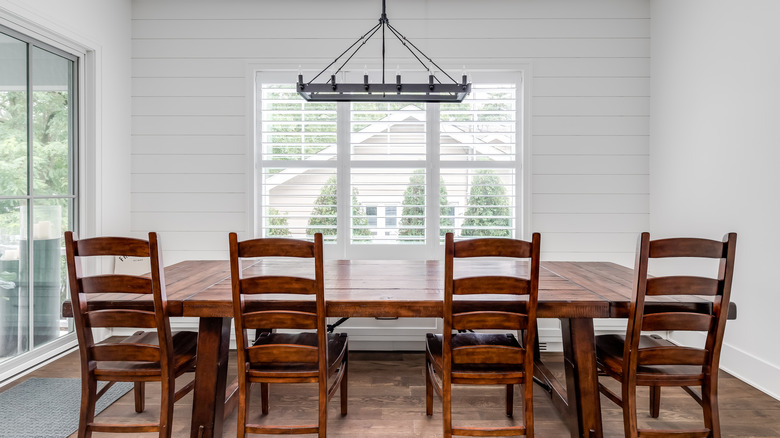
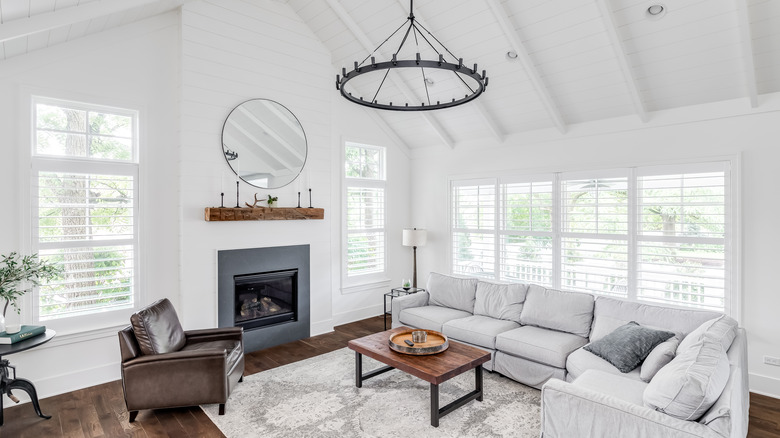
You can refresh your home by using shiplap in several places. You can install it on a single surface to create an accent wall, add personality to your ceiling, or even as a backsplash in the kitchen or bathroom. ChatterSource notes that shiplap performs admirably when installed along the ceiling — with timber beams running along the length of the surface. Utilizing wooden beams to highlight the ceiling brings a unique dimensional aspect to the space and can make the shiplap installation that completes the feature really pop.
Accent walls and mudroom installations also benefit immensely from the use of shiplap. Mudrooms are built directly inside the door leading to exterior areas, and as a result, are often small yet need to be highly functional. Sometimes they also serve as a laundry room and as extra storage space. The durability of shiplap boards makes them a perfect choice for high-traffic areas of the home like these. Despite the room's compact size, the horizontal shiplap lines visually expand the space as the overlapping boards add texture.
Some potential downsides of a shiplap addition
There are some things to be wary of when considering a shiplap wall, ceiling, or accent feature, though. While the boards are durable, the surface takes extra cleaning attention. ChatterSource notes that design makes trapped dust and debris a real concern to be mindful of. The iconic grooves can be great dust collectors, and with enough buildup, this can begin to show. As a result, you'll need to stick to a consistent schedule of cleaning and really dig into the grooves to eliminate any built-up muck. Compressed air is a fantastic tool to thoroughly remove any stubborn dust.
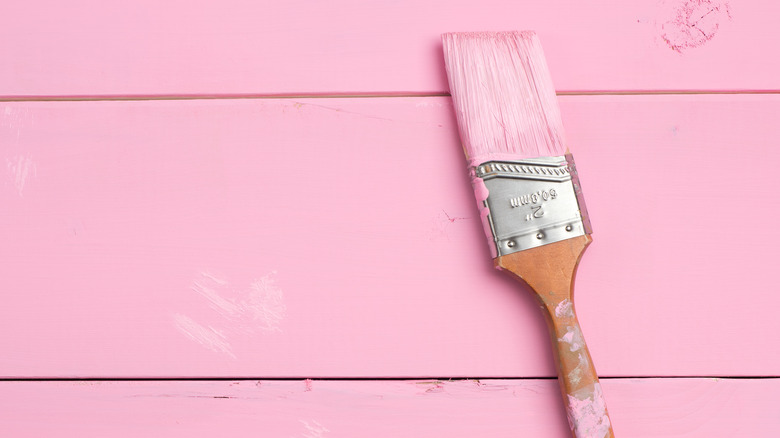
Shiplap can be difficult to paint if you find yourself needing to update the color. When installing, it's best to paint boards before they're placed on the wall for this reason. Still, you may wish to repaint the wall down the road. Using a paint sprayer is an ideal way to repaint the walls if you decide to switch up the shade. You'll get a smooth application while being able to get paint into the tight grooves. Otherwise, you'll have to rely on a brush, roller, and a lot of patience if you choose to hand paint the wall.
How to prep a wall for new shiplap
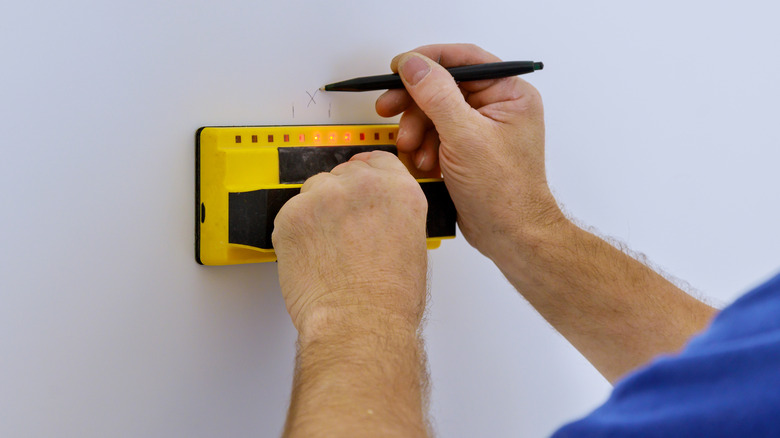
You can install shiplap over drywall or directly onto the studs of exposed framing. This means that in a home you're building yourself, you can save time and money by foregoing the drywall in places where you'll add shiplap. Preparation is critical in any DIY project, and the same is true for a shiplap wall installation. Baird Brothers Fine Hardwoods notes that removing the baseboards and any other trim on the wall is the first thing you should do when tackling this project. Your shiplap wall will look far better if it isn't butting up against these existing trim elements. If you like the look of the trim, you can reinstall it on top of the shiplap wall to recreate the look.
Prep your drywall surface by patching large holes and treating any mold issues. The next thing to do is mark the studs so you can hang the boards securely. Use a stud finder to locate each stud on the wall and mark the spot with a pen or pencil. If you plan to paint the adjacent walls or ceiling in the space, do so before you install the shiplap. That way, you don't have to worry about accidentally getting paint on your newly hung boards.
Can you install it yourself?
Perhaps the best part of the shiplap look is that virtually anyone can install it themselves. You can even start small by trying out the process in an entryway nook or on a powder room accent wall. The more you get confident with the process of measuring, cutting, and hanging, the sooner you'll be able to tackle bigger projects.
Lowes reports that shiplap installation is quick and easy, and it just takes a few tools that you likely already have at home. You'll need a circular, miter, or table saw, for precision cutting. You'll also want to have a level and a stud finder on hand for straight and secure hanging. Lastly, you'll need a fastening method. Either a nail gun or a basic hammer and nails will work.
Make your measurements twice and then cut boards so that they can be fastened through the wall and into the studs behind the drywall. Then, the process is just a matter of taking your time to add each new board and fasten it into place as you work up or across the target area. Dude Sawdust suggests starting from the bottom when installing the boards horizontally. With each board you place on the wall, you'll need to ensure a level and flush fit.
Select the right material for your project space
Real wood is an ideal material for a variety of spaces. Dude Sawdust notes that wooden shiplap boards will resist moisture and offer protection for the wall material behind them. This makes it a great choice for shiplap wall features in the kitchen, bathroom, or even as an exterior feature.
While it's not moisture-resistant, MDF offers a smooth and flawless finish when painted. Opting for boards made from this budget-friendly material will give you a similar result to real wood, at about 5% less in costs (via Home Like You Mean It). Ceiling installations in the living room, a bedroom accent wall, or a hallway space can all benefit from the use of this material.
The last option is typically reserved for exterior use. PVC shiplap boards can be used on your home's facade for a stylish look that's made to withstand the elements. Celuplast notes that these materials are moisture-resistant, low-maintenance, and retain their color long-term.
Consider alternatives to white shiplap
Real shiplap boards are expensive, can be difficult to install, and not everyone loves the look of white walls. Fortunately, there are some awesome alternatives that can fit your budget, skillset, and unique style. Homestead Timbers points out that one popular choice is nickel gap. These are boards that are very similar to shiplap, except they are easier to install and produce less costly material waste. The nails are also hidden — an ideal feature if you're looking for a sleek and seamless look.
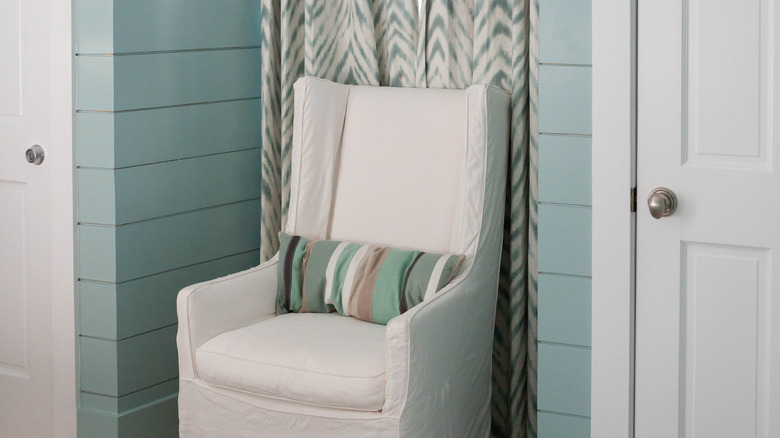
When you think of shiplap, you likely think of airy and white spaces. However, shiplap can also be bold or cozy. If you want the look with a vivid twist, consider using real shiplap or nickel gap boards painted in a fun hue. This makes for a stunning accent wall or pop of color in your space. A pretty blue can create a beachy vibe while charcoal-painted shiplap gives a room a dramatic, modern look.
For the ultimate ease of installation and budget-friendly material, look to shiplap printed wallpaper. Peel and stick varieties are super simple to hang and shouldn't cause damage to the wall when they're removed. There are a ton of low-cost options available and if you decide you're done with the shiplap trend, you can simply peel it off.
Prepare the boards and paint them before installation
One pro tip to keep in mind is to paint the boards before adding them to the wall. The natural locking mechanism of the rabbet groves in the boards makes painting them once seated together a tough task. So, before the boards are hung, you can save yourself a lot of time and hassle by painting them in advance.
Prime your boards before painting or use a formula that blends paint and primer. A paint designed for cabinetry and trim will provide benefits that are also useful for shiplap surfaces. Look for a quality option that ensures good adhesion and fade resistance. You also likely want to look for a formula labeled scrubbable, especially for white shiplap in high-traffic areas.
Glidden recommends using a mini foam roller or one with a 1/4″ nap to paint wood surfaces. This allows you to easily coat the slender boards and produces a flawless finish. Apply as many coats as needed for complete coverage, allowing the paint to dry completely between coats. Check the paint label's directions to determine the amount of time that boards should cure before hanging.